In this lesson you'll be implementing the hemispheric lighting term of the lighting equation. Before starting on the solution, look at this page for an explanation of the theory (Hemispheric Lighting Explained) as you work through the tutorial. If you get stuck, refer to the Goal1_Solution.fx file inside the solutions directory for the suggested answer. Most of the steps can be implemented in many different ways, so don't worry if your code is different from the solution.
The hemispheric lighting goal is divided into three tasks:
Extra Credit: Make the skull translucent where the occlusion term is low (you'll need to set alpha blend states).
Preparation
Open Goal1.fx. If you have the SDK installed, the .fx file is located at:
(SDK root)\Samples\C++\Direct3D\Tutorials\HLSLWorkshop\
Description
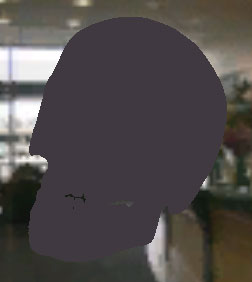
The default render technique is Hemisphere, which uses only the hemispheric lighting term of the lighting equation. Since you'll be implementing hemispheric lighting in this lesson, this term is currently calculated using placeholder values; therefore, your render view should show a flat, dark, gray skull surface:
Preparation
Locate Goal 1A in the code and follow the instructions.
Description
The occlusion term is a weight that was calculated in a offline pass of the model that is the percentage of the hemisphere that is blocked by other parts of the model. In the term provided, a value of 0 means that the vertex is not occluded by any geometry (all light will be received) versus a value of 1 which means that the vertex is completely blocked from light.
Multiplying by the result of 1 - Occ will darken the hemisphere light in relation to how much this vertex is affected by a hemisphere light.
Solution
Hemi *= (1 - Occ);
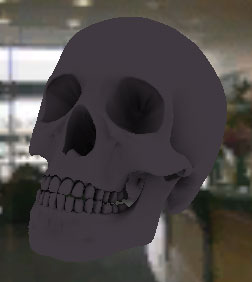
After modulating by the occlusion term, the model appears shadowed in occluded areas:
Preparation
Locate Goal 1B in the code and follow the instructions.
Description
A hemisphere light is made up of two colors, sky and ground, that are interpolated between based on the normal; that is, areas with normals pointing towards the sky are "sky"-colored, and areas pointed towards the "ground" are more "ground"-colored.
An easy way to implement a hemisphere light is to linearly interpolate between the sky color and the ground color based on the angle between the normal and sky direction. The angle can easily be calculated by doing a dot product between the normal and sky direction. This results in a -1 to 1 value that, when remapped to 0 to 1, is perfect for linearly interpolating between the two colors.
Solution
float LerpFactor = (dot(Normal, DirToSky) + 1) / 2;
Both Normal and DirToSky should be normalized (unit) vectors.
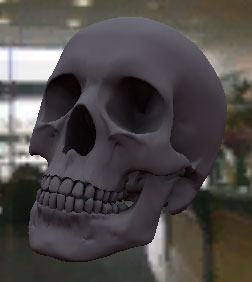
After taking into account the angle between sky and ground colors, the model reflects the white sky color on areas pointed upward and the black ground color on areas pointed downward:
Preparation
Locate Goal 1C in the code and follow the instructions.
Description
Experiment with a few values for sky and ground. The hemisphere light is used to simulate an environment that is dominated by one color at the north and south poles of a "sphere" surrounding the object. One hemisphere is the sky color and the other is the ground color. An example of this is blue for the sky and green for the ground. This will simulate basic radiosity of a scene for an object sitting on a green surface like grass with a blue sky overhead. Note that the default color values are stored at the top of the file.
Solution
float4 GroundColor              = { 0.1f, 0.4f, 0.0f, 1.0f };    // ground
float4 SkyColor                 = { 0.5f, 0.5f, 0.9f, 1.0f };    // sky
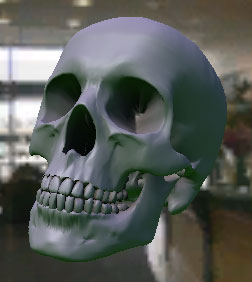
Notice how the new sky and ground colors affect the model:
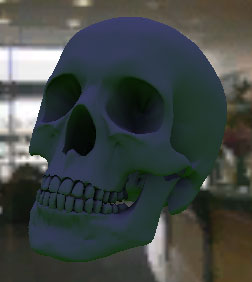
Because the selected technique Hemisphere only uses the hemispheric term of the lighting equation, the model shading is very dark. Try scrolling through the other techniques to see how the different components of the lighting equation affect the model; notice that all the techniques which start with Hemisphere include the hemispheric lighting term you implemented. The following image, rendered using the Hemisphere technique, shows the model under complete illumination:
That completes Goal 1. Feel free to try the extra credit problem or move on to Goal 2 when ready.