In this lesson you'll be implementing environment mapping to simulate ray-traced reflections. Before starting on the solution, look over the Environment Mapping Explained for an explanation of the theory, and refer back as needed as you work through the code. If you get stuck, refer to the Goal3_Solution.fx file inside the solutions directory for the suggested answer. Most of the steps can be implemented in many different ways, so don't worry if your code is different from the solution.
The environment mapping goal is divided into four tasks:
Extra Credit:
Preparation
Open Goal3.fx. If you have the software development kit (SDK) installed, the .fx file is located at:
(SDK root)\Samples\C++\Direct3D\Tutorials\HLSLWorkshop\
Description
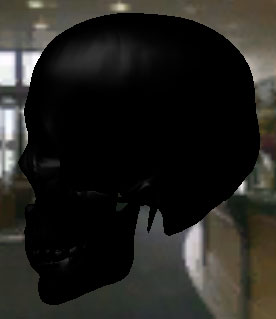
The default render technique is HemisphereDiffuseSpecular, which uses the full hemispheric lighting equation developed in lesson 1; however, the pixel shader has been modified to use the environment map in place of the diffuse color. Since you'll be adding support for environment mapping in this lesson, the placeholder code evaluates to black, leaving only subtle white highlights from the specular contribution:

Note that the animation calculation added in the previous lesson has been commented out to make things easier.
Preparation
Locate Goal 3A in the code and follow the instructions.
Description
Texture variables are the .fx file representation of the texture interfaces. Texture parameters also have annotations that specify what type of texture and where the texture should come from. This information is read by the application, which then creates a texture using that information and sets the interface back into the effect for use. In this case, the sample looks for type and name annotations in order to correctly load the texture.
The sampler variable is the HLSL .fx representation of how to do lookups. The texture intrinsics require a sampler, because a sample encompasses the concept of the texture and the method in which to do the lookup (that is, types of filtering, and so on). In .fx files, samplers can also have sampler_state blocks that specify the state to be loaded into the device whenever that sampler is used.
Note These blocks are ignored if D3DXCompileShader or Effect Command-Line Compiler is used.
Note
Create a texture variable named EnvironmentMap. Also create two string annotations:
Create a samplerCUBE variable called Environment. Add a sampler_state block that sets the following state:
Solution
texture EnvironmentMap
<
    string type = "CUBE";
    string name = "lobbycube.dds";
>;

samplerCUBE EnvironmentSampler = sampler_state
{
    Texture = (EnvironmentMap);
    MipFilter = LINEAR;
    MinFilter = LINEAR;
    MagFilter = LINEAR;
};
Preparation
Locate Goal 3B in the code and follow the instructions.
Description
The cubemap contains the view of the environment from the object's perspective along the six positive and negative axes. By sampling this texture and applying the result to the model's surface, the model will appear to reflect the environment.
Note
Use the provided CubeTexcoord and the texCUBE intrinsic to do the texture lookup.
Solution
return texCUBE(EnvironmentSampler, CubeTexcoord);
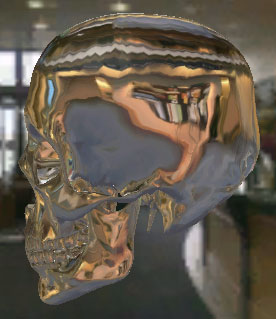
The environment can now be seen reflected from the object:

Note that the reflection does not take the viewer's position into account (as you'll notice if you move the camera). This will be fixed in the next step.
Preparation
Locate Goal 3C in the code and follow the instructions.
Description
The reflection vector is used to find the ray of light leaving a particular point in the environment, bouncing off the surface of the object, and entering the camera.
Note
A good way to start is just to return the Normal until you make sure the cube map lookup is working. Next you can use the reflect intrinsic to reflect the ViewToPos vector around the Normal vector. Both the ViewToPos and Normal vectors should be normalized before calculating reflection (which has already been done for you in the vertex shader).
Solution
return reflect(ViewToPos, Normal);
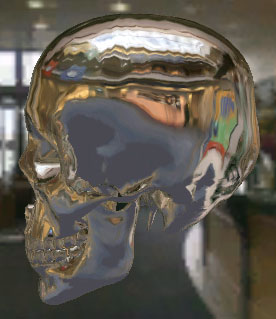
The environment mapping appears much more accurate with the correct reflection vector:

Note that the environment mapping is still not quite right - upon close inspection you will notice that the surface reflection appears slightly warped when moving the model around. This is a result of calculating the cubemap sample coordinates per-vertex and interpolating the result across the fragment. Instead, the normal and view vector could be interpolated across the fragment and used to calculate environment mapping per-pixel. For this workshop, per-vertex approximation is good enough, and per-pixel environment mapping is left to the user as an extra credit exercise. As a general rule, moving calculations from the vertex shader to the pixel shader gives greater accuracy at the expense of performance.
Preparation
Locate Goal 3D in the code and follow the instructions.
Description
Most shiny objects are not completely reflective. Some percentage of the final color is a reflection of the environment and the remaining contribution comes from the material's diffuse properties. Factor in the diffuse color to decrease reflectivity.
Note
Linearly interpolate between the diffuse color calculated within the vertex shader (In.Diff) and the environment map color sampled from the cubemap. A good reflectivity value for this scene is 0.25
Solution
OutColor = lerp(In.Diff, Environment, 0.25);
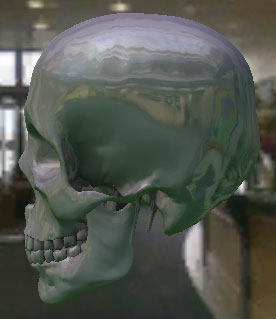
The environment now appears as a subtle reflection on top of the diffuse color:

Now that you have everything working, you might want to uncomment the animation calculation and to see how the reflections give added visual cues to the animated deformations.
This completes Goal 3. Feel free to try the extra credit problems or move on to Goal 4 when ready.