Hemispheric lighting divides scene lighting into two spheres: an upper hemisphere and a lower hemisphere. Each vertex uses its normal to determine whether it is more visible to the upper or the lower hemisphere. Once the visibility is determined, per-vertex lighting is interpolated from the two hemisphere colors to produce more realistic object lighting. See Goal 1 - Hemispheric Lighting Tutorial.
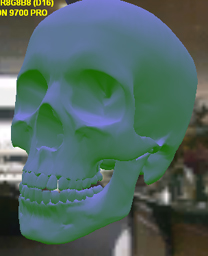
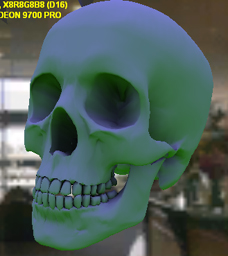
Compare the two objects below. The difference between the lighting on the two objects is that the one on the right has a hemispheric component.


In the image on the right, notice the color difference between the top and the bottom of the object. The top is brighter with a bluish tint because it is more influenced by the sky color. The bottom is darker with a greenish tint because it is more influnced by the ground color.
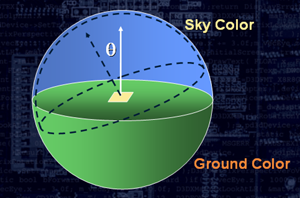
Here is an example of a vertex "p" that is influenced by two hemispheres. This diagram shows two hemispheres: the top one is blue, and the bottom one is green. The polygon in the center of the sphere is the one we are lighting. The angle theta is the angle between the vertex normal and the up vector (a vector pointed (0,1,0)).

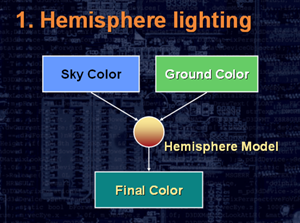
Hemispheric lighting takes the sky and ground color and blends them together based on the value of theta like this:

The resulting hemisperic component can then be combined with other per-vertex components (such as ambient, diffuse, or specular components).
This example also includes an occlusion term that identifies which vertices are occluded (or blocked) from the hemispheric lighting. A value of 1 means that the vertex is completely occluded from the light; a value of 0 means the vertex is not blocked from the light. In this example, the occlusion term is a per-vertex property, and was supplied in the per-vertex model data.
An easy way to implement a hemisphere light is to interpolate between the sky color and the ground color based on the angle between the normal and sky direction. The angle can easily be calculated by doing a dot product between the normal and sky direction. This results in a -1 to 1 value that, when remapped to 0 to 1, is perfect for interpolating between the two colors.