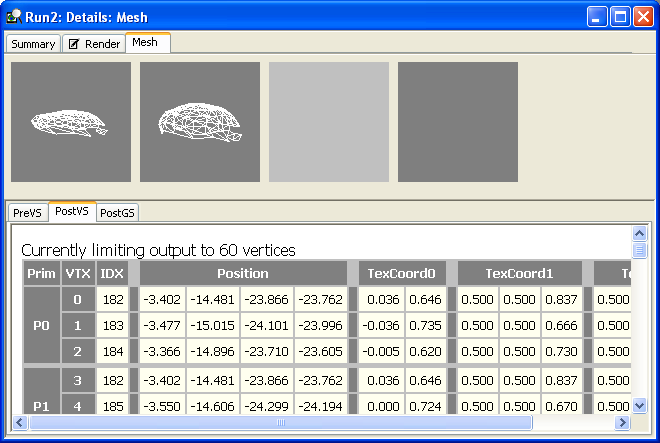
A mesh tab displays mesh data. Use this tab to view mesh vertex transformations before and after shader processing.

The mesh tab has two areas for displaying data.
The viewer shows four different views of the mesh data; these correspond to four different locations in the pipeline.
| View | Description |
|---|---|
| 1 | View the mesh vertices before the vertex shader. The camera is pointed at the center of the object. |
| 2 | View the mesh vertices after the vertex shader. The camera is pointed at the center of the object. |
| 3 | View the mesh vertices after the geometry shader. The camera is pointed at the center of the object. If there is no geometry shader assigned, this view is blank (a solid shade of light gray). |
| 4 | View the mesh vertices in screen space. The camera is set up identical to the camera in the target program. |
The vertices in the mesh can be viewed in the following tabs.
The mesh tab is automatically created when an experiment runs on a target program that contains a mesh. To initialize the mesh tab:
The vertex shader debugger is launched from the mesh tab. To debug a vertex shader, you must first choose the pipeline location that you want to view, and select the appropriate vertex data tab.