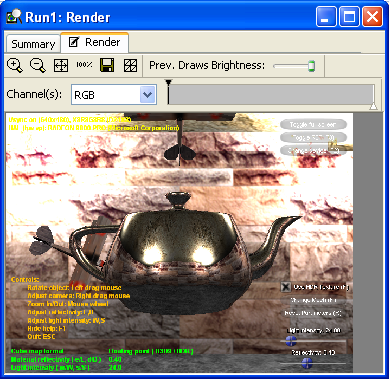
The render tab displays the rendered output of the current frame. The render tab is always present in the details view.

To render a frame, select the event you want rendered, and click on the render tab. Only those frames with a full-stream capture can be rendered. Such frames are displayed in bold type in the event view.
Navigate between frames using the previous/next frame controls in the event view.
The render tab has two types of controls.
Common controls perform common operations like zooming and file saving.
| Symbol | Name | Description |
|---|---|---|
|
|
Zoom In | Enlarge the image. |
|
|
Zoom Out | Shrink the image. You can also click down on the image, and then change the mouse wheel to zoom. |
|
|
Fit Image | Zoom (in or out) until the image is completely visible. |
|
|
Full Size | Reset the zoom to display the image at its normal size. |
|
|
Save | Save the image to a file. |
|
|
Wire Frame | Render any object(s) in wire frame. |
To save a file, either click on the Save button, or right-click on the render tab and select the Save Picture option from the contextual menu.

Render controls adjust the range of data displayed to make the data more visible.
The toolbar also contains a slider that controls the brightness of rendered objects that have been drawn previous to the current frame event.
| Symbol | Name | Description |
|---|---|---|
|
|
Previous Draw Brightness | Specifies how bright to display draws that occurred earlier in the frame. Dragging the slider to the left will decrease the brightness of previously drawn objects, dragging the slider to the right will increase the brightness. Using this slider with the event view can help identify what objects are drawn by each draw call. |
|
|
Channels | Specifies what channels of the image to display. The channels available are:
If Alpha Channels are used in the scene, these channels are also available:
|
|
|
Channel Level | Specifies the range of values to focus on. The min and max values of the range are specified by dragging the small triangles at the top and bottom of the slider. The min and max values can also be directly specified by right-clicking on the control and entering values. Values close to the top of the range will be lighter and those that are closer to the bottom will be darker. Values greater than the top of the range will be completely white while those less than the bottom of the range will be completely black.
To adjust the min/max levels, right click on the channel level control to launch the contextual menu.
Select the adjust menuitem. This dialog will open for setting the min/max levels.
|