Using the Resource Type AppWizard
The Microsoft® Visual C++® development environment includes the Resource Type AppWizard, a wizard that guides you through the creation of a new resource type. The Resource Type AppWizard prompts for two types of information:
-
Information that is common to all resources, or common properties.
-
Information that applies only to resources belonging to your new type, or private properties.
Private properties are not shared with resources belonging to other types; they are specific to a single type. Examples of private resource properties include ShareName and Path properties for File Share resources and the Signature property for Physical Disk resources.
The following procedure takes you through the steps necessary for creating a project to support a new resource type with the Resource Type AppWizard.
 To use the Resource Type AppWizard to create a new resource type
-
Start your Visual C++ development environment.
-
Select New from the File menu and then Project Workspace from the list box.
-
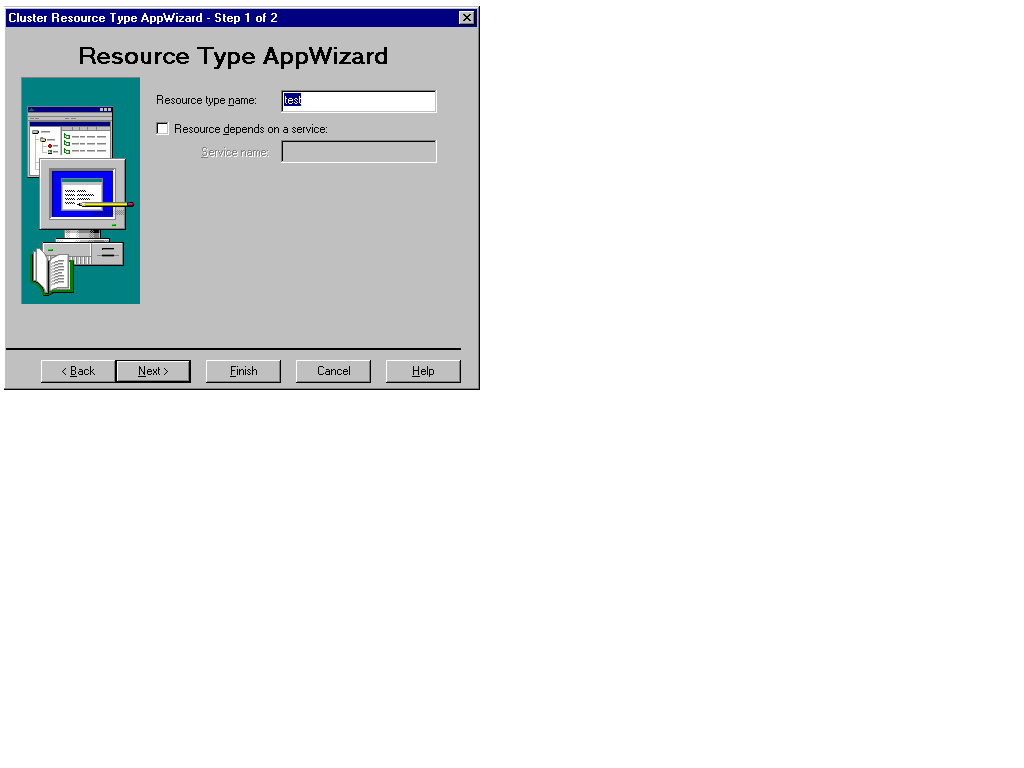
Select Cluster Resource Type Application from the list of project types, enter the name of the project, and press the Create button. You will see the following dialog box:
-
Provide a name in the Resource type name edit control.
-
If you are creating a resource type to manage a service, check the Resource depends on a service checkbox and enter the name of the service.
-
Press the Next button. You will see this dialog box:
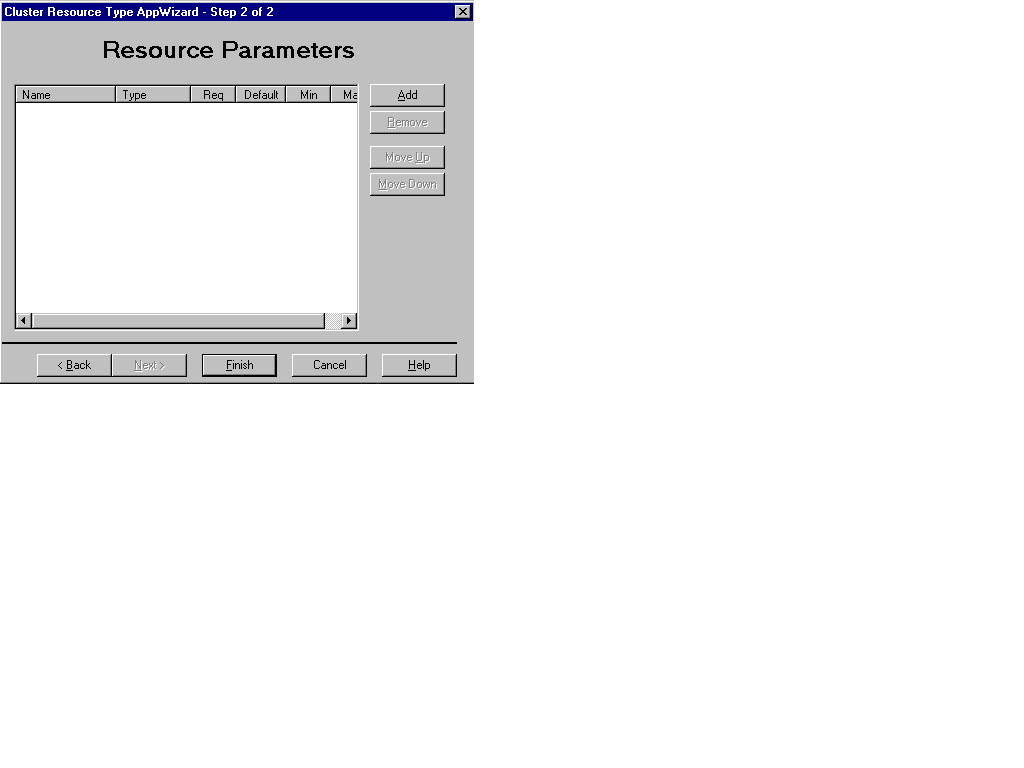
The Resource Parameters dialog box allows you to add parameters that are specific to your resource type, like a share name for a disk resource or a subnet mask for an IP address resource. Parameters are passed to your resource DLL to control the software associated with your new resource type. Some parameters are considered private properties of the resource and are accessible through Cluster Administrator and other management applications using the control code functions of the Cluster API.
For more information about the common and private properties of resources, see Cluster Properties. For general information about control codes, see Cluster Control Codes.
-
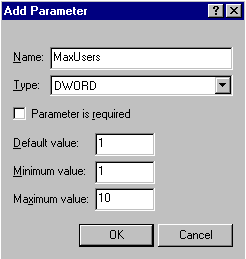
For each parameter that you want to enter, press the Add button and specify the name and type of the parameter and whether or not it is required. If you specify a numeric type such as DWORD, you can enter a default value, a minimum value, and a maximum value as shown in the following dialog box
-
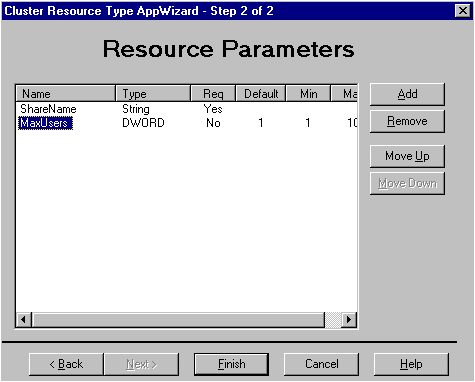
After adding each parameter, press the OK button of the Add Parameter dialog box. You will notice that the parameter and all related information is inserted into the Resource Parameters dialog box. The order in which the parameters appear dictates their order on the Parameters page in your Cluster Administrator extension. The following dialog box shows how the Resource Parameters screen appears after two parameters have been added:
-
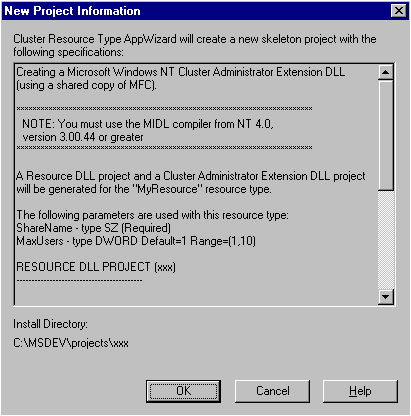
When you have added all of the parameters for the resource type, press the Finish button. A screen entitled New Project Information is displayed, providing data about the projects that you are about to create to support your new resource type. The data includes the names of the projects, resource type, project files, and classes, and specifies the directory in which the projects will be installed.
The following New Project Information screen shows the type of data that is generated:
-
If you are satisfied with the New Project Information, press the OK button to create the projects.
-
Wait for the projects to be created and the workspace to be unloaded and reloaded. Your resource DLL and Cluster Administrator extension DLL projects are now ready for you to use.
 To use the Resource Type AppWizard to create a new resource type
 To use the Resource Type AppWizard to create a new resource type


