 To run the C++ Code Generator Wizard
[This is preliminary documentation and subject to change.]
The C++ Code Generator Wizard generates framework provider code for classes defined in the database. Producing this code is an initial step in the process of writing a provider that provides dynamic instances for a particular class of objects.
 To run the C++ Code Generator Wizard

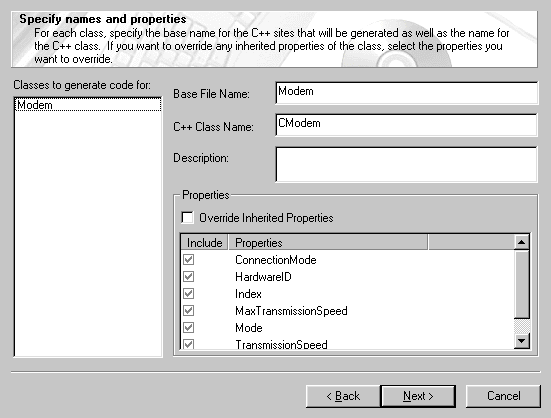
This screen shows each class you selected in step 1. For each class, do the following:
If you are writing a provider for a class that is derived from an abstract class or if the parent class does not have a provider, you typically need to provide all the class properties. In this case, select Override Inherited Properties, then select all the properties that appear.
If your class is derived from a class that already has a provider, you only need to provide the properties the derived class defines. You do not need to override inherited properties in this case.

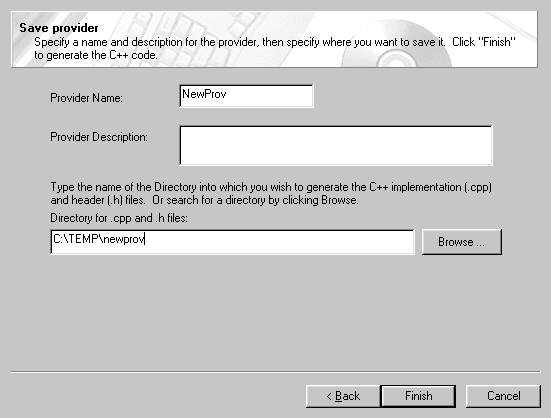
Enter the Provider Name, Provider Description, and the directory where the generated files will reside. You can use the Browse button to select the directory.
The wizard generates the following files: .CPP and .H files for each class created, .DEF and .ODL files for the provider, and Olesrvr.cpp. For instructions on turning these files into a functioning provider, see Creating a Provider with CIM Studio.