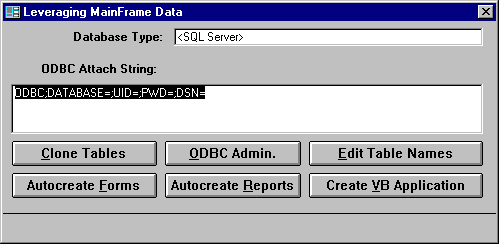
Our first step is to extract all needed data from the mainframe and to transfer it to a Microsoft Access database. This is done to prevent our development from affecting real data and to isolate the development process from the mainframe. The creation of this database can be done in very few lines of Microsoft Access Basic code once the ODBC connection is set up.
Before we can import data from the mainframe, we must tell ODBC how to connect to the mainframe. The first step is to click the ODBC Admin button.

After we click the ODBC Admin button, we are presented with the existing defined sources.
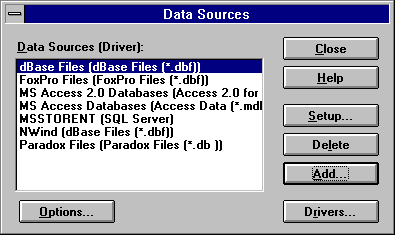
If our source is not defined, we click the Add button to add a new source. If our mainframe driver is not installed, we would click the Drivers button first. After we click the Add button, we are presented with a list of installed drivers.
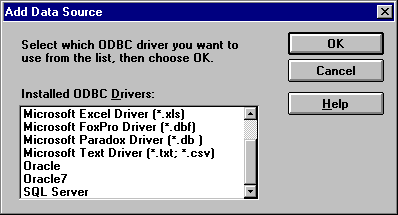
Select the appropriate driver, and complete any setup forms. Close the ODBC Administrator by closing the Add Data Source dialog box.
The tables to be imported from the mainframe must be entered next. Enter the needed table names in the table at the bottom of the form.
Once we have entered the table names, we fill in the top two text boxes with the ODBC connection information. For most ODBC drivers, you will keep the database type as <SQL Database>. The ODBC Attach String field is determined by the ODBC driver.
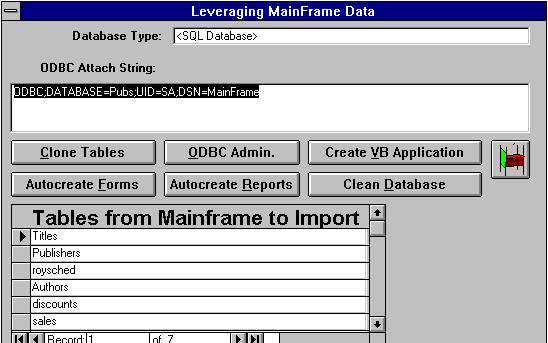
Clicking the Clone Tables button will download the specified tables. The Table tab in the Microsoft Access database will display all the tables that have been successfully downloaded.
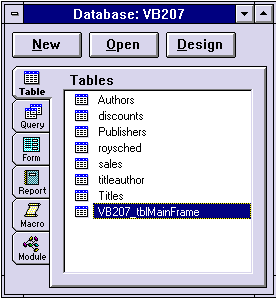
The download code is very simple:
Sub VB207_CloneTables ()
Dim DB As Database
Dim RS As Recordset, GoOn%, CR$
CR$ = Chr$(13) + Chr$(10)
Set DB = dbengine(0)(0)
Set RS = DB.OpenRecordset("VB207_tblMainFrame")
On Error GoTo Button24_Problems
While (Not RS.eof) And (GoOn% <> 7)
    DoCmd TransferDatabase A_Import, VB207Action.DBType, VB207Action.ODBCConn, A_TABLE, RS("TableName"), RS("TableName")
    RS.MoveNext
Wend
RS.Close
On Error GoTo 0

Exit Sub
Button24_Problems:
GoOn% = MsgBox(Error$ + " Should we continue?" + CR$ + VB207Action.DBType + CR$ + VB207Action.ODBCConn, 16 + 4, "Error")
Resume Next
End Sub
This code simply transfers the data from the mainframe to the Microsoft Access database using the TransferDatabase command. If a problem occurs—for example, a bad ODBC connection string—our error handler permits us to exit the routine immediately.
After we have downloaded the actual data, we need to add back two pieces of information: the table indices and the relationship. The indices are simple to add by going into design mode on the imported tables.
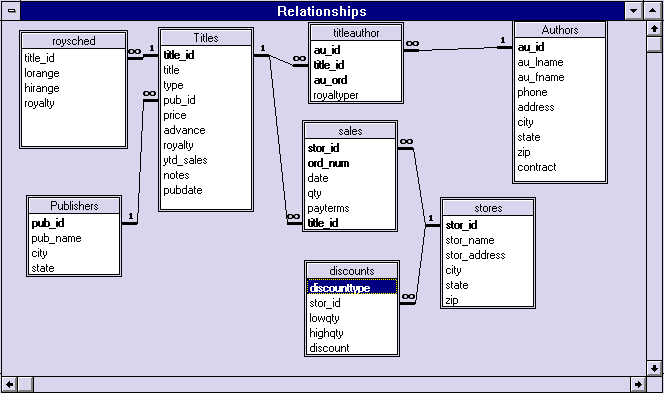
The relationships between the tables on the mainframe can be added by using the relationship editor. The relationship table should appear something like the sample below after all the relationships are added.
The mainframe can contain views of the data that we wish to create in our Microsoft Access database. We use query by example (QBE) to create these needed views. For example, suppose we wish to have a list of stores, titles, authors, and quantities of books. We drop the tables we want into the QBE dialog box and then select these fields (au_lname, au_fname, title, stor_name, and qty). Our QBE screen looks like this:
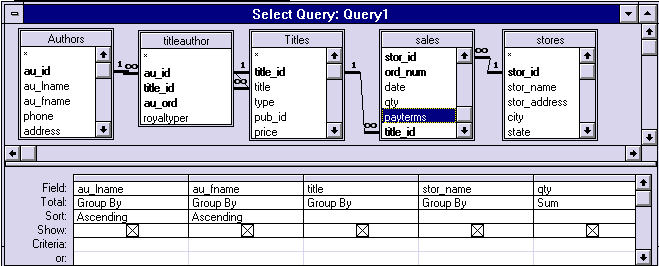
Now, for those of you who prefer not to use QBE and prefer to be real programmers and code in SQL code only, try this code:
SELECT DISTINCTROW Authors.au_lname,
   Authors.au_fname,
   Titles.title,
   stores.stor_name,
   Sum(sales.qty) AS SumOfqty
FROM (Titles INNER JOIN
   (Authors INNER JOIN titleauthor
      ON Authors.au_id = titleauthor.au_id)
   ON Titles.title_id = titleauthor.title_id)
   INNER JOIN
   (stores INNER JOIN sales ON stores.stor_id = sales.stor_id)
   ON Titles.title_id = sales.title_id
GROUP BY Authors.au_lname,
   Authors.au_fname,
   Titles.title,
   stores.stor_name
ORDER BY Authors.au_lname,
   Authors.au_fname;
The SQL code approach usually takes seven times longer than the QBE method.
We create all the queries we need (using either the SQL code or the QBE method) and a few that we suspect we may need (it's hard to stop when you are having fun!). When we are finished, we are ready to create forms and reports.
Creating forms and reports is easy and fast if you exploit the Wizards in Microsoft Access to create screens for each table and query. The field names in the tables and queries are used as captions on the forms and reports. These computer names are not ideal, but we will correct that shortly.
Simply click the AutoCreate Forms and AutoCreate Reports buttons and all your forms will be created. The form created for our query example is shown below:
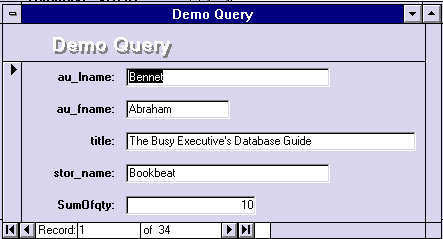
The form creation code is very easy because we use the existing Wizard code.
Set DB = dbengine(0)(0)
'Do tables next.
If 7 <> MsgBox("Do you wish forms for each table?", 48 + 4, "Auto Forms") Then
DB.TableDefs.Refresh
cObj = DB.TableDefs.count
If (cObj > 0) Then
    For iDoc = 0 To cObj - 1
        stname = ""
        stname = DB.TableDefs(iDoc).name
        If (Not (stname Like VB207Table)) And (Not (stname Like SYSTEMTABLE)) And (Not (stname Like STTMPCLIPPFX)) And (Not (Len(stname) = 0)) Then
            GoSub MakeForm
        End If
    Next iDoc
End If
End If
[code for queries]
MakeForm:
    StartCount% = Forms.count
    rc = zwAutoForm(stname)
    'Success?
    If StartCount% < Forms.count Then
        Set NewForm = Screen.activeForm
        FrmName = "frm" + stname

        On Error Resume Next 'Remove old copy if any.
        DoCmd DeleteObject A_Form, FrmName
        On Error GoTo 0
        If StrComp(NewForm.Caption, stname, 1) = 0 Then
            NewForm.SetFocus
            SendKeys "^{F4}Y"
            SendKeys FrmName + "~", True
        End If
    End If
Return
The appearance of these forms may be modified by changing parameters or by opening the .MDA files and changing the code.
After we have created the forms, we need to spend an hour organizing the forms and reports based on the nature of the data and what we know about the user's business needs. Use any suitable drawing package to create an organization chart of forms and reports.
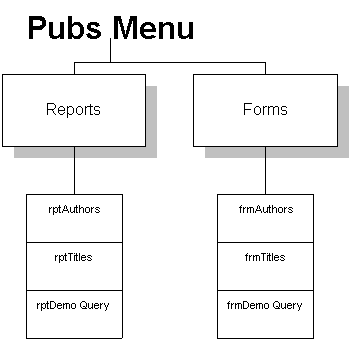
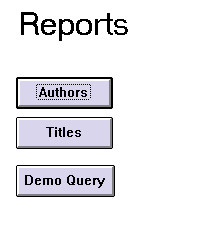
We create any needed lookup screens or menus by hand. To build a menu, we place controls and then answer the Wizard's questions. A sample menu is shown below:
Now we have a rough application ready to show tomorrow morning.