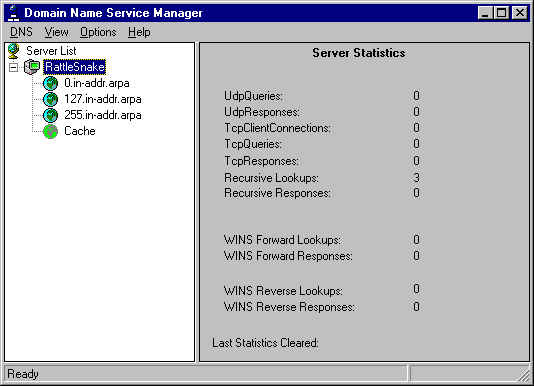
To configure the DNS server, run the DNS Manager under the Administrative Tools. Initially, the DNS Manager will not have any servers in its list. To add the local server, pull down the DNS menu and click New Server. Fill in the name of your local server and click OK. The server will then show up in the Server List. Double-click on the server to see the server statistics and zones that have been defined.

Since initially, the DNS server has no information about your specific network, the DNS server service installs as a caching-only name server for the Internet. This means that DNS only contains information on the Internet root servers. For most DNS configurations, additional information must be supplied to obtain the desired operation.
The first step in configuring the DNS server is to determine the hierarchy for your DNS domains and zones. Design considerations for a DNS hierarchy are discussed in the next section of this paper. Once the domain and zone information has been determined, this information must be entered into the DNS configuration using the DNS Manager.
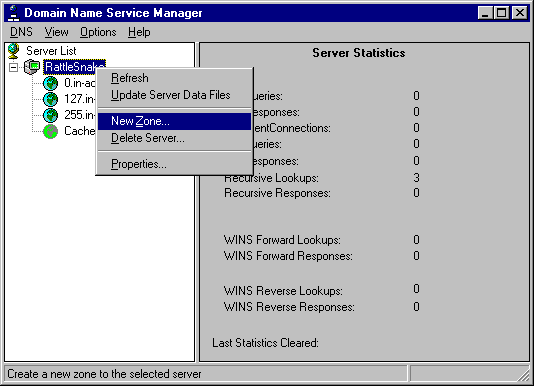
Since DNS information is grouped and controlled by zones, a zone must first be created. To do this, click the server name with the alternate mouse button and then click New Zone.
|
|
If you double-click on the CACHE zone, you can see all of the hosts that the DNS server has statically defined and dynamically cached due to a previous query. The CACHE will also show all of the WINS entries that have been resolved and have not elapsed their WINS specific Cache Time-out Value. |
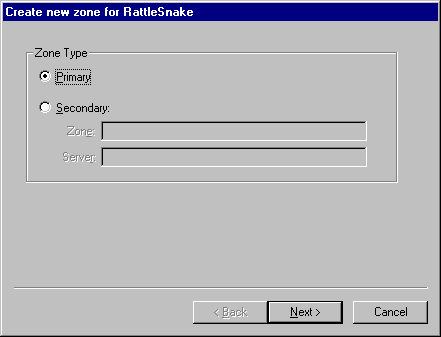
At this point, a dialog is presented which ask if the zone you are creating is a primary zone (information stored locally) or a secondary zone (information obtained from a master server via a zone transfer). If it is a primary zone, no additional information is needed at this step. If it is a secondary zone, you must also enter the zone and master server names in this screen.
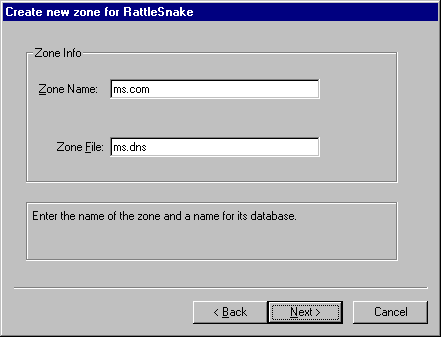
The next step is to fill in the zone name and zone file information for the local server. This will determine how the zone shows up in the DNS Manager and what file name it is stored under. If this is a secondary zone, this zone name should match the master server zone name. If this zone file already exists in the DNS directory, DNS will import these records automatically when this zone is created.
If this is a secondary zone, you would then be asked to enter the IP address of the master name servers (the name servers with which you will do zone transfers for this zone).
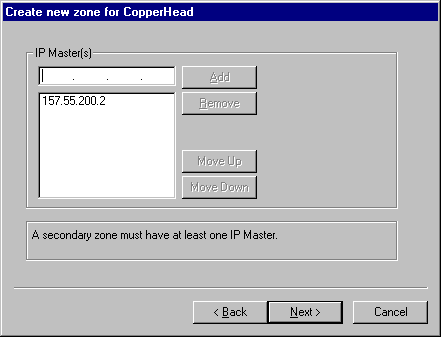
Once all this information is entered, the zone will be added to the DNS hierarchy. If you have additional zones that need to be added, follow the same procedure for each of them. Once all zones have been added to the server, you should then add any DNS subdomains under the zones that your hierarchy might contain. To do this, click the appropriate zone with the alternate mouse button and click New Domain.
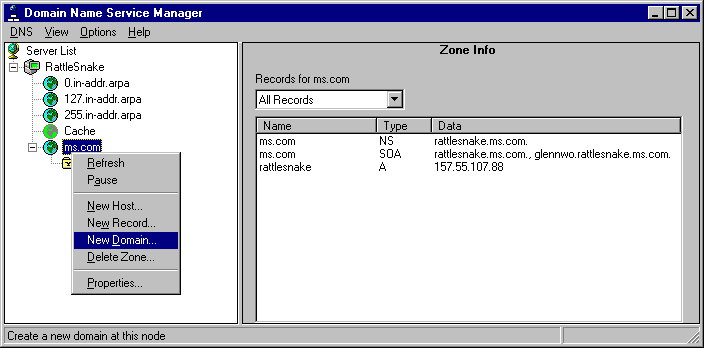
Enter the name of the new subdomain in the dialog box and click OK. If multiple levels of subdomains are needed, create each successive sub-domain by clicking on the immediate parent with the alternate mouse button, clicking on New Domain, and entering the name of the new subdomain.
This process can also be used for adding new host or resource records at any domain location within the DNS hierarchy.