Presented by: Ken Spencer
Ken Spencer works with 32X Corporation, a firm specializing in top-quality seminars. Ken also teaches seminars at professional conferences around the world on various topics. Ken has authored and co-authored several books, including OLE Remote Automation with Visual Basic [Prentice Hall], Client/Server Programming with Microsoft Visual Basic [Microsoft Press®] and Inside Visual InterDev [Microsoft Press]. You can reach Ken at Error! Reference source not found.. For more information on 32X seminars, see our Web site..
Email: KenSpencer@32x.com
First, thanks go to Rob Copeland and Erik Christensen from Microsoft Corporation for providing the genesis of the presentation and white paper. Thanks also go to Chris Flores from Microsoft for the help he provided with this presentation and for his general help over the years.
Creating and deploying controls for use in Web pages is one of the most exciting new features in Microsoft® Visual Basic® programming system version 5.0. This presentation will focus on the design, test, and deployment of ActiveX™ controls and documents over the Internet. Topics include design considerations, ActiveX documents, ActiveX Control Pad, Setup Wizard, Internet Download, safety, and digital signing.
ActiveX controls are software components that are packaged into an .ocx file. These components allow developers to package software that can be reused by many different types of applications. Based upon the number of people interested in building ActiveX controls at VBITS and other seminars, there are a wide number of people in the world that are actively building these components with Visual Basic 5.0.
Most applications, such as Microsoft Office 95 and 97, will run ActiveX controls. Most development languages, such as Visual Basic, the Visual C++ development system, the FoxPro® database management system, Delphi, and others, are also capable of hosting controls and using their features.
Control development in Visual Basic is based on the Visual Basic form metaphor and technology to allow existing and new Visual Basic developers to visually create controls. Using this technology, we can build ActiveX controls with all the great form graphics methods, standard events, and properties that we are used to seeing in commercial ActiveX controls.
Debugging is a snap with the new IDE as multiple applications may be hosted at the same time in one project group. The project group feature allows you to debug and develop with several projects at one time, enabling faster development, debugging, and the production of higher quality software.
An ActiveX document is a Visual Basic application that can run in a browser or the Office Binder. The ActiveX applications consist of document files (.vbd) and either a .dll or .exe application. The ActiveX document file is a structured storage file that is similar to a Microsoft Word document or Microsoft Excel spreadsheet. The .exe or .dll file works as an automation server that contains the code and provides the working code for the application. A .dll is an in-process server, while an .exe is an out-of-process server.
When a user navigates to a document file, the automation server starts and runs inside the browser or Office Binder. The automation server does the processing; the document file provides the data. When you save the properties of a document, the properties are saved in the .vbd file.
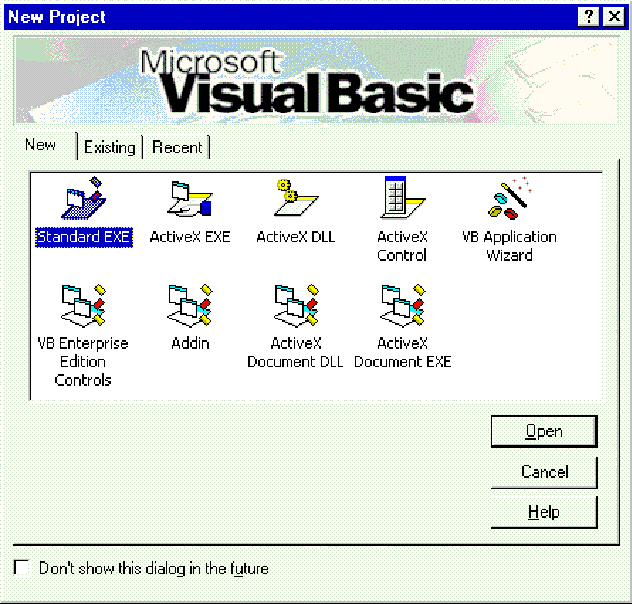
There are several ways you can create an ActiveX document. The first approach is to build from scratch by selecting ActiveX Document DLL or ActiveX Document EXE from the New Project dialog shown in Figure 1.
Figure 1
Once Visual Basic generates the shell of the document, you can add controls and code to the document just like you would to a normal Visual Basic application.
The second method of building an ActiveX document is to load an existing Visual Basic application and run the ActiveX Document Migration Wizard from the Add-Ins menu. The wizard will prompt you to choose the forms to migrate, the options to use, and will provide you with a document describing what you must do to finish the application.
The ActiveX Document Migration Wizard will migrate one form or multiple forms. The new ActiveX documents will be placed in your Visual Basic project. You can modify the code in the documents and then compile them using the standard compile options. Every time you use the wizard, you should check the code in the document for any comments the wizard placed in the code indicating actions that you must take.
ActiveX controls can also be created in several different ways.
The first method is the raw code approach. Using this method, you must create all the code yourself. You can create raw controls that execute faster and consume fewer resources. The trick here is the “can” part. To create compact and fast controls will require diligent programming that generates efficient code.
The second method is to subclass another control. The original control becomes a constituent control that lives within your control. You manage the constituent control and determine what it does and how. This method is extremely simple and allows you to quickly create a control that matches your needs. For instance, if you need a TextBox control that has a particular function, you can build a new ActiveX control and place a TextBox on it. Then add your functionality to your control.
Next, add your properties, methods, and events to mask those of the control you subclass. For instance, you may want to replace the Text property of a TextBox control with your own Text property. Then you can perform validation and other actions whenever the Text property is set before you pass the value to the to the TextBox property.
The third method is the composition method. A control built with the composition model provides a single interface for multiple controls. For instance, you can build a control that has all the fields and buttons for a particular object (such as a name and address for a person) and package that as one control. Whenever you need a name and address, drop the control onto a page or form.
Composition is easier than building a raw control because the subcontrols handle most characteristics themselves (except size and position).
Whichever method you use, you should use the ActiveX Control Interface Wizard to read the source for your control and assist you in creating the necessary features for the control. For instance, the wizard will generate all the standard properties, events, and methods that most controls should have. The wizard also provides you with a nice interface to add your own properties, methods, and events. The wizard also assists you in wiring your own properties to properties of constituent controls you have included in your control. The wizard can be run as many times as necessary on a control, including after you have added your own code.
Control hosts are important as each provides the foundation for the controls it hosts. The hosts provide specific functionality. Host-specific functionality may consist of support for control features such as frames, control enumerating, transparency, and more. If a host does not support the feature, then your control may not form as you intended.
The controls host supports the Extender object to provide standard properties from the host that the control does not need to provide.
The host also provides Ambient properties that controls can use to blend in with the host.
The Extender and Ambient properties are not available during the Initialize event as the control has not been sited at that point. The properties are available during the InitProperties and ReadProperties events.
To make sure that your controls work in the widest possible number of hosts, you must test your control in multiple hosts. For instance, you should test in both Internet Explorer and Netscape, making sure the control works well with both. Also test with multiple versions of each, if possible. You should also test in development tools such as Visual Basic and Visual C++, and in general purpose applications such as Word and Microsoft Excel.
The Extender object provides a number of properties to each control it hosts. You must use good error trapping in your controls as all containers don’t provide the same functionality in Extender properties, methods, and events.
The following are standard Extender properties provided by the Extender object:
All hosts should provide these properties, but some may not.
If your control is placed on a host that has an Extender property with the same name as one of your control’s properties, then users of your control will see the Extender property and not your controls property. The user can still access your property by using the Object property of the Extender object. For instance, if we have a control with a Tag property, the user could access that property by using the following code:
CritterName.Object.Tag = "Triceratops"
The Object property returns a reference to your control’s interface just as you defined it, without any Extender properties.
The Ambient properties can be used by your control to stay consistent with its container. The container provides information your control can use to synchronize itself with the container. For instance, you can use the BackColor property to set your control’s background color to the same color as its host.
Some of the most important Ambient properties are:
The AmbientChanged Event fires whenever one of the Ambient properties changes. The argument to this event will contain the name of the property that changed.
ActiveX controls have two modes of run-time behavior. When you place a control on a form in the Visual Basic design environment, the control’s code actually starts executing. Anytime the form containing the control is visible in design mode, the control is running. If you close the form, the control will stop.
When you run your application, the control will start executing. The same code runs in design mode and run mode. You can use the Ambient property UserMode to determine which mode a control is in.
Controls are persisted by using the PropertyBag. The PropertyBag has actually been around since the days of Visual Basic version 1.0, but it has been hidden from the Visual Basic developer. Now that we can create ActiveX controls with Visual Basic, we must deal with the PropertyBag.
The PropertyBag is used to store properties of the control. For instance, when you change the Text property of the TextBox control, the value is stored in the PropertyBag. When you change a property such as Text and save the form, the PropertyBag object writes the information into the Form file. If you change a property on a hypertext markup language (HTML) page, the PropertyBag writes the properties to the PARAM tag for the control. When the control runs, the PropertyBag reads the property values. This occurs both at run time and design time.
The PropertyBag object provides three events:
Visual Basic 5.0 provides a number of new features for debugging controls. You can debug controls in the design environment by hosting the controls project and the test project in a project group. The project group will allow you to quickly move back and forth between the control and the test project. Figure 2 shows Visual Basic with a control project (AddressControl) and a test project (ListCombo).
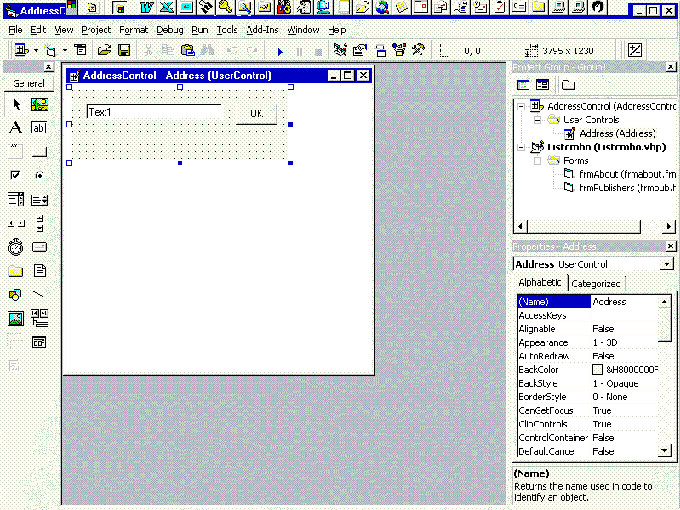
Figure 2
You can set breakpoints in your controls code and use all of Visual Basic’s debugging features for both your control and its test project. You can walk through the controls functions step by step.
Once your control has been thoroughly debugged in the Visual Basic design environment, you should test the control in other containers that will host the control. As mentioned earlier, you can should test in multiple versions of each application.
Now that you have the control built, where is the control going to live? This is actually a question you must answer both in the design, build, and deployment phases of control design. Controls can typically live in several different hosts and host environments:
Controls can be compiled by Visual Basic into either a p-code .ocx or a binary .ocx. The type of executable generated will depend upon the options selected when the control is compiled. If you use VBCCE to build the control, the control will be complied using p-code as VBCCE does not produce any other compile options. Visual Basic, Professional Edition, and Visual Basic, Enterprise Edition, can generate either native or p-code executables.
Both methods result in small, easy-to-distribute .ocx files. They also both convert your source code into a form which is not readable and thereby provides reasonable security against copyright infringement.
P-code executables will generally be smaller than a native code executable built from the same source project. The p-code executable will rely on code that is most likely already on the users computer in the form of the Visual Basic run-time library.
The controls you develop with Visual Basic 5.0 can be afforded licensing protection with the same underlying mechanism as controls developed with Visual C++ (IClassFactory2).
Here are some of the more important points. For complete details on the inner workings of licensing see the ActiveX Software Development Kit (SDK).
The Internet brings up an array of new licensing issues. For example, take the case of a license agreement, which specifies that a control can be run on only one machine. If that one machine is a Web server to which 500 other machines are connected, the license agreement is not necessarily being violated. Perhaps this is what you intended and perhaps not. Seek legal council when considering license agreements.
You cannot circumvent a control’s license agreement by simply incorporating that control (as a constituent control) into a control of your own. The license agreement for the constituent control remains in full force when incorporated into a control of your own.
When you use controls on Web pages, a license must exist on the Web server machine. Without a license present the Web browser will receive a control creation error.
One of the thorniest issues with building and distributing commercial controls is licensing. The vendors want their controls to be easy to use so developers will purchase them. At the same time, vendors need some assurance that they’ll receive revenue from the developers. Visual Basic 5.0 addresses this issue by incorporating licensing features into the IDE. When building an ActiveX control, the Visual Basic 5.0 developer simply needs to select the Require License Key check box to produce a license file to distribute with that control.
The license file (with a .vbl extension) is transferred by the Visual Basic Setup program to a target machine during setup. The license file will be installed during any type of installation, including CD-ROM, floppy disk, and network. Other major setup package vendors will provide Visual Basic licensing support in their setup programs.
You can quickly add licensing support for a control in the design stage. You must add the licensing before you compile the control.
To add licensing support to your control project
Visual Basic will create a .vbl file containing the registry key for licensing your control component when you compile it. The setup wizard will automatically include the .vbl file when you create the setup distribution. If you decide to add licensing to an existing control, then you must change the licensing option in the design environment and recompile the control.
Because the license file is included with the setup distribution for your control, the license file will automatically be installed along with other support files for the control. The setup program will also add the license key to the registry on the system the control is installed to. This is one more reason that a control must be installed on each system that will use the control in the design environment.
After the control is installed on a developers system, they can use the control in the design environment. When they place an instance of a control on a form in Visual Basic, then Visual Basic will ask the control to create itself and use the license key from the registry. This interaction between the control and the host design environment takes place between any development tool that is used with an ActiveX control.
Now, suppose a developer notices that your control is registered on their system. This may occur after they have visited an Internet site that uses the control or installed an application that uses the control. If the developer tries to place an instance of the control on a form in Visual Basic, the operation will fail because there will not be a design-time license for the control.
When you compile an application that uses a control, the run-time license information is compiled into the executable application. When a user runs the application containing the control, the Visual Basic run-time environment will ask the control to create an instance of itself and will pass it the license key that is contained in the executable. The control will automatically use this license information to create itself. This is a control that can be used in an application and does not require any run-time license file.
When ActiveX controls are used in standard applications such as Microsoft Office applications, the controls license information cannot be compiled into a document file. For this reason, these applications work the same as the Visual Basic or other development environment-a design-time license for the control must exist on the system that uses it. You cannot buy one copy of the control, and then use the control on many different systems.
If you are developing controls for in-house use in these types of applications, it is usually best to not include licensing support for the control.
Web browsers work a bit differently than traditional applications like Microsoft Word or Microsoft Excel. Because the file that is using a control is hosted by a Web server, the licensing file for the control may be stored on the Web server where it is accessible for any user. The Web browser can then ask the Web server for the license information and pass the license key to the control when it asks the control to instantiate itself.
The key to licensing controls for use on the Internet and Intranet is license support in the browser. If the browser trying to use your control does not support licensing, then the control creation process will fail as the browser will not pass the control the license key.
The license file used by the browser is a .lpk file. This file can be created with the LPK_TOOL.EXE utility that is included with Visual Basic. This tool is in the folder: D:\VB5.0\TOOLS\LPK_TOOL.
You can run the program from the CD-ROM or copy it to your local system or a network share. The LPKTOOL interface is shown in Figure 3.
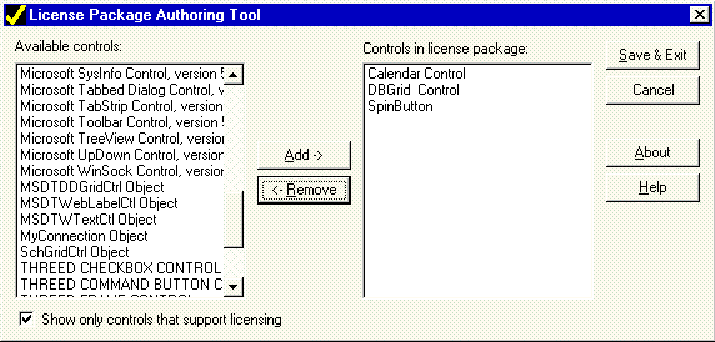
Figure 3
To use this tool, simply select the components that should be in the license file and click the Add button. This will move the components to the list on the right side of the application. When you are finished selecting components, then click the Save & Exit button. You must specify the name and location for the resulting .lpk file.
It is normally beneficial to create a license file that can be used by multiple pages within your Web application. This license file can be created and reused over and over, without having a separate license file for each page.
Except for the CLASSID, the information in the license file is not readable.
You must use the Internet Explorer License Manager object to access the license file. You do this by using the following object tag in any Web page that contains a licensed control:
<OBJECT
CLASSID="clsid:5220cb21-c88d-11cf-b347-00aa00a28331">
<PARAM NAME="LPKPath" VALUE="TechEd97.LPK">
</OBJECT>
This object tag references the License Manager and sets the path for our license file (TechEd97.lpk). The path in this sample is a relative path, indicating that the license file is in the same folder as the page that uses it. You should always use relative paths for license files to ensure that users can’t download them by using the uniform resource locator (URL) they see in the HTML generated for the page. Of course, you can use folder hierarchies for the path, allowing you to place the license file and other files that use it in separate folders.
If your control is a composite control, built from other controls, then licensing is more complicated. You must not only distribute licenses for your control, but you must also have the required licenses for constituent controls that are part of your control.
When a composite control is asked to create an instance of itself, it will ask each constituent to create an instance of themselves. As each constituent is asked to create itself, it will check the registry for a license. If the license does not exist, the creation will fail for both the constituent and your control.
If your control is used in a compiled application, this is not an issue. The license information for each constituent control will be contained in the executable because the person creating the executable must have a license for each control. If your control is used on a Web site, then the Web site must have valid license files for each constituent control.
The only Visual Basic, Professional Edition, or Visual Basic, Enterprise Edition, control that requires a license is the DBGrid control. Be sure to check the Visual Basic license information and the Visual Basic documentation for more information on license options and responsibilities.
You have several options for packaging ActiveX controls. You can create one control per .ocx or package multiple controls per .ocx. With one control per .ocx, the user must load a separate .ocx for that control. If you package multiple controls per .ocx, then a user only needs on .ocx to load all the controls.
The packaging becomes especially important when you are creating Internet controls. While packaging several controls in one .ocx may make them easier to use, they may create longer download times when users access a page that uses them on the Internet. This works both ways. If a page uses one control from your .ocx that contains five controls, then they must download all five controls to get one. On the other hand, if the same page uses all five controls, then the user must only download one .ocx to get all the controls.
To download an ActiveX control, the user must use the Object tag CODEBASE parameter. The easiest way to create the entire Object tag with the appropriate parameter settings is to run the Visual Basic Setup Wizard.
The Setup Wizard will build a sample HTML file that contains the Object tag for the control complete with a CODEBASE reference to the CAB files that contain the control and other support files that are required for the control. The CAB files can contain multiple files, as well as code signatures for the files.
There are several issues that must be addressed with any type of automatic downloading:
In the free-for-all environment of the Internet, where the simple act of clicking on a hyperlink can lead to malicious code running amok on your machine, the first step in protecting yourself is knowing whose controls are running on your machine. Digital signing provides this capability.
Digital signatures combine public key cryptography with a trusted independent third party, referred to as a Certificate Authority (CA), to provide assurance that you know the source of a control. Here’s how it works:
Visual Basic 5.0’s Setup Wizard supports both the National Institute of Science and Technology’s Secure Hash Algorithm (SHA) and RSA’s Message Digest (MD5).
Signed controls also contain information as to the level of safety afforded the system that downloads the control. Controls can be safe for scripting and safe to initialize, or unsafe.
Controls that are safe for scripting should be unable to read or write any information to or from the system they are run on through the scripting language. This ensures that they can’t damage the system by overwriting or modifying important files, and that they can’t pass information back across the network. For instance, a script developer cannot do anything with the control that would cause it to write to a specific file or registry key on the client system. The control may do those things, but it cannot be controlled by the script writer.
Controls that are unsafe are potentially dangerous. They could be used to collect intelligence without the user’s knowledge or to irrevocably format a hard drive.
Users of controls should also be aware that it is the developer who selects the safety level. A well-meaning, but incompetent developer could construct a control that he or she signs as being safe for scripting. Someone else could then incorporate that control in his or her HTML page along with potentially damaging script code. When the control is downloaded it is accepted because it is marked as being safe for scripting when in reality it isn’t, and the next thing that executes on that machine is a damaging script.
Visual Basic 5.0’s Setup Wizard will package your control and all the support files that it requires. It does this by gathering all the dependencies of an application and then allowing you to manually add any additional files that you’d like to distribute.
You can run the wizard from the Visual Basic 5.0 folder. Figure 4 shows the Setup Wizard interface.
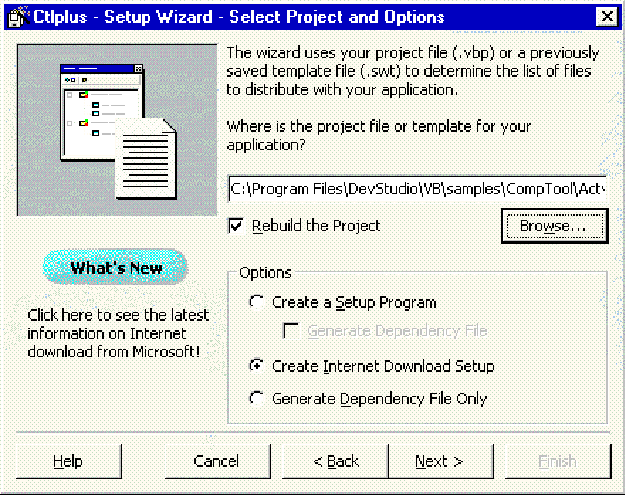
Figure 4
In this dialog box, you should point the wizard at the source file for your control or document. You can enter the path or use the Browse button to point to the file. If you click the Rebuild option, then the wizard will start Visual Basic and recompile the project. Use this option carefully! If you do not have binary compatibility set for the project, then a new CLASSID will be generated by the compile. When a new CLASSID is generated, then any application or page that references the old CLASSID will not be able to use the control until the reference is changed.
Next you must specify the location for the download files. Figure 5 shows the Internet Distribution Location step with the destination pointing to the project Ken.
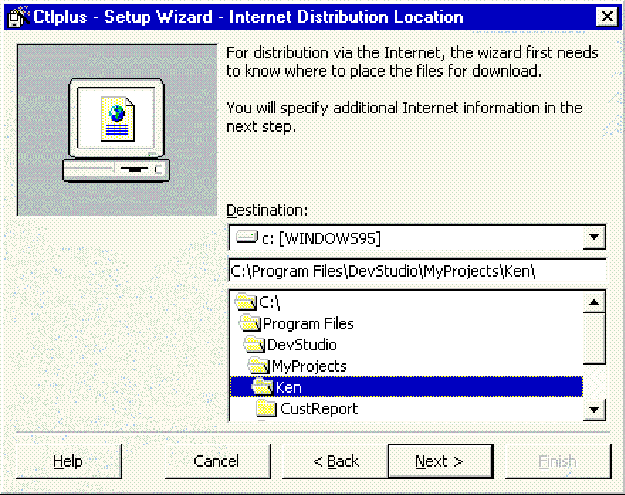
Figure 5
The folder Ken is actually a working folder for the Visual InterDev Web project Ken. The files are placed in this folder so they can be locally accessed by the pages in the Web project with a relative URL.
The next step (not shown) allows you to choose the location of any alternate files to download. The default location is the Microsoft Web site.
Click the Safety button to bring up the Safety dialog box where you can set the safety level for the application.
The next dialog box allows you to specify any ActiveX Automation components for your application.
When you click the Next button, the Setup Wizard will process the setup files. You may be prompted for additional files the wizard detects should be included. Figure 6 shows the File Summary step after the processing is complete.
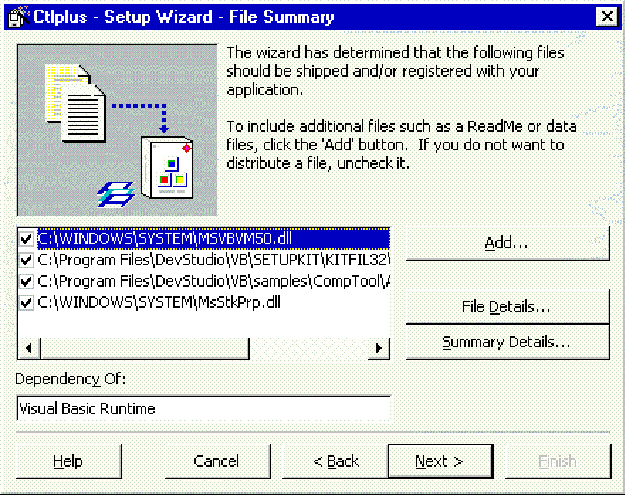
Figure 6
You can click the Next button and the Finished step will display. Click Finish to complete the process. The wizard will process the files at this point and actually create the distribution.
The wizard will create a sample .htm file such as this:
<HTML>
<!--	If any of the controls on this page require licensing,
		you must create a license package file.  Run LPK_TOOL.EXE
		to create the required LPK file.  LPK_TOOL.EXE can be found
 		on the ActiveX SDK,
		http://www.microsoft.com/intdev/sdk/sdk.htm.  If you have
	 	the Visual Basic 5.0 CD, it can also be found in the
		\Tools\LPK_TOOL directory.

	The following is an example of the Object tag:

<OBJECT CLASSID="clsid:5220cb21-c88d-11cf-b347-00aa00a28331">
	<PARAM NAME="LPKPath" VALUE="LPKfilename.LPK">
</OBJECT>
-->
<OBJECT ID="ShapeLabel" WIDTH=188 HEIGHT=105
CLASSID="CLSID:0BC3D471-9A62-11D0-9B33-0080C7B88E7A"
CODEBASE="Ctlplus.CAB#version=1,0,0,0">
</OBJECT>
</HTML>
This file includes the Object tags for both the License Manager and the control you are creating in the setup kit. You can paste this entire page, minus the comments, into your page that uses the control. Make sure that you update the <PARAM NAME="LPKPath" VALUE="LPKfilename.LPK"> line with the path of the license file. Check the section in this paper for more information on licensing.
Property pages can be created in Visual Basic to provide users with a nice interface for setting properties. With a property page, the user does not have to use the normal properties window to set properties for your control. Figure 7 shows the property pages for the CtlPlus sample application that ships with Visual Basic.
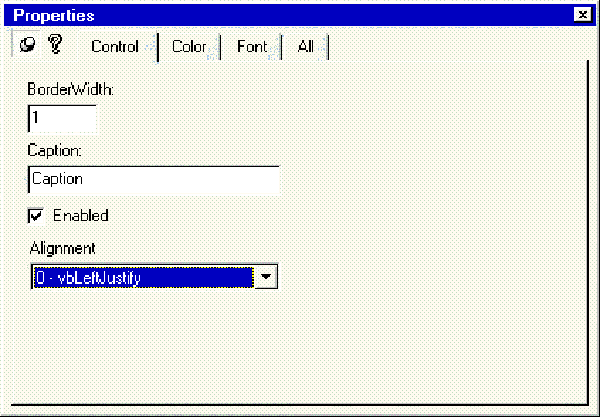
Figure 7
The Control tab shown in Figure 7 was created in Visual Basic along with our control. The Color and Font tabs are standard property pages that you do not need to create.
Refer to the Visual Basic documentation and several of the good ActiveX books that are on the market for more information on property pages.
Containers play an important role with controls. The container provides properties, methods, and events that are used by the controls and ActiveX documents that are hosted by the container. The Parent property provides you with access to the container.
The Extender and Ambient objects are not available during the Initialize event, but are available during InitProperties and ReadProperties events.
Visual Basic allows your control to asynchronously download its properties. This feature allows the control to remain responsive to user demands while the properties are downloaded in the background. Asynchronous downloading is most useful when a control is used in Internet Web pages, and there are numerous properties to load for that control. The user will see the Web page created and be able to interact with it as the properties are downloaded. Your control will be able to manage the entire process and handle all user interactions.
The AsynchRead method triggers the asynchronous download process. The AsynchReadComplete event fires when the download is complete for each property. The code that best illustrates the AsynchRead method is in the Stock.vbp project from the session. Just open the project in Visual Basic and search for AsynchRead.
The HyperLink property tells its container to navigate to a specific URL. The URL can be drawn from the history list or can be anything the developer specifies. This property makes it easy to add Internet and Intranet features to your application or control.
This code snippet is from the sample HyperControls project from the session. It uses the NavigateTo method of the Hyperlink object to change to the link contained in the variable sLink.
If Len(sLink) > 0 Then
	RaiseEvent JumpToLink(ByVal sLink, bCancel)
      If Not bCancel Then
         Hyperlink.NavigateTo sLink
      End If
End If
The Hyperlink object also allows you to move forward and backward through the history list as shown by this snippet of code from the Visual Basic Help system:
Private Sub cmdGoForward_Click()
	On Error GoTo noDocInHistory
	UserDocument.Hyperlink.GoForward
	Exit Sub
noDocInHistory:
	Resume Next
End Sub
Notice the error handling that we have included here. You must include robust error handlers for your control to run properly in different hosts.
The PictureFromURL property causes a graphic to download asynchronously from the specified URL contained in the property. This improves the performance of every Web page and frees the developer from dealing with the complexity of creating the asynchronous download code.
You should add a Property Let procedure in your control with the name PictureFromURL. Search the Books Online for PictureFromURL to see a sample of how to implement this. This technique uses the AsynchRead method to implement the download.
The Hide and Show events are fired when a user navigates off a page and back on again, respectively. This allows the developer to easily create code that can determine the state of the page at any time. If the Hide event fires, the developer can place the control into a dormant state, yet reactivate the control when the Show event fires.
The ability to determine how your control functions as users navigate on and off of a page containing the control allows the developer to create a more interactive and friendly control. Web page designers will be drawn to your controls because of the native intelligence the controls display.
Your control or document does not have Hide and Show methods. The user, not the developer, controls the display.
© 1997 Microsoft Corporation. All rights reserved.
The information contained in this document represents the current view of Microsoft Corporation on the issues discussed as of the date of publication. Because Microsoft must respond to changing market conditions, it should not be interpreted to be a commitment on the part of Microsoft, and Microsoft cannot guarantee the accuracy of any information presented after the date of publication.
This document is for informational purposes only. MICROSOFT MAKES NO WARRANTIES, EXPRESS OR IMPLIED, IN THIS SUMMARY.
Microsoft, FoxPro, Microsoft Press, Visual Basic, and Visual C++ are registered trademarks and ActiveX is a trademark of Microsoft Corporation. Netscape is a trademark of Netscape Communications Corporation.
Other product or company names mentioned herein may be the trademarks of their respective owners.