Group policies are supported for both Windows NT and NetWare networks. Creating policies for groups is similar to the process for creating policies for users or computers.
You must first ensure that GROUPPOL.DLL, which supports group policies, has been successfully installed on each client computer. For more information, see "System Policy Editor" earlier in this chapter.
You cannot create new groups by using System Policy Editor; you can use only existing groups on the NetWare or Windows NT network. To create a new group, use the tools provided with your network administrative software.
Or
If user-level security is enabled, click Browse and find the name of the group. Then click OK.
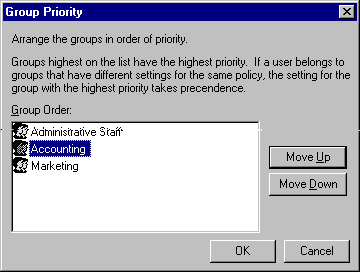
Group policies are downloaded starting with the lowest priority group and ending with the highest priority group. All groups are processed. The group with the highest priority is processed last so that any the settings in that group's policy file supersede those in lower priority groups. You can use one policy file for each group, even if some of the client computers in the group don't have support installed for group policies. Client computers that aren't configured for using group policies will ignore group policy files.
Important
If a policy exists for a specific named user, then group policies are not applied for that user.