Seeing stars
The Fun ’n Games program (FUNNGAME.VBP) shows you how to draw the hard way. Figure 7-3 shows what might happen when you click the Stars button. The code uses the Polygon API function to draw many random stars and uses the
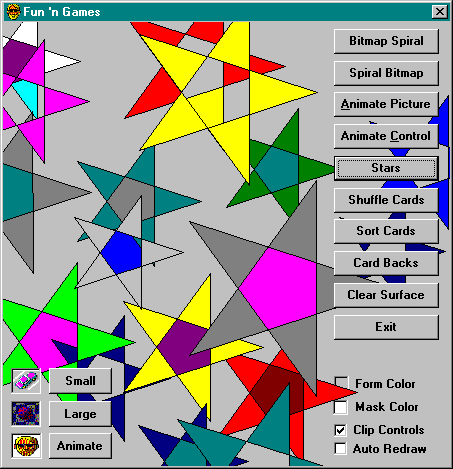
Figure 7-3. Stars of Windows.
FloodFill function to fill the centers with various colors. The differences between the Basic Way and the Windows Way are hidden by the VBPolygon and VBFloodFill functions.
Let’s start with the Star procedure. Calling it is a simple matter:
For i = 1 To Random(5, 20)
    dxyRadius = Random(Height / 8, Height / 4)
    xMid = Random(1, Width): yMid = Random(1, Height)
    ‘ Black border and two random colors
    Star Me, xMid, yMid, dxyRadius, vbBlack, _
         QBColor(Random(1, 15)), QBColor(Random(1, 15))
    ‘ Black border and one random color
    ‘Star Me, xMid, yMid, dxyRadius, vbBlack, QBColor (Random(1, 15))
    ‘ One filled color
    ‘Star Me, xMid, yMid, dxyRadius, QBColor(Random(1, 15))
Next
You simply pass the canvas object to draw on, the x and y positions, the radius, the colors of the border, the start points, and the inside area. The comment lines show some alternate calls that will give different star effects.
Here’s the code to draw a star:
Sub Star(cvsDst As Object, ByVal x As Long, ByVal y As Long, _
         ByVal dxyRadius As Long, clrBorder As Long, _
         Optional clrOut As Long = -1, Optional clrIn As Long = -1)
With cvsDst
    ‘ Handle optional arguments
    If clrOut = -1 Then clrOut = clrBorder
    If clrIn = -1 Then clrIn = clrOut

    ‘ Start is 144 degrees (converted to radians)
    Const radStar As Double = 144 * PI / 180

    ‘ Calculate each point
    Dim ptPoly(1 To 10) As Long, i As Integer
    For i = 1 To 10 Step 2
        ptPoly(i) = x + (Cos((i \ 2 + 1) * radStar) * dxyRadius)
        ptPoly(i + 1) = y + (Sin((i \ 2 + 1) * radStar) * dxyRadius)
    Next

    ‘ Set colors and style for star
    .ForeColor = clrBorder    ‘ SetTextColor
    .FillColor = clrOut       ‘ CreateSolidBrush
    .FillStyle = vbSolid      ‘ More CreateSolidBrush

    Call MGdiTool.VBPolygon(.hDC, ptPoly)
    ‘ Set color for center
    .FillColor = clrIn        ‘ CreateSolidBrush
    Call MGdiTool.VBFloodFill(.hDC, x, y, .ForeColor)
End With
End Sub
Star starts with the classic loop for calculating the points of a polygon. You decide how many degrees you want between each point on a circle and then convert degrees to radians. (Multiply degrees by pi, and then divide by 180.) Next, loop through each point, using cosine to calculate the x points and sine to calculate the y points. (Get out your high school geometry book if you want to understand exactly how and why this works.) If you place the points close enough and do enough of them, you’ll get a circle, although this isn’t a very efficient circle algorithm. If you want a pentagon, use one fifth of a circle (72 degrees). If you want a star, use two fifths of a circle (144 degrees). You end up going around the circle twice (144 × 5 = 720) to return to the starting point.
As you calculate the points, you put them into an array and then pass the array to VBPolygon, a wrapper for the Polygon API function. Putting the points into an array turns out to be messy. Polygon expects an array of POINT UDTs, but VBPolygon will be public and public procedures can’t use UDT parameters. Therefore, VBPolygon takes an array of Longs with the x and y values in every other slot. Another big difference is that VBPolygon takes a Basic-style array while Polygon must take a C-style array (as described in “Arrays” in Chapter 2). The last difference is that VBPolygon receives points measured in twips but must convert them to pixels for Polygon.
The code is messy but not difficult:
Function VBPolygon(ByVal hDC As Long, aPoint() As Long) As Boolean
    Dim apt() As POINTL, i As Long, iMin As Long, c As Long
    iMin = LBound(aPoint)
    c = UBound(aPoint) - iMin + 1
    BugAssert 0 = (c Mod 2)     ‘ Even number of elements
    c = c / 2
    ‘ Create array of pixel-adjusted points
    ReDim apt(0 To c - 1) As POINTL
    Do While i < c
        apt(i).x = aPoint(iMin) / Screen.TwipsPerPixelX
        iMin = iMin + 1
        apt(i).y = aPoint(iMin) / Screen.TwipsPerPixelY
        iMin = iMin + 1
        i = i + 1
    Loop
    ‘ Pass first element and count to Polygon
    VBPolygon = Polygon(hDC, apt(0), c)
End Function
VBFloodFill works much the same as VBPolygon does, except that it doesn’t worry about array conversion. It simply converts its twips arguments to pixel arguments as shown on the top of page 382.
Three Ways of Scaling
One of the most confusing issues in GDI programming is setting the scale. Just try to wade through SetMapMode, SetViewportExtEx, SetViewportOrgEx, and related functions in the Windows API documentation. Visual Basic settles all this nicely for you by doing all calculations in one mode: twips. A twip has an actual size, but it’s easier to just think of it as a magical unit. As long as you measure everything with the same units, it doesn’t much matter how big the units are.
You can’t always use the same kind of units, however. When working with bitmaps, you must usually work in pixel mode (MM_TEXT, in SDK jargon). Visual Basic might convert everything to twips, but when you get down to the API level, you play by API rules, which normally don’t use twips. To stir the pot even more, Visual Basic has a lot of COM Automation elements. COM Automation likes to use a mode named MM_HIMETRIC, which you can think of as another kind of magical unit.
A common scenario is that you must work with twips and pixels (and sometimes MM_HIMETRIC units) at the same time. One way to handle mixed modes is to set the ScaleMode property to vbPixels, perform some operations, set the property back to vbTwips, carry out some more operations, and keep changing back and forth as needed. But Visual Basic doesn’t recognize MM_HIMETRIC as a ScaleMode value. Besides, changing modes constantly is messy.
You can also use the TwipsPerPixelX and TwipsPerPixelY properties of the Screen object as a means of converting between pixels and the default mode without changing the default. So you might see lines such as these:
dx = Width * Screen.TwipsPerPixelX
dy = Height * Screen.TwipsPerPixelY
The ScaleX and ScaleY methods provide another way to convert to and from any mode. For example, the following lines are equivalent to the two preceding lines of code:
dx = ScaleX(Width, vbPixels, vbTwips)    ‘ From pixels to twips
dy = ScaleY(Height, vbPixels, vbTwips)
The second and third parameters of ScaleX and ScaleY are optional. The default conversion from MM_HIMETRIC betrays the origin of the ScaleX and ScaleY methods, which were intended to make it easy to convert Picture.Width and Picture.Height to twips. The Picture object comes directly from COM Automation, where MM_HIMETRIC is standard; therefore, any property or any argument that expects twips will require the standard conversion shown here:
dx = ScaleX(Me.Picture.Width)   ‘ From MM_HIMETRIC picture to twips
dy = ScaleY(Me.Picture.Height)

Function VBFloodFill(ByVal hDC As Long, ByVal x As Long, _
                     ByVal y As Long, ByVal clr As Long) As Boolean
    VBFloodFill = FloodFill(hDC, x / Screen.TwipsPerPixelX, _
                                 y / Screen.TwipsPerPixelY, clr)
End Function
FloodFill works by flooding everything around it until it encounters another color with the specified fill color. This allows some interesting effects in the Fun ’n Games program because you can layer different effects on top of each other. The outside of the star (filled by Polygon) is filled with the current FillColor (Brush, in Windows terminology) regardless of the background, but the center of the star (filled by FloodFill) interacts with its background.
Both VBPolygon and VBFloodFill assume that Visual Basic is operating in twips mode and that Windows is operating in what it calls MM_TEXT (for reasons unknown) but what Visual Basic calls pixel mode. If you change the mode, either in Visual Basic or in Windows, these functions will fail.