The FTEdit utility on the Windows NT Server Resource Kit CD aids in the recovery of stripe sets, volume sets, stripe sets with parity, and mirror sets. For more information about using FTEdit, see Ftedit.hlp on the Windows NT Server Resource Kit CD.
Note
You can recover and rebuild information for all of these volumes in the same way. However, rebuilding a mirror set with FTEdit is a waste of time, since the mirror set has to be regenerated anyway. You are better off simply breaking the mirror set by using Disk Administrator, and then recreating it. See Disk Administrator Help for the procedures.
Because stripe sets and volume sets are not fault tolerant, Windows NT Server performs orphan processing differently than it would for stripe sets with parity and mirror sets. If one of the disks in a stripe set or volume set fails, the entire volume is no longer usable, and all the primary partitions or logical drives that are members of the volume are marked as orphans. In Disk Administrator, the members of the volume are displayed as Unknown.
All data about the configuration of volume sets, stripe sets, mirror sets, and stripe sets with parity are contained in the HKEY_LOCAL_MACHINE\SYSTEM\DISK Registry key. This disk configuration information is stored in binary format, so it is not practical to edit it manually. When the Registry information is corrupt or missing, and no backups are available, you can use FTEdit to build the Registry information and allow the operating system to read the volumes.
For example, if the disk containing the boot partition becomes unusable, or the computer fails, you might want to move the disks containing the volumes to another computer. Alternatively, you might decide to reinstall the operating system on a new disk. In either case, the operating system does not have any information about the volumes.
The operating system has information about which disks are members of volumes, but it cannot distinguish between a stripe set, a stripe set with parity, a volume set, or a mirror set without the Registry information. In this situation, when the volumes are displayed in Disk Administrator, the file system might be displayed as Unknown, and there will be no drive letter assigned to the volumes. This is to prevent writing to the volume, which could corrupt it.
When using FTEdit to rebuild the DISK Registry subkey, you need to know the order in which the partitions on the disks were combined to create the volume. The following scenario shows why order is important.
A previous user created a volume set by combining unpartitioned areas on three disks in this order:
When a volume set is created, the Partition Boot Sector is the first sector on the first area selected. Data are written to the areas in the order in which they are combined. Thus, if someone created a 6 MB file on this volume set, the file would occupy the following areas:
Now you need to use FTEdit to rebuild the volume set. You select the disks in the order disk 0, disk 1, and then disk 2. Windows NT will not be able to find the Partition Boot Sector for the volume set, because the first sector of the volume set that you rebuilt is on disk 0, which contains only data. The Partition Boot Sector is actually on disk 2, but that disk area is at the end of the volume set you created. Your attempt to rebuild the volume set has failed, because you did not know the order in which to combine the disk areas.
The remainder of this section describes using FTEdit to build Registry information for a stripe set with parity that has been moved from another computer. (Disks 1, 2, and 3 are the disks that have been moved.) Each disk is 519 MB and has one partition. Both computers are running Windows NT Server version 4.0.
1. Open Disk Administrator, so that you can update the disk configuration information. Disk Administrator needs to store the disk signature and other basic disk information before the disks can be recognized.
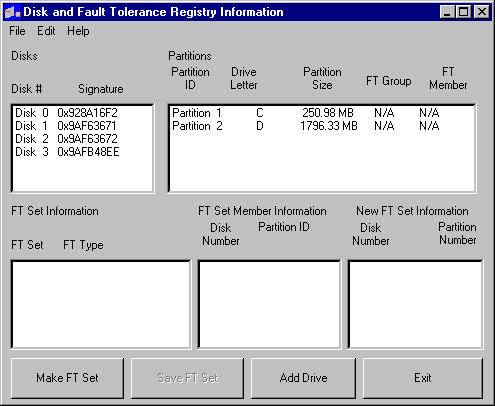
2. Open FTEdit. The dialog box in Figure 7.4 is displayed.

Figure 7.4 Using FTEdit to recover a stripe set with parity
The Disks group box identifies all of the disks connected to the computer. The Partitions group box contains information about the disk currently selected, or the first disk, if none are selected. Disk 0 is two gigabytes, and contains two partitions.
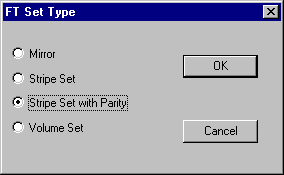
3. On the Edit menu, click Create FT Set. In the FT Set Type dialog box, click the Option button for the type of volume you are building. In this example, click Stripe Set with Parity.

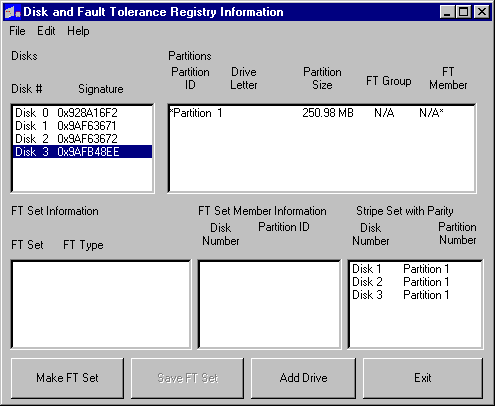
4. In the Disks list box, select the first disk that will be a member of the stripe set with parity. Available partitions are displayed in the Partitions list box on the right.
Double-click the partition from each disk that will make up the stripe set with parity. The disk and partition information will be displayed in the list box on the lower right. The title of this list box reflects the type of volume being built. For this example, the title is Stripe Set with Parity. The next screen shot shows the dialog box after double-clicking Partition 1 on each of Disk 1, Disk 2, and Disk 3.

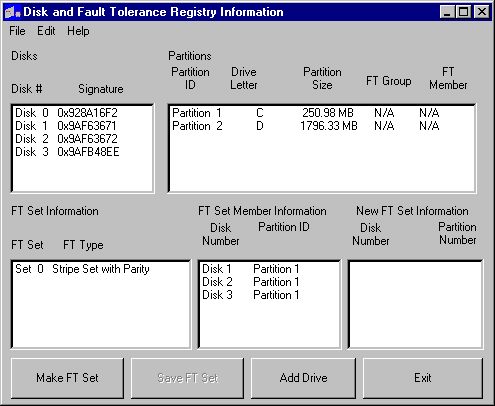
5. Click the Save FT Set button. The information is transferred to the FT Set Member Information list box. Check to make sure the information is correct. FTEdit should look like the following illustration:

The Partitions list box shows the information for Disk 0. The disks that are used in creating the new volume are those listed in the FT Set Member Information list boxes.
6. On the Edit menu, click Save Changes to System. The following message box is displayed:

7. Exit FTEdit, close any open programs, and restart the system. You need to do this to get the new information loaded into the Registry.
8. Open Disk Administrator.
Click one of the partitions in the stripe set with parity. If the status bar has a message like Stripe set with parity #N [INITIALIZING], the computer on which you were previously using the stripe set with parity did not finish shutdown. Wait for Disk Administrator to finish the initialization. If the volume was functional before the disks were moved, and the correct information was entered in FTEdit, the data on the volume should be intact.
9. From the Disk Administrator Tools menu, click Drive Letter. In the Assign Drive Letter dialog box, click Assign drive letter, and then choose a drive letter for the new volume.
The volume is now accessible from Windows NT Explorer, My Computer, and by the rest of the operating system.
10. After confirming that the volume is correctly configured and is accessible, be sure to add this new configuration information to the records that you keep for this computer.
You might want to back up the stripe set with parity at this time.
These same steps can be used to recover volume sets and stripe sets. To successfully use FTEdit to build Registry information, you must know the following information:
If your configuration involves multiple stripe sets, stripe sets with parity, and volume sets on several different disks, you might face a very difficult job remembering which primary partitions and logical drives belong to which volumes. For this reason, it is a good idea to keep the disk configuration simple, and to keep recovery information as up-to-date as possible.
Note
FTEdit edits the binary information in the Registry. It cannot recover damaged or corrupt data on the disk.