After you have added and configured a server by using DNS Manager, you create the zone or zones managed by that server. Remember that you will need to create a zone for each group of WINS-enabled computers where you want to use both DNS and NetBIOS name resolution. Before creating a zone, make sure that you have correctly configured TCP/IP on the DNS server and that you have entered the DNS server host name and domain name on the DNS tab on the Microsoft TCP/IP Properties page.
To add a Primary zone
1. Right-click the appropriate server icon, and click New Zone to start the zone wizard.
2. Click Primary, and then click Next.
The zone wizard will prompt you for additional information and then automatically create the zone, zone file, and the SOA, NS, and server A data records.
Tip
To create a reverse-lookup zone, use this same procedure and use a zone name that complies with the reverse-lookup name format (nnn.nnn.nnn.in-addr.arpa). For example, the reverse-lookup zone that could contain PTR records for IP addresses 172.16.16.1 through 172.16.224.254 would be named .16.172.in-addr.arpa. Whenever possible, create reverse-lookup zones before adding host data so that you can use the automatic Create PTR Record option in the Add Host dialog box.
After you have created the primary zone, you can create secondary zones by using the same procedure.
To add a Secondary zone
1. Right-click the secondary server icon, and click New Zone to start the zone wizard.
2. Click Secondary, and enter the requested information.
3. Click Next.
The zone wizard will prompt you for additional information and then automatically create the zone, zone file, and the SOA, NS, and server A data records.
After a zone is created, you can further subdivide that zone as described in the following procedure.
To create a subdomain (a domain contained within a zone)
1. Right-click the appropriate zone folder.
2. Click New Domain.
3. Type the domain name in Domain Name, and then click OK.
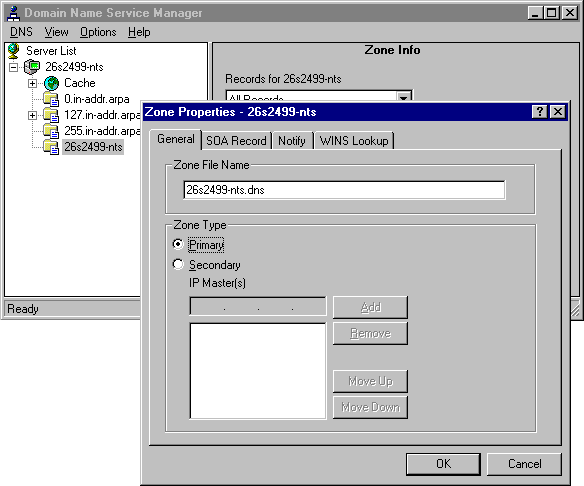
After you have successfully added a zone, you can configure and modify the zone properties. To do this, select and right-click the zone icon to display the Zone Properties dialog box. You can use the Zone Properties dialog box to perform the following actions:
The following figure illustrates the Zone Properties dialog box for a normal zone.

Figure 9.5 Zone Properties dialog box
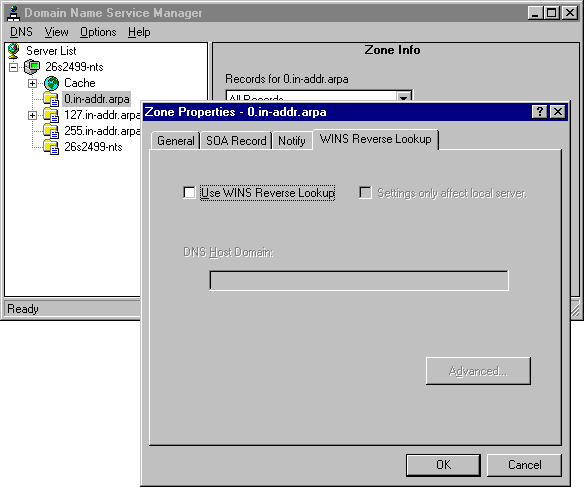
The only difference in the Zone Properties dialog box for a reverse-lookup zone is the text on the WINS Lookup tab, as illustrated in the following figure.

Figure 9.6 Zone Properties dialog box for Reverse-Lookup Zone