You must create connection to your PPTP server by using a VPN device.
To create a connection to dial up a PPTP server by using a VPN device
1. Click Start, point to Programs, point to Accessories, and then click Dial-Up Networking. The Dial-Up Networking window appears.
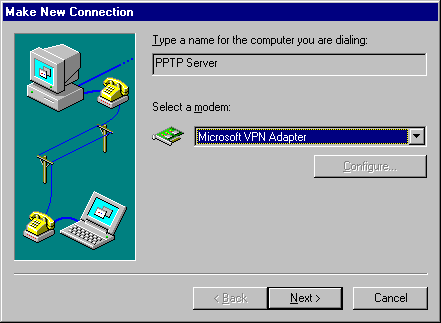
2. Click Make New Connection. The Make New Connection wizard appears, as illustrated in the following figure.

3. Type a connection name, such as the name of your PPTP server, in the Type a name for the computer you are dialing box.
4. Select Microsoft VPN Adapter in the Select a modem box, and then click Next. The following dialog box appears.
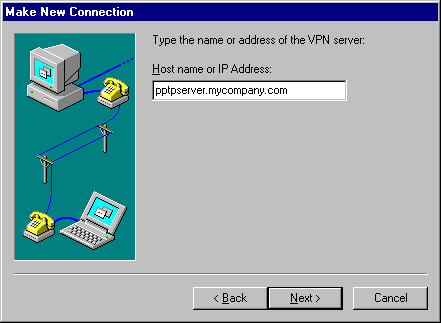
5. In the Host name or IP address box, type the name or IP address of the PPTP server that is connected to the Internet.
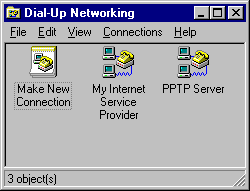
6. Click Next, and then click Finish. A connection icon is created in the Dial-Up Networking folder, as illustrated in the following figure.
7. Verify the PPTP server connection by using the following procedure.
Note Keep in mind that after you connect to a PPTP server on a remote network, your workstation will be connected to that remote network as if you were physically attached to it. Therefore, you must ensure that your workstation and its applications support the protocols native to that network.
To verify or edit the connection to your PPTP server
1. In My Computer, right-click the PPTP server connection icon in the Dial-Up Networking folder, and then click Properties to verify that your PPTP server connection is correctly configured. The PPTP Server dialog box appears, as illustrated in the following figure.
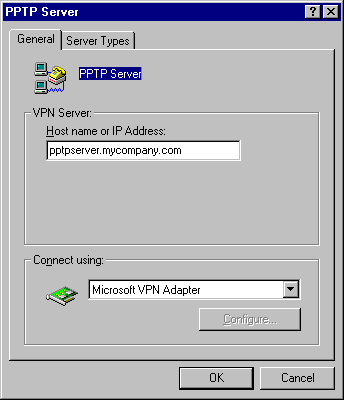
2. Review the information on the General tab to ensure that the host name or IP address is correct and that Microsoft VPN Adapter is selected. Make any necessary changes.
3. Click the Server Types tab. The Server Types tab is illustrated in the following figure.
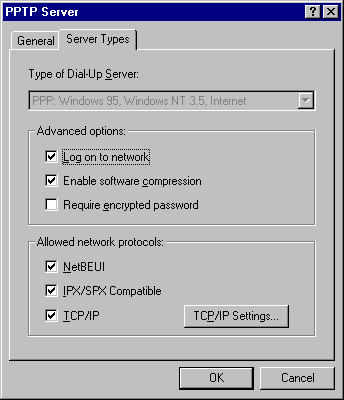
4. In the Advanced options box, make sure the Log on to network checkbox is selected only if the target network requires workstations to log on to a network.
Note Network operating systems such as Microsoft Windows for Workgroups, Microsoft Windows NT and Novell NetWare require you to log on to a network. In contrast, UNIX-based networks generally do not require you to do so. Contact your network administrator for more information.
5. In the Allowed network protocols box, ensure that the network protocols used on the target network are selected. Any selected protocol (TCP/IP, IPX/SPX, or NetBEUI) must already be installed on the client workstation you are configuring. Note that TCP/IP does not need to be selected unless it is the protocol used on your target network.
6. If you use TCP/IP on your private network, click TCP/IP Settings to display the TCP/IP Settings dialog box. Ensure that the TCP/IP settings conform to the settings required for a client on the target network. (The default settings are appropriate for most networks. Contact your network administrator for more information.)
7. Click OK.