by Suzie Adams
In the article, "Using Active Messaging to Retrieve E-mail from the Inbox," we created a simple application to read E-mail from a user's Inbox. Building on that foundation, the next step is to create an application that uses the Active Messaging Library to create and send an E-mail message. In this article, we'll create two pages. The first page will allow the user to enter the from, to, subject, and message contents of the E-mail message. The second page is a non-visual page and will create and send the message itself. When the processing on the non-visual page is complete, the page will call the InBox.asp page, which we created in the previous article. InBox.asp will then display the contents of the inbox that should now include the message we just created.
As always, we'll use Visual Interdev to build our ASP application. For this example, you'll need access to an Exchange 5.0 server and an IIS 3.0 Web server. You must also have a valid E-mail account and have installed the Active Messaging DLLs.
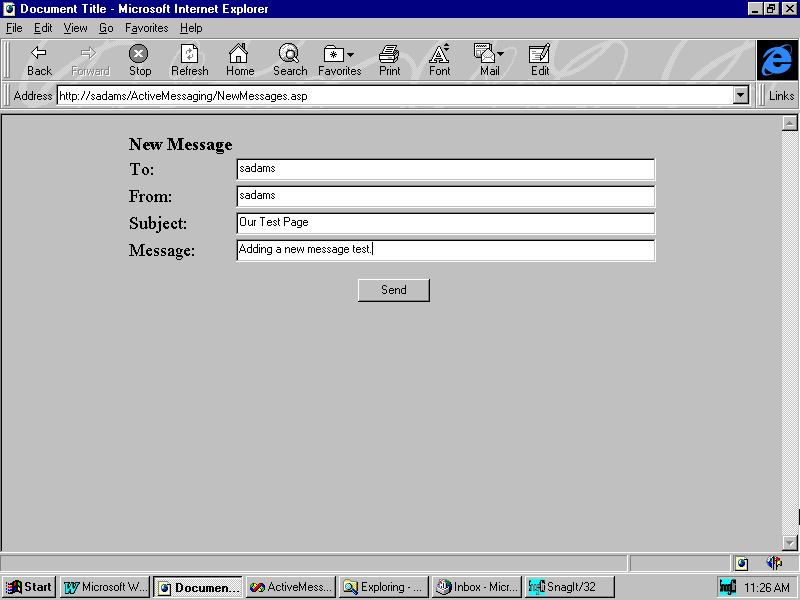
To begin, create a new page in the ActiveMessaging project called NewMessages. This page will allow us to enter the from, to, and subject lines, as well as the content of the E-mail we're going to create. You could also use this page to select the recipient of the E-mail by reading the Exchange server's address book.
The code in Listing A contains the HTML required to accomplish these tasks. The form also contains an HTML button that will submit the form to a new page called SendMessage.asp that we'll create shortly. You should place the HTML displayed in Listing A between BODY and HTML tags in the .asp page you just created.
Listing A: The NewMessage.asp HTML
<Form method="POST" action="SendMessage.asp">
<center>
<table>
   <tr>
      <td><strong>New Message</strong><td>
   </tr>
   <tr>
      <td>To:</td>
      <td><input type="text" size="80" name="Recipient"><td>
   </tr>
   <tr>
      <td>From:</td>
      <td><input type="text" size="80" name="From"><td>
   </tr>
   <tr>
      <td>Subject:</td>
      <td><input type="text" size="80" name="Subject"><td>
   </tr>
   <tr>
      <td>Message:</td>
      <td><input type="text" size="80" name="MessageText"></td>
   </tr>
</table>
<BR>
<input type="submit" name="Send" value="Send" >
</center>

</Form>
Figure A

NewMessages.asp allows the user to create a new E-mail message.
Next, we'll create the SendMessage.asp page. This page will compose the E-mail message from the values posted to it from the NewMessages.asp form. To begin, create the new ASP page and name it SendMessage.asp. In this page, write the code that will create the MAPI session and then log on to the Exchange Server. You'll find the code we used to accomplish this in Listing A of the article, "Using Active Messaging to retrieve E-mail from the Inbox." The From field in the NewMessages.asp page allows the user to log on to the Exchange Server.
Next, you need to include the error-checking statements to ensure a successful login, as we also did in the previous example. If the login is successful, add a new message to the messages collection, then set the subject and text properties of the new message. Next, add a new recipient to the recipient's collection and set the recipient to the user in the To field. Then, resolve the recipient's E-mail address to ensure its delivery. Finally, if everything is successful, you can send the message.
Listing B: The SendMail.asp Active Server script
<%
On Error Resume Next

From = Request("From")
sTo = Request("Recipient")
Subject = Request("Subject")
Body = Request("MessageText")

' Hard code this to your Mail server name.
bstrServer = "VIPER"

Dim objSession
Dim bstrProfileInfo

Set objSession=Server.CreateObject("MAPI.Session")
bstrProfileInfo = bstrServer + chr(10) + From

objSession.Logon "","",False,True,0,True,bstrProfileInfo
Set Session("objSession") = objSession

If Err.Number <> 0 Then
   Response.Write("Unable to connect to Mail Server! <BR>")
   Response.Write("Error source: " & Err.Source & "<BR>")
   Response.Write("Error number: " & Err.Number & "<BR>")
   Response.Write("Error description: " & Err.Description & "<BR>")
   Err.Clear
Else

    Set objMessage = objSession.Outbox.Messages.Add
    objMessage.Subject=Subject
    objMessage.Text=Body

    Set objonerecip = objmessage.Recipients.Add
    objonerecip.Name = sTo
    objonerecip.Resolve

    objMessage.Send showDialog=False
End if

Response.Redirect "InBox.asp"
%>
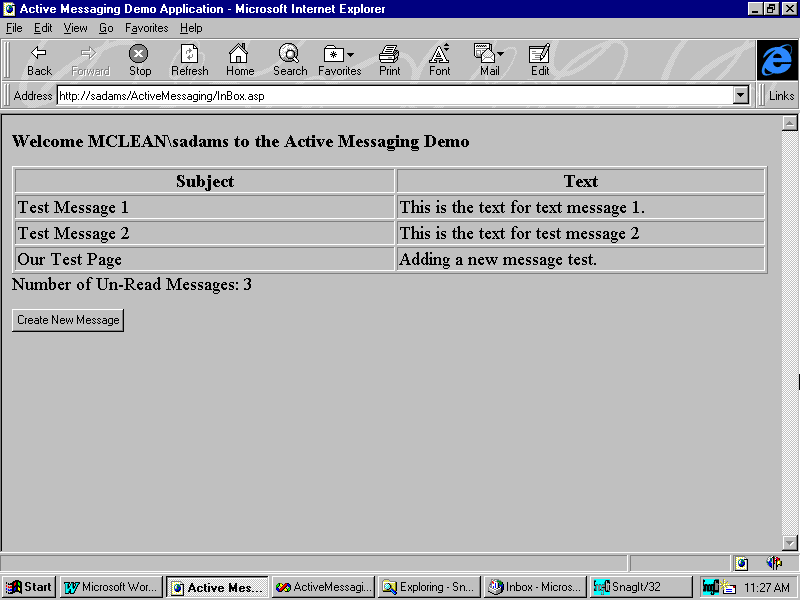
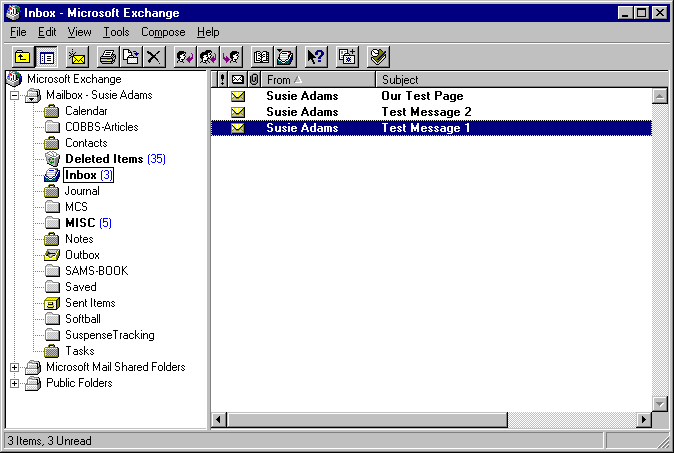
The complete code for SendMail.asp is shown in Listing B. Notice that, once the mail has been sent, the last line redirects the user to the InBox.asp page we created in the previous article. Depending on the traffic on your network, you should soon see the new message appear in the table. If you don't see it immediately, refresh the page several times, and it will eventually appear, as shown in Figure B. You can also view the message from your exchange client, as Figure C illustrates.
Figure B

The new message appears in the InBox table.
Figure C

You can also view the messages from within the Exchange Client.
Active Messaging allows you to easily utilize Exchange Server 5.0's functionality through Active Server pages. In this article, we've shown you a technique for creating and sending E-mail with Active Messaging.
-----------------------------
Suzie Adams is a senior consultant with Financial Dynamics, a client/server and Internet solutions consulting firm in McLean, Virginia. She has worked in the application development area for more than 11 years and currently focuses on the design and development of active content Web applications.
-----------------------------
This article is reproduced from the December 1997 issue of Active Server Developer's Journal. Active Server Developer's Journal is an independently produced publication of The Cobb Group. No part of this article may be used or reproduced in any fashion (except in brief quotations used in critical articles and reviews) without prior consent of The Cobb Group. To contact The Cobb Group, please call (800) 223-8720 or (502) 493-3200.
Copyright © 1997 The Cobb Group, a division of Ziff-Davis Inc. The Cobb Group and The Cobb Group logo are trademarks of Ziff-Davis Inc. All rights reserved. Reproduction in whole or in part in any form or medium without express written permission of Ziff-Davis is prohibited.