
Microsoft Corporation
November 1996
The Visual Basic® 5.0 Control Creation Edition makes creating ActiveX™ controls as easy as creating typical Visual Basic applications. After reading this article, you'll see just how easy it can be.
This document is designed to give you an overview of the simple process of creating ActiveX controls with Visual Basic. If you are already familiar with any version of Visual Basic, you should be able to create your first ActiveX control in 10 minutes!
The directions that follow will guide you through the process of building what is commonly called a "spinner" control. A spinner control is a graphical ActiveX control that allows the user to increase or decrease a value by using a mouse instead of a keyboard. A spinner control is pictured below.
Figure 1. A spinner control
Now that you have an idea of what you will be building, let's get started.
Start the Control Creation Edition, highlight Standard EXE, and click Open as shown below. This creates the host application. This host will be used as the test container for the spinner control.
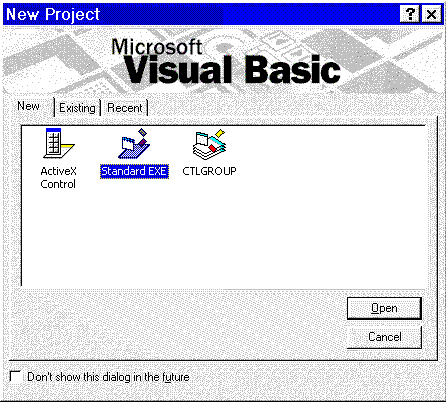
Figure 2. The Visual Basic New Project window
From the File menu, select the Add Project command.
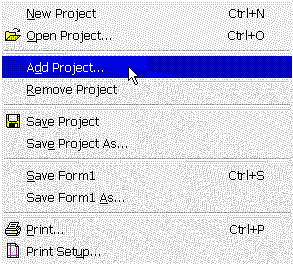
Figure 3. Adding a new project in the Add Project dialog
In the Add Project dialog, highlight ActiveX Control and click Open.
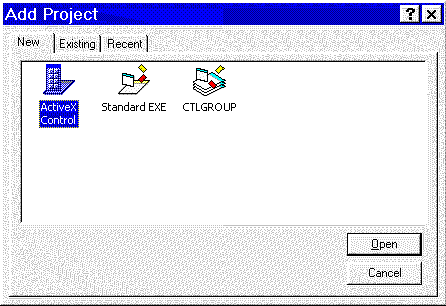
Figure 4. The disabled ActiveX control
Two projects should now be open. As illustrated in the following diagram, the projects are similar. Note that a new control is visible in the toolbox (highlighted in Figure 5 with the number 1). If you hold your mouse over this control in the Toolbox, the Tooltip should pop up and display the current name of the control, "UserControl1." The icon in the Toolbox should be gray since the control is disabled. The control will be enabled in a few more steps!
Visual Basic 5.0 uses the same visual metaphor for building ActiveX Controls as it uses in building applications. Using this metaphor, you first "draw" the interface, set some properties, write some event driven code, and then you are on your way.
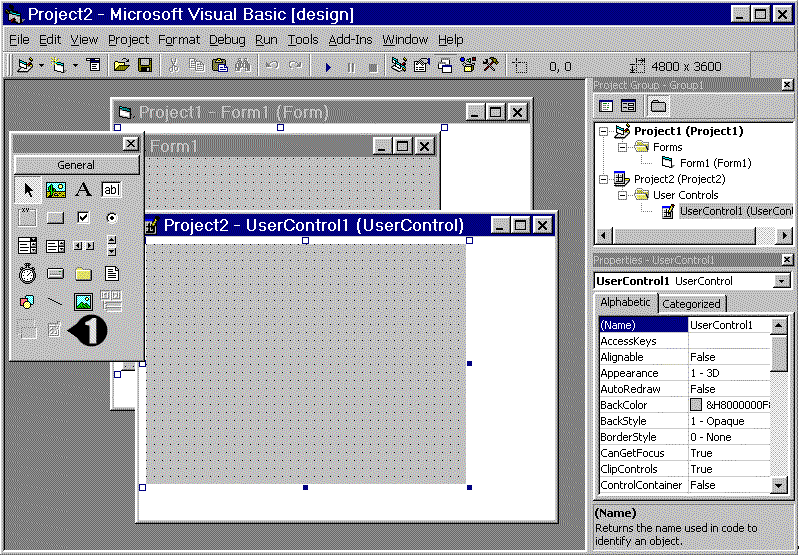
Figure 5. The Visual Basic design window
The spinner control is easily created using a powerful new feature of the Control Creation Edition—the ability to combine existing controls into new, more specialized controls. In this case, controls for a standard textbox and a vertical scrollbar will be combined to create the spinner control.
First, click on the textbox control in the Visual Basic toolbox. The textbox control is identified with the number 1 in the figure below. Use your mouse to draw a small textbox in the upper left corner of the Project2 window.
Second, click on the vertical scrollbar control in the toolbox and draw it just to the right of the textbox control. The vertical scrollbar control is identified with the number 2 in the figure below.
Finally, drag the control sizing handle to surround the newly drawn controls. The control sizing handle is identified with the number 3 in the figure below. Your ActiveX spinner control should be similar to the control pictured below.
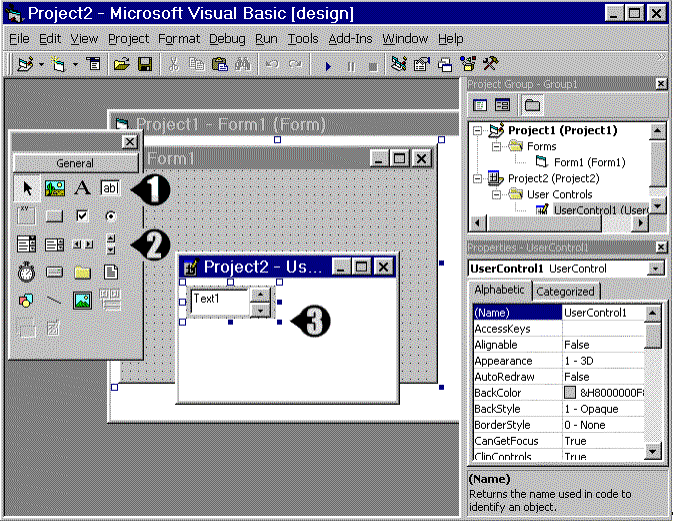
Figure 6. Drawing the visual interface for the control
We have created the visual interface for a spinner control. The next step is to write event-driven code to reflect the current value of the vertical scrollbar in the textbox. The value displayed in the textbox must increase or decrease in response to the user clicking on the up or down arrow of the vertical scrollbar. To tie these two events together, some code must be written in the Change event of the vertical scrollbar. Double-click on the vertical scrollbar to display the code window. Type the following line of code in the window:
text1.text = vscroll1.value
You may have been surprised as you typed the above line of code. When you typed the "dot," Visual Basic 5.0 displayed a list of all allowable properties for the textbox. ActiveX components contain this type of information and Visual Basic is automated to make it readily available. This an example of the new "intelligence" you'll find in the Visual Basic 5.0 Control Creation Edition development environment.
After the code is entered, close the code window by clicking on the close box (#1 in Figure 7 below). Finally, close the spinner control form by clicking on its close box (#2 in Figure 7 below)
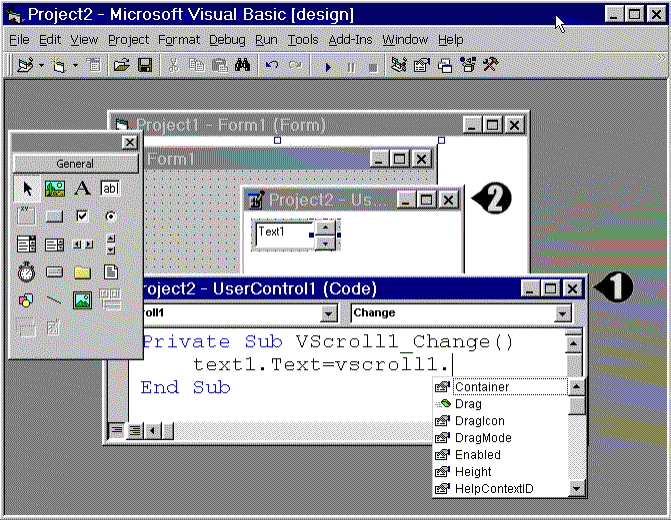
Figure 7. Entering the event driven code in the code window
If the control has been successfully built and the spinner form is closed, the spinner control should be enabled. Check to be sure it no longer appears gray in the toolbox window. Your environment should appear similar to the figure below.
The control is ready to be tested (#1 in Figure 8 below).
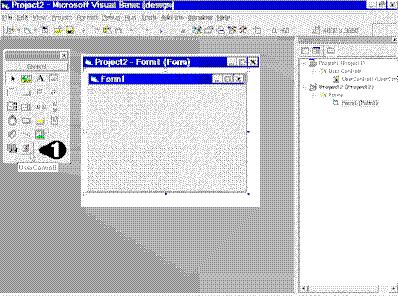
Figure 8. The enabled spinner control in the toolbox
To test the newly created control, click on it in the toolbox and draw it on Form1 as shown below. Press F5 to run the application. As you click the up and down arrow in the spinner control the value in the textbox changes, just as we coded it.
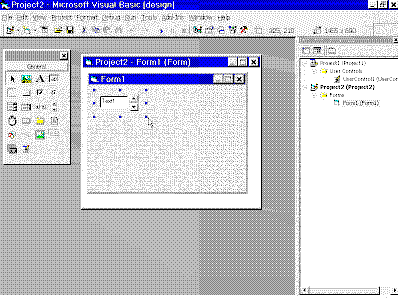
Figure 9. Drawing the spinner control for testing
Congratulations, you have just created your first ActiveX control and you wrote only one line of code!
Your next step should be to review the documentation located on http://www.microsoft.com/vbasic/techmat/ and learn more about the great features that can be easily built into your ActiveX controls. Some of these include custom property pages, making your controls data aware, and placing your controls on web pages as an alternative to writing Java applets.
Once your ActiveX control is created you can immediately put it to use in all Microsoft ActiveX control hosts including:
If you wish to place your ActiveX Controls on Web pages, you should use the ActiveX Control Pad. The ActiveX Control Pad ships as a part of the Visual Basic 5.0, Control Creation Edition and can be downloaded for free from http://www.microsoft.com/workshop/author/cpad/.
ActiveX controls can be hosted by all applications whose makers license the Visual Basic for Applications environment. As of November 1996, these include:
Adobe Systems· http://www.adobe.com/
Autodesk · http://www.autodesk.com/
B&C Microsystems Inc. · http://www.bcmicro.com/
HAHT Software, Inc. · http://www.haht.com/
Micrografx · http://www.micrografx.com/
NetManage · http://www.netmanage.com/
Onpoint Technologies, Inc. · http://www.onpoint.com/
OSI Software, Inc. · http://www.osisoft.com/
Rockwell Software · http://www.software.rockwell.com/
Sagent Technology, Inc. · http://www.sagenttech.com/
SAP · http://www.sap.com/
StarBase Corporation · http://www.starbasecorp.com/
Systems Modeling, Inc. · http://www.sm.com/
Tandata Corp. · http://www.tandata.com/
The EC Company · http://www.eccompany.com/
Vantive · http://www.vantive.com/
Visio Corporation · http://www.visio.com/
For the most up-to-date list, visit the Visual Basic for Applications website or go directly to the “Who is Licensing Visual Basic for Applications” page.
If you would like to use your ActiveX controls on Web pages you can use the ActiveX Control Pad to script the interaction between ActiveX controls and VBScript. The ActiveX Control Pad ships as a part of the Visual Basic 5.0, Control Creation Edition and FrontPage '97.