ImageList Scenario: Add Open, Save, and Print Images to a Toolbar Control
See Also
Toolbars typically contain a row of buttons where each button performs a frequently used operation when pressed. Toolbar buttons often save screen space by using images to represent the operation. In this scenario, three common functions — opening, saving, and printing a file — are represented by images assigned to Button objects of a Toolbar control. The images and buttons commonly used to represent these functions are shown here:

These objects are used in the following example:
-
ImageList control named "imlTool"
-
Toolbar control named "tbrStandard"
To add images to a Toolbar control
-
Add images to the ImageList and assign unique Key property values to each object.
-
Associate the ImageList with the Toolbar control.
-
Assign images to Button objects using the Buttons tab.
Add Images to the ImageList and Assign Unique Key Property Values
To add ListImage objects at design time
-
Right-click the ImageList control and click Properties to display the Property Pages dialog box.
-
Click the Images tab.
-
Click Insert Picture to display the Select Picture dialog box.
-
Use the dialog box to find the bitmap files in the following table. The bitmaps can be found in the samples directory.
-
After finding a file, click the file, and click Open, or double-click the file to open insert it into the ImageList control.
-
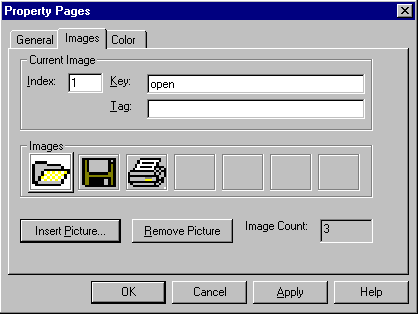
In the Images tab, click the Key box and type the Key property value, as found in the following table. The Images tab should resemble the figure below.
| File |
Key |
| open.bmp |
open |
| save.bmp |
save |
| print.bmp |
print |
Images tab with three ListImage objects

Associate the ImageList with the Toolbar Control
Before you can assign the images to Button objects, you must first associate the ImageList with the Toolbar control.
To associate an ImageList with a Toolbar control
-
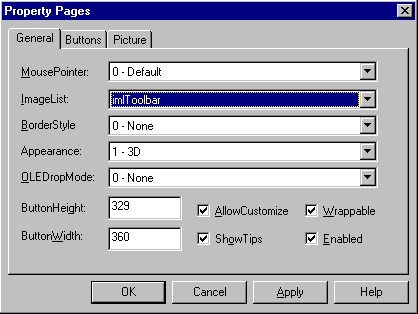
Right-click on the Toolbar control and click Properties to display the control's Property Pages, as shown in the figure below.
-
On the General tab, select the name of the ImageList control from the ImageList box.
Associate an ImageList with a Toolbar control

Assign Images to Button Objects Using the Buttons Tab
To assign an image to a Button object
-
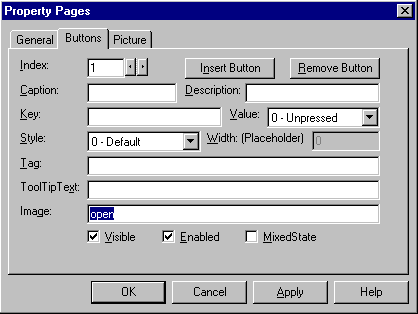
Click the Buttons tab (on the Toolbar control's Property Pages dialog box) to display the Buttons tab, shown in the figure below.
-
Click Insert Button to insert a new Button object.
-
Click the Image box and type the Key value of a ListImage object.
-
Click Apply.
-
Repeat steps 2 to 4 to add more buttons, and assign images to the new Button objects.
Add Button objects and assign Images using the Buttons tab


