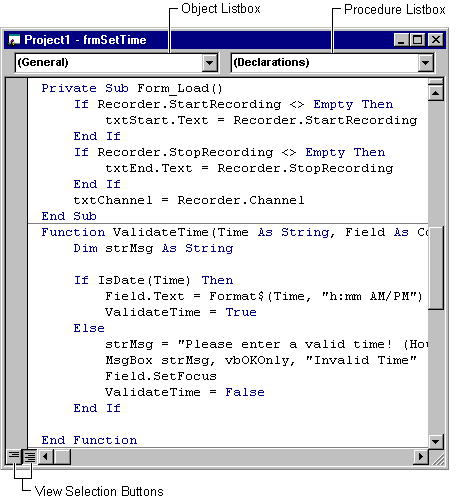
The Visual Basic Code Editor is a window where you write most of your code. It is like a highly specialized word processor with a number of features that make writing Visual Basic code a lot easier. The Code Editor window is shown in Figure 5.4.
Figure 5.4 The Code Editor window

Because you work with Visual Basic code in modules, a separate Code Editor window is opened for each module you select from the Project Explorer. Code within each module is subdivided into separate sections for each object contained in the module. Switching between sections is accomplished using the Object Listbox. In a form module, the list includes a general section, a section for the form itself, and a section for each control contained on the form. For a class module, the list includes a general section and a class section; for a standard module only a general section is shown.
Each section of code can contain several different procedures, accessed using the Procedure Listbox. The procedure list for a form module contains a separate section for each event procedure for the form or control. For example, the procedure list for a Label control includes sections for the Change, Click, and DblClick events, among others. Class modules list only the event procedures for the class itself — Initialize and Terminate. Standard modules don't list any event procedures, because a standard module doesn't support events.
The procedure list for a general section of a module contains a single selection — the Declarations section, where you place module-level variable, constant, and DLL declarations. As you add Sub or Function procedures to a module, those procedures are added in the Procedure Listbox below the Declarations section.
Two different views of your code are available in the Code Editor window. You can choose to view a single procedure at a time, or to view all of the procedures in the module with each procedure separated from the next by a line (as shown in Figure 5.4). To switch between the two views, use the View Selection buttons in the lower left-hand corner of the editor window.
Visual Basic makes writing code much easier with features that can automatically fill in statements, properties, and arguments for you. As you enter code, the editor displays lists of appropriate choices, statement or function prototypes, or values. Options for enabling or disabling these and other code settings are available on the Editor tab of the Options dialog, accessed through the Options command on the Tools menu.
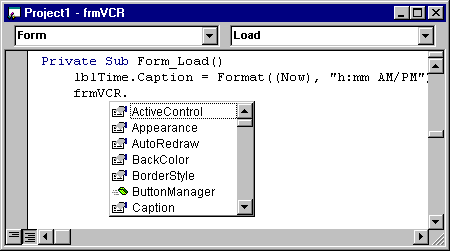
When you enter the name of a control in your code, the Auto List Members feature presents a drop-down list of properties available for that control (Figure 5.5). Type in the first few letters of the property name and the name will be selected from the list; the TAB key will complete the typing for you. This option is also helpful when you aren't sure which properties are available for a given control. Even if you choose to disable the Auto List Members feature, you can still access it with the CTRL+J key combination.
Figure 5.5 The Auto List Members feature

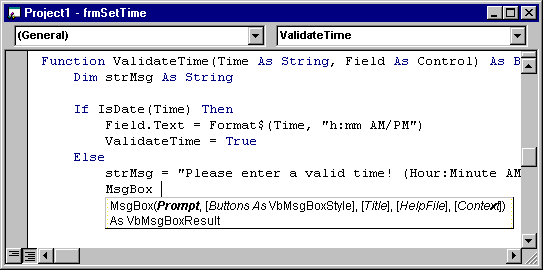
The Auto Quick Info feature displays the syntax for statements and functions (Figure 5.6). When you enter the name of a valid Visual Basic statement or function the syntax is shown immediately below the current line, with the first argument in bold. After you enter the first argument value, the second argument appears in bold. Auto Quick Info can also be accessed with the CTRL+I key combination.
Figure 5.6 Auto Quick Info

Bookmarks can be used to mark lines of code in the Code Editor so that you can easily return to them later. Commands to toggle bookmarks on or off as well as to navigate existing bookmarks are available from the Edit, Bookmarks menu item, or from the Edit toolbar
For More Information For more information on key combinations to access these and other functions in the Code Editor window, see "Code Window Keyboard Shortcuts."