Changing the Course Control to a Combo Box
In this topic, using the dialog editor, you will convert the Course edit control to a drop-list style combo box.
Suggested Reading
To change the Course control to a combo box
-
Click the ResourceView tab and expand the Dialog folder.
-
Double-click the dialog resource
IDD_ENROLL_FORM.
-
Select, and then delete the Course edit control.
-
Add a combo box in its place.
-
Right-click the combo box and click Properties from the pop-up menu. Pin down the Combo Box Properties box, and then specify the following:
-
Click the General tab, and in the ID box, type
IDC_COURSELIST.
-
Click the Styles tab, and from the Type list box, choose Drop List.
-
Increase the size of the combo drop-down box so it can show more than two course names at a time:
-
Click the drop-down arrow on the right side of the combo box.
-
Use the bottom sizing handle to extend the drop-down area downward enough to hold several lines of text.
-
Change the tab order of the dialog box to make sure that the new control follows its associated static text label in the tab order. This enables ClassWizard to match the recordset member to the static text caption.
-
From the Layout menu, choose Tab Order.
-
With the tab order showing, click the Course static text control, and then click the Course combo box control.
The tab order should ripple through the other controls, keeping the sequential relationship between each static text and its associated edit control.
-
Press ESC to exit Tab Order mode.
Leave the dialog editor open for the next procedure.
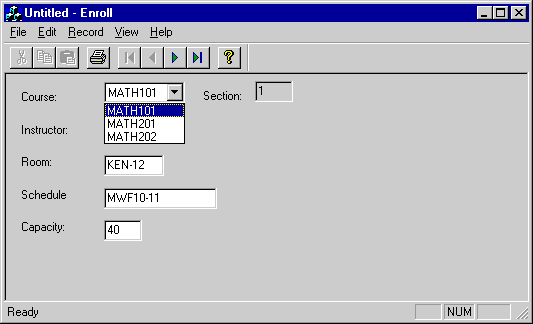
The figure below shows the final appearance of Enroll Step 2 with the combo box in place.
Enroll Step 2 with a Combo Box


