The tutorial example program, Enroll, manages a student registration database similar to, but simpler than, a college registration system. It will help you to follow the tutorial if you understand the structure of the student registration database.
Enroll is based on a database, StdReg32.mdb, that you will register with ODBC as the “Student Registration” data source name. The following table lists the tables, what they store, and the columns in them.
Tables in the Student Registration Database
| Table name | Contents | Column list |
| Course | Think of each record as an entry in a course catalog. Example: the MATH101 course. | CourseID* CourseTitle Hours |
| Section† | A section record is a specific offering of a course at a specific time. For example, MATH101 may have many sections. | SectionNo* CourseID* InstructorID Schedule RoomNo |
| Student | A record for each student at the school. | StudentID* Name GradYear |
| Enrollment | A record for each student in a particular section of a course. For a given student, there is an enrollment record for each course the student is taking. | CourseID* SectionNo* StudentID* Grade |
| Instructor | A record for each instructor at the school. | InstructorID* Name RoomNo |
* Indicates the column (or columns) that comprise the table’s primary key.
† The Dynabind_Section table is used in the Dynabind sample, but not in the Enroll tutorial.
To copy StdReg32.mdb to your local drive
The Sample Application dialog box appears
The Copy dialog box appears
The database is copied to your local drive. You can examine it, add records, and so on, using Microsoft Access.
Note You can also install the sample source project files for Enroll. For more information, see Installing the Sample Files in Scribble, Lesson 1.
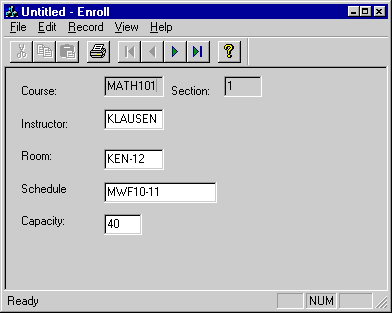
In Enroll, you use a “form” (a view with dialog-style controls) to view registration information for courses, section by section. Section information displayed includes the course name, section number, instructor, room, and schedule (such as “MWF 10-11”). For example, you can view section 1 of the course MATH 101, then section 2, and so on. The initial tutorial step provides updatable fields and viewing of all sections. Later steps add more capabilities, including the ability to view more than one recordset with the same record view, and for adding and deleting records. The following figure shows what the Enroll application looks like at the end of the tutorial.
The Enroll Tutorial Application
