Drawing or Erasing Freehand
Home Page (Graphics Editor) | Overview | How Do I ... Topics
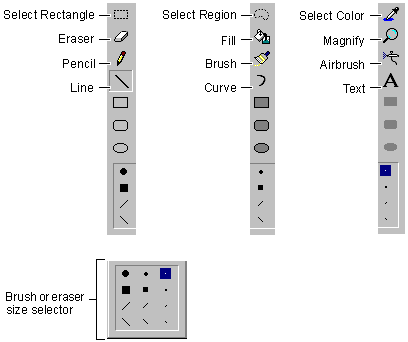
The Graphics editorís freehand drawing and erasing tools all work in the same way: you select the tool and, if necessary, select foreground and background colors and size and shape options. You then move the pointer to the image and click or drag to draw and erase.
When you have selected the eraser tool, brush tool, or airbrush tool, the option selector displays that toolís options.
Tip Instead of using the eraser tool, you may find it more convenient to draw in the background color with one of the drawing tools.

To select and use a drawing tool
-
Click a button on the Graphics toolbar.
-
The eraser tool paints over the image with the current background color when you press the left mouse button. When you press the right mouse button, it replaces the current foreground color with the current background color.
-
The pencil tool draws freehand in a constant width of one pixel.
-
The brush toolís shape and size are determined by the option selector.
-
The airbrush tool randomly distributes color pixels around the center of the brush.
-
If necessary, select colors and a brush:
-
In the Colors palette, click the left mouse button to select a foreground color or the right mouse button to select a background color.
-
On the options selector, click a shape representing the brush you want to use.
-
Point to the place on the image where you want to start drawing or painting. The pointer changes shape according to the tool you selected.
-
Press the left mouse button (for the foreground color) or the right mouse button (for the background color), and hold it down as you draw.
To change the size of the brush, airbrush, or eraser
-
Choose a shape in the option selector.

