Introduction to the Order System Example
Imagine yourself as the newest member of the MIS department in a small fish and seafood distributing company. Your first assignment is to make changes to the company’s sales order support application. After meeting with your boss, you understand that:
-
An order has a purchaser
-
An order consists of one or more order rows, each of a given article in a given quantity
-
Orders are registered and handed to shipping
-
Customers, orders, and articles need to be persistently stored by the order system
Before making any decisions on how to change the order system, you wisely decide to run the current implementation and to use Visual Modeler for studying the current architecture.
Starting the Order System
To start the order system application:
-
Start your Microsoft Visual Basic development environment by double clicking on the ordersys.vbp project file, which you can find in the folder where the Order System sample is installed.
-
Run the program by choosing Start With Full Compile from the Run menu.

If you have problems running the order system, make sure that:
-
The database files ordersys.mbd and ordersys.ldb are located in the same folder as the project file, and that the files are writable (not read only)
-
The correct DAO Object Library is loaded. Choose References on the Project menu and check the appropriate library
-
None of the references in the References dialog box are marked as "MISSING:"
Entering a New Order
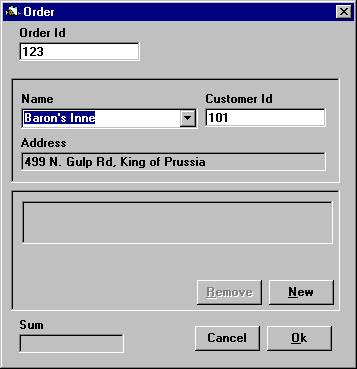
After having successfully started the order system application you are now ready to enter a new order. An Order Id has already been allocated in the Order dialog box.
To enter a new order:
-
Start by assigning a customer to the new order. By default the first customer found has been chosen, which is "101", "Baron's Inne", at "499 N. Gulp Rd, King of Prussia". Click the Name box to view all other customers and select one of them.
-
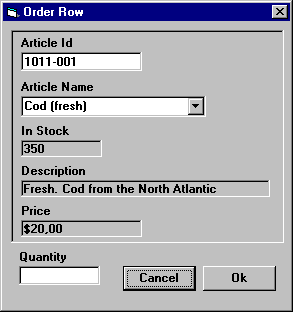
Continue by adding new rows to the order: Click New to open the Order Row dialog box.

-
Select an article from the Article Name list and see how the information in the dialog box changes.
-
To populate the Article Name list with seafood articles with a higher article identifier, type "2*" in the Article Id box and press ENTER.
-
Select any article, enter a number in the Quantity field, and click OK.
-
The Order dialog box now presents the new order row and recalculates the total order sum after each new order row has been created.
-
Click OK to accept and register the new order.
-
Click OK to exit the order system.


