Restricting Access by IP Address
It is optional to restrict access to the server by denying access to all remote users except those whose IP addresses have been specifically granted access. IP address security is probably most useful on the Internet to exclude everyone except known users.

 To restrict access by IP address
- Start the Internet Service Manager. Do this by clicking Start, pointing to Programs, and clicking Windows NT 4.0 Option Pack. Then, click Microsoft Internet Information Server, and then Internet Service Manager (ISM).
- Expand the <Server Name> folder and the Default Web Site folder. Right-click the Admin folder under FmLib. Click Properties to display the Admin Properties dialog box.
- Click the Directory Security tab.
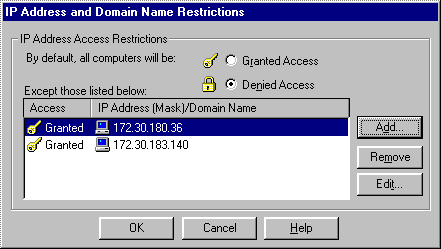
- Click Edit for IP Address and Domain Name Restrictions to open the IP Address and Domain Name Restrictions dialog box.
- Select Denied Access. This restricts access to all computers you do not expressly name in the Except those listed below list box.
- Click Add. In the Grant Access On dialog box, type the IP address of the computer to which you will be granting access. Optionally, click DNS Lookup, type the name of the computer, and click OK.
- Click OK to close the Grant Access On dialog box.
- Repeat steps 6 and 7 for each IP address you want to grant access to. Click OK to close the IP Address and Domain Name Restrictions dialog box.
- Click OK to close the Admin Properties dialog box.

Note The IP address of a computer is a leased resource, which means that it could change. The DHCP tries to assign the same address repeatedly as long as the computer continues to be connected to the network. An administrator's computer is likely to be online most of the time, so the IP address reassignment should not be an issue for most administrators.


 To restrict access by IP address
