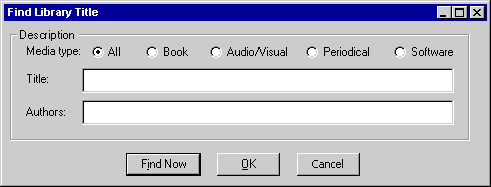
Using the Microsoft Outlook LitCrit form, you can submit a critique about any item, even an item not in the FmLib database. The LitCrit application treats critiques about items in the database differently than other critiques. For this reason, LitCrit asks you for the title of the item you're reviewing. It does this with the Find Library Title dialog box, using the following procedure.
At this point, you have started Microsoft Outlook, opened the LitCrit public folder, and clicked New Critique on the Outlook Actions menu. The Find Library Title dialog box is displayed automatically or from the Add Critique to Library dialog box.
Find Library Title dialog box

 To use the Find Library Title dialog box
If you are reviewing a title that is not in the FmLib database or don't care whether your critique is accessible from the CML, click OK or Cancel to exit the Find Library Title dialog box and go to Adding a New Critique in Outlook. The difference between choosing OK and Cancel is that OK copies the content of the title and authors fields to the LitCrit Outlook form; Cancel simply closes the dialog box.
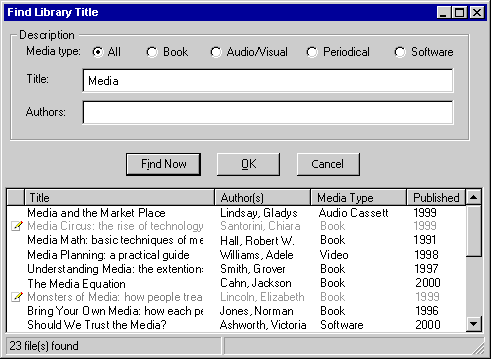
Clicking OK closes this message box and returns you to the Find Library Title dialog box, where the cursor is now positioned in the Title text box; go back to step 1. If you clicked Find Now after entering a title, the FmLib title table is searched for records with matching titles, authors, and media types. (Administrators can use the application setting MaxFindResults to set the number of titles that are displayed as a result of this search in the extended Find Library Title dialog box.)
If at least one match is found in the title table search, the MaxFindResults element from the FmLib Settings table is checked. If the number of matches found does not exceed the MaxFindResults value, the found records are displayed in the extended Find Library Title dialog box. An important piece of information displayed here is whether you have reviewed each title in the list. To do this, the SQL Serverô borrower table is searched and the borrower# retrieved using your alias. The SQL Server Critique table is searched for a previously submitted critique for this title (bib#), reviewed by you (using your borrower#).

If the number of matches found in the title table exceeds the MaxFindResults value, only MaxFindResults title records are displayed in the extended Find Library Title dialog box and the matches in excess of MaxFindResults do not appear. To increase the chance of displaying all the titles that match your search criteria, make your search criteria as specific as possible. An icon indicates that you have already submitted a critique for a title and the text of the entry tells whether the critique is approved (black text) or in the approval process (dimmed text).
If the title of the item you're reviewing is shown, choose it by double-clicking its row in the bottom part of the extended Find Library Title dialog box. An icon in the first column indicates that you have already submitted a critique for this title. When you double-click an entry that displays an icon the critique# is copied to a hidden critique# field on the form; otherwise the title's bib# is copied to a hidden bib# field on the form.
Clicking OK closes this message box and returns you to the Find Library Title dialog box, where the cursor is now positioned in the Title text box. If you clicked OK in the Find Library Title dialog box after entering a title, your media, author, and title information is saved. This information is copied onto a blank LitCrit form, which is now opened; go to Adding a New Critique in Outlook.

Note The Find Library Title dialog box was later renamed to Choose Title dialog box.