Creating a Help Desk Console
When you create a customized SMS console, you are creating a specialized snap-in to run within the MMC user interface. This snap-in usually provides a subset of the full functionality provided by the SMS Administrator console (Sms.msc). When you include an SMS console tree item, such as the All Users collection, in a custom snap-in, the full functionality of that item is made available when using the snap-in, limited only by the permissions granted to the user account for access to the SMS site database and to SMS objects themselves.
The following procedure describes how to create a customized snap-in that a help desk administrator can use to assist clients.
 To create a help desk snap-in
- If the SMS Administrator console is running, quit the program. Then, at a command prompt, type the following:
mmc.exe
The MMC console runs without installing any snap-ins. A child window labeled Console Root is displayed within the console. Because no snap-ins are loaded, a root item (Console Root) is displayed, with no items beneath it in the console tree.
- On the Console menu, click Add/Remove Snap-in.
- In the Add/Remove Snap-in dialog box, click Add.
- In the Add Standalone Snap-in dialog box, select Systems Management Server from the list of available snap-ins and then click Add.
- In the Database Connection Wizard Welcome page, click Next.
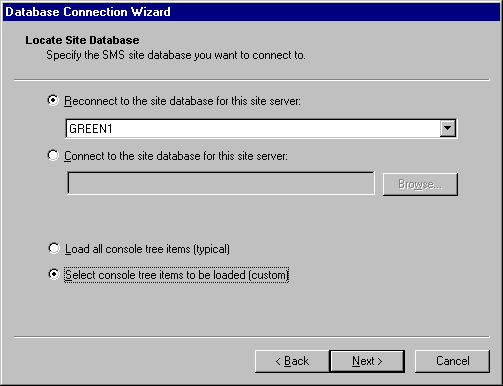
- In the Locate Site Database page, shown in the following figure, specify the SMS site database to which you want to connect. You can connect to the default SMS site database or to another in your site hierarchy.
- If you want to reconnect to the default SMS site database, verify that Reconnect to the site database for this site server is selected.
- If you want to connect to another SMS site database in the site hierarchy, click Connect to the site database for this site server and either type the name of a primary site server or click Browse and select a site server in the Server Selection dialog box. Then, click OK.
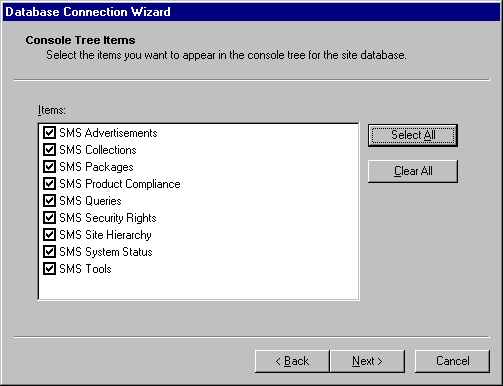
- The Console Tree Items page, shown in the following figure, displays the SMS console tree items you can include in this console. Click Clear All to remove all selected items, and then click SMS Collections to add this item to the custom console. Then, click Next.
- The Completing the Site Database Wizard page displays a list of the console tree items you chose for this console. Either click Back to make any desired changes or click Finish to finish creating the snap-in.
- Close the Add Standalone Snap-in dialog box.
- In the Add/Remove Snap-in dialog box, click OK.
The customized console you just created is now running as a snap-in loaded into an MMC console. Note that the console tree item, Systems Management Server, appears beneath the Console Root item.
- Click Systems Management Server.
- On the Action menu, click New window from here.
A second child window opens within the MMC console. The new window displays Systems Management Server as the root console tree item.
- On the Window menu, select the original child window and then close it.
- With MMC still running and the Systems Management Server window displayed as the only child window, click Save As on the Console menu.
- In the Save As dialog box, type the name of the new custom console and then click Save.
Granting Security Rights
A user cannot do anything useful with a console until you grant the user access to the SMS site database and specific security rights to SMS objects. Security rights are granted on classes and instances of SMS objects.
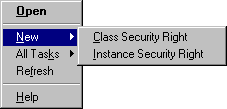
You can grant remote control security rights to a help desk administrator user account by using either of two methods. Both methods are accessed from the Security Rights menu in the SMS Administrator console. By using the first method, you can explicitly grant class and instance rights from the New menu, as shown in the following figure.
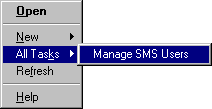
The second method is to use the SMS User Wizard. You open this wizard by clicking Manage SMS Users on the All Tasks menu.
 To explicitly grant Remote Control permissions to a Collection instance
- In the SMS Administrator console, navigate to Security Rights.
Systems Management Server  Site Database (site code - site name)
  Security Rights
Right-click Security Rights, point to New, and then click Instance Security Right. In the Security Rights properties dialog box, type the name of the user group or user to whom you want to grant permissions. Use the domain\username syntax. If the user or user group account already has SMS security permissions, select the account from the User Name list. In the Instance list, select the collection for which you are granting permissions. In the Permissions list, select the permissions you want to grant the user or user group (for this example, select Use Remote Tools). When you select this permission, the Read permission is automatically granted. Select the Read Resource permission as well, and then click OK.
With these permissions, a help desk administrator can remotely control clients belonging to the specific collection instance to which you have granted security rights.
The procedure for granting class security rights to a user is essentially the same, except that you grant rights to an entire class of SMS objects, including all the instances of that class. In many situations, you might prefer to grant security permissions for individual collections rather than all of them.
 To grant Remote Control permissions by using the SMS User Wizard
- In the SMS Administrator console, navigate to Security Rights.
Systems Management Server  Site Database (site code - site name)
  Security Rights
- Right-click Security Rights, point to All Tasks, and then click Manage SMS Users.
- In the SMS User Wizard Welcome page, click Next.
- The User Name page, shown in the following figure, opens.
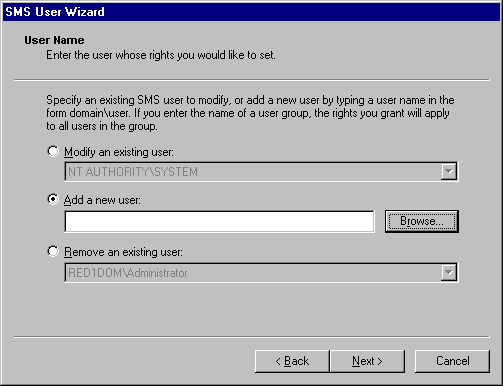
- Click Add a new user and then type the name of the user or user group account to whom you are assigning permissions. Or, click Browse to view a list of existing users and user groups. After you have made your selection, click Next.
- In the Rights page, you can view any permissions already granted to users or you can grant a user new permissions. Click Add another right or modify an existing one, and then click Next.
- In the Add a Right page, select the class and instance of the SMS collection for which you want to grant permission.
- In the Permissions list, select the Use Remote Tools and the Read Resource permissions, and then click Next.
Note To grant security rights, your user account must have the right to grant security rights to others. This right, which is generally reserved to a few trusted administrator accounts, is granted automatically to the domainís Administrator account and to the user account that installed SMS. Granting a user the Administer permission to an SMS object class allows that user to grant others security permissions for that class.
- Click Back until you return to the Rights page, and then review the permissions you granted to this account. When you are satisfied that this list is correct, click Next.
- In the Completing the SMS User Wizard page, click Finish to complete the wizard.
After you grant a user the appropriate security permissions for each collection, that user can view the membership of each SMS collection and, if you enabled Remote Control for the site, remotely control the clients.
The console you just created is only one possible help desk console configuration. Your organizationís needs should guide the selection of console tree functionality and security permissions you grant to help desk personnel. You can add functionality to an existing console or create new, customized consoles that include additional functionality, as appropriate. Different users might have different security rights to different SMS objects, but all these users can use the same customized administrative console. Each user will see different levels of detail and will be able to perform different tasks, based on their security permissions.
Minimum Security Rights for a Help Desk Console
Table 4.1 lists the suggested security permissions for a help desk console.
Table 4.1 Suggested Security Permissions for a Help Desk Console
| SMS object | Security permissions |
|---|
| Collections (class) | Read, Read Resource |
| Collection (instance) | Use Remote Control |
| Status | Read |
| Queries | Read |
 To create a help desk snap-in
 To create a help desk snap-in


 To explicitly grant Remote Control permissions to a Collection instance
 Site Database (site code - site name)
  Security Rights
 To grant Remote Control permissions by using the SMS User Wizard
 Site Database (site code - site name)
  Security Rights