Three Approaches to Obtaining SMS Data with Access 97
This section describes three approaches to using Access 97 to obtain SMS data through the SMS Provider. Each of these approaches is then described in more detail.
- Create links to the SMS data.
- The advantage of this approach is that you always have current data. The links to the SMS data reflect the latest information in the SMS site database. Linking a table creates a reference to the SMS data table and saves the link in your Jet database. None of the SMS data is actually stored locally on the computer you are using or in the Access database. You can create both dynaset-type and snapshot-type Recordset objects with linked data.
- Create tables from imported SMS data.
- The advantage of this approach is that you are working with tables that you can manipulate or change, depending on your analytical needs. The disadvantage of this approach is that the data in these tables is not current. Instead, it is a snapshot in time of the more dynamically changing SMS data. When importing data, you cannot append the data to an existing table. However, once you have imported the data, then you can use an append query to add the data to another table.
- Create SQL pass-through queries.
- The advantage of this approach is that you can bypass the Jet database engine and directly query the SMS Provider data source. Doing so improves the performance of queries, because the SQL statement you use is executed on the SMS site database server instead of the computer you are using. When you use this approach, you construct your own SQL queries, which gives you more control over the result set obtained with the query. You can also edit an existing query to adapt it to your information needs, and then send that query via SQL pass-through. A possible disadvantage of this approach is that this method cannot create linked tables.
Tip SMS 2.0 records every database query that is made against the SMS site database in the Smsprov.log file. You can use the SQL statements recorded in this log file as the basis for your own queries. You might find that using the SMS Query Builder to construct queries, then examining the statements recorded in the Smsprov.log file can provide useful examples of constructing SQL statements against the SMS site data.
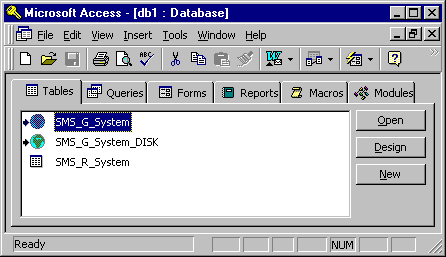
You can design reports based on the data in links. However, if you need to manipulate this data, you might want to create new local tables and import data into them instead. If you delete a link, you are not deleting the underlying SMS table. The following figure shows two links to SMS data and a local table that was created by importing SMS data.
Connecting to the SMS Provider
Because the procedures that follow all require connecting to the SMS Provider, that procedure is illustrated here, starting with the Select Data Source dialog box. This dialog box is called from a different dialog box in each of the procedures to link to SMS data, import data in local tables, and use SQL pass-through.
 To connect to the SMS Provider
- In the Select Data Source dialog box, shown below, click the Machine Data Source tab.
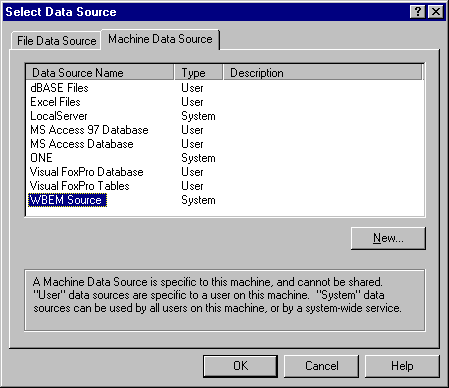
- Select WBEM Source as the data source name for this link, and then click OK.
- In the Configure Connection dialog box, shown below, type a user name and password for an account that has permissions to connect to the SMS Provider namespace. Either type or browse for a site server name to connect to, then click Connect. After you do so, the button name changes to Refresh and the available WMI namespaces appear in Namespace Selection.
![Configure Connection dialog box in Access 97. The namespace tree is expanded in the Namespace Selection box and an SMS site is selected.]()
- In the Namespace Selection box, navigate to the namespace that corresponds to your site code, expanding the namespace tree as required. Select the namespace you want to connect to, then click OK.
You are now connected to your site’s SMS Provider namespace.
Creating Linked Data Sources
To create linked tables to SMS data, perform the following procedure:
 To create linked tables to SMS data
- Start Access 97, and then create a new blank database.
- On the File menu, point to Get External Data, and then click Link Tables. If the Access Database window is open, click New from the toolbar, then Link Table.
- In the Link dialog box, a portion of which is shown below, select ODBC Databases() from the Files of type list.
![Portion of the Link dialog box in Access 97. ODBC Databases is selected in the Files of type list.]()
- Follow the procedure described in the “Connecting to the SMS Provider” section. Continue with step 5 when you have completed that procedure.
- In the Link Tables dialog box (shown in the following figure), select one or more SMS data tables to link to. Make sure that the Save Password checkbox is selected or the next time you open this database you will have to re-establish the WMI connection for each link. When you have made your selections, click OK. Access 97 will create a link to each SMS data table.
![Link Tables dialog box in Access 97. Two SMS data tables and the Save password check box are selected.]()
- For each link, you are prompted to identify and select one or more fields that uniquely identify each record on the Select Unique Record Identifier dialog box, as shown in the following figure. Click OK to accept the default fields.
![Select Unique Record Identifier dialog box in Access 97 with ActionInProgress field selected.]()
The links you create using this procedure will appear in the Access Database Window. You can report from these links just as you would with any Access data source, but you are not able to alter the underlying data or change the SMS table itself.
Creating Tables from Imported SMS Data
To create tables from imported SMS data, you follow a procedure that is similar to the procedure for creating linked tables. The main difference between these two procedures is that you are not prompted to identify the unique attributes identifying each table row.
 To create tables from imported SMS data
- Start Access 97, and then create a new blank database.
- On the File menu, point to Get External Data, and then click Import. If you have the Access Database window open, click New, and then select Import Table.
- In the Import dialog box, select ODBC Databases() from the Files of Type list.
- Follow the procedure described in the “Connecting to the SMS Provider” section. Continue with step 5 when you have completed that procedure.
- Select the SMS objects to link to from the Import Objects dialog box, and then click OK.
Creating SQL Pass-through Queries
The following procedure describes creating a SQL pass-through query.
 To create a SQL pass-through query
- Start Access 97 and create a new, empty database.
- On the Access Insert menu, click Query. If the Access Database window is open, select the Queries tab, then click New.
- In the New Query dialog box, make sure that Design View is selected, and then click OK.
- A new query design view window is created, and the Show Table dialog box appears, as shown below.
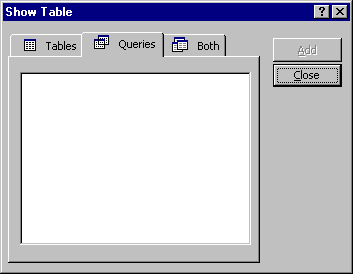
- Click Close without selecting a table or query.
- The Select Query dialog is displayed. Right-click the upper pane, click SQL Specific, and then click Pass-Through.
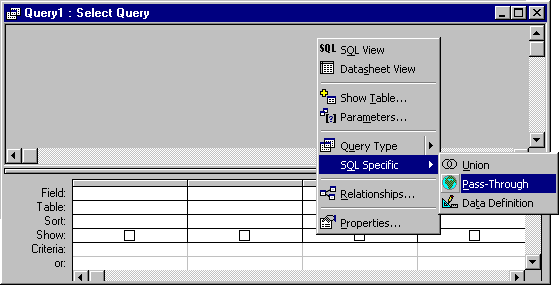
- A query design window for the pass-through query opens. Type in (or paste) an SQL query statement.

- With the query design window open, as shown above, select View, Properties from the Access menu, or click the Properties icon from the Access toolbar.
- On the Query Properties dialog, shown below, click the Ellipsis button next to the ODBC Connect String text box.
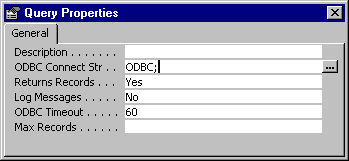
Note Make sure that when you installed Access 97, you also installed the Advanced Wizards component. If you did not, when you click the Ellipsis button above, you will be prompted to reinstall Access 97 to add this component.
- When the Select Data Source dialog box appears, follow the procedure described in the “Connecting to the SMS Provider” section. Continue with step 11 when you have completed that procedure.
- After you have connected to the SMS Provider namespace, the Connection String Builder dialog box appears. Click Yes to save the fully qualified connection string.

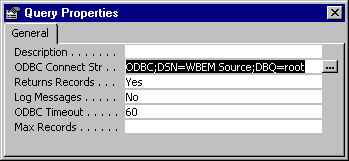
The ODBC connection string now contains additional information such as the password you have specified, as shown in the following figure.
- After saving the query, you can run it. To do so, on the Query menu, click Run.
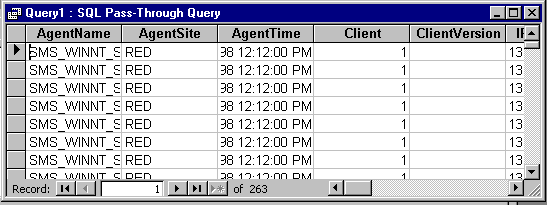
- When the query runs, the data obtained is displayed in the Access grid.


 To connect to the SMS Provider
 To create linked tables to SMS data
 To create tables from imported SMS data
 To create a SQL pass-through query
