The SQL Server Upgrade Wizard is a fast, reliable way to upgrade the databases. The wizard is easy to use and understand, but still allows flexibility. Microsoft’s extensive testing has shown that simply taking the default path through the wizard results in a successful upgrade for a majority of installations.
You can estimate how long the upgrade will take based on the approximate size of the SQL Server 6.x data devices:
These numbers can vary depending upon the hardware and the database schema (the number of tables, for example, to be upgraded). Double these times if you want to perform an upgrade using the tape data transfer option.
After you complete the preparatory work, start the SQL Server Upgrade Wizard. You can start the wizard from SQL Server Setup, or on the Start menu, point to Programs and Microsoft SQL Server – Switch. (Upgrading is supported only on Windows NT–based installations of SQL Server.)
When the wizard begins, the welcome screen warns that both the SQL Server 6.x and SQL Server 7.0 installations (the MSSQLServer service(s)) will be stopped and restarted several times during the upgrade process. Therefore, users cannot use any instance of SQL Server while the upgrade process is running.
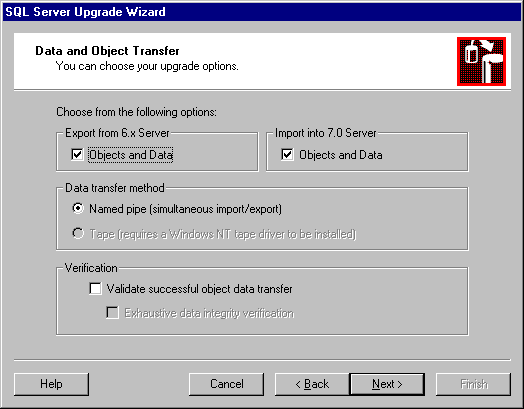
Click Next to view the Data and Object Transfer dialog box.

The Data and Object Transfer dialog box contains key choices that affect what you see as you continue with the upgrade wizard. As for most dialog boxes in the wizard, it is recommended that you accept the defaults. However, you should be aware of the options:
If the tape option is unavailable (as shown in the preceding illustration) but you have a tape drive installed and you want to perform a tape data transfer method upgrade, you probably have some other tape program running, such as the Microsoft Windows NT Backup program. Cancel the wizard, close the open applications that might be using the tape drive, and then restart the SQL Server Upgrade Wizard.
Neither of these options is selected by default. When you choose these options, you receive a warning that the time it takes to perform an upgrade may increase significantly. Select these options if you want 100 percent verification of your upgrade. Selecting the Validate successful object data transfer option can add a significant amount of time to the upgrade, depending on how many objects you have to upgrade. Performing the exhaustive data integrity verification can add approximately one hour for each GB of data you want to upgrade, and is CPU-intensive.
After you specify the options you want to use, click Next to view the Logon dialog box.
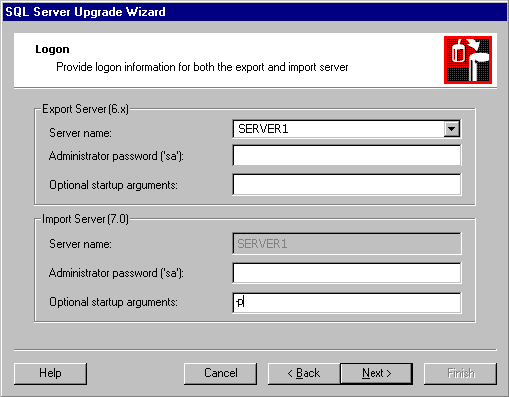
In this dialog box, you can select the export server and the import server. You must supply the system administrator password for both installations of SQL Server.
The optional startup arguments allow you to specify any flags that you want to use during the upgrade process. Unless you are instructed to do so by Microsoft SQL Server Product Support or your Independent Software Vendor (ISV), you should not specify any options here. The -p option is the most common option to specify. The -p option raises the precision of decimal and numeric data types to 38 digits, instead of the SQL Server default of 28 digits. You can specify this option for SQL Server 7.0 if you have used it for SQL Server 6.x and you want numeric values with digits of precision greater than 28 to transfer correctly.
You can verify startup parameters by selecting the Configure option for the server in SQL Server Enterprise Manager, and then clicking Parameters for SQL Server 6.5 as shown in this illustration.
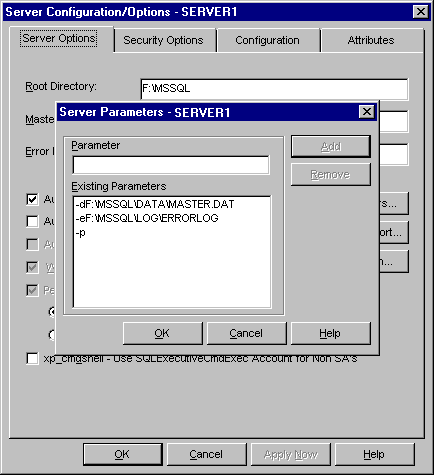
The optional startup parameters you use for the SQL Server 7.0 server are not added to the SQL Server 7.0 configuration. You do not need to specify the –d or –e options on either SQL Server 6.x or SQL Server 7.0. The only options necessary are those that are not part of the existing SQL Server 6.x and SQL Server 7.0 startup parameters.
After you click Next in the Logon dialog box, a message warns that the SQL Server 6.x and SQL Server 7.0 installations will stop and restart.

Click Yes to continue. At that point, several background checks occur. You must correct any problems before you can continue with the SQL Server Upgrade Wizard. For a list of the checks that occur at this stage, see “Prepare the SQL Server 6.x Installation” earlier in this chapter.
The Code Page Selection dialog box appears.
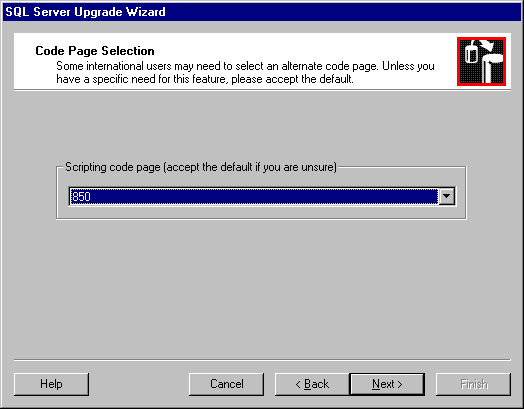
The SQL Server Upgrade Wizard determines the code page in use by the SQL Server 6.x installation and recommends the code page to use during the upgrade. Do not change this selection unless you have been instructed to change it by Microsoft SQL Server Product Support or your ISV, or you have advanced experience with code page issues.
If you have selected a tape data transfer method, after you click Next, the Data Transfer dialog box appears.
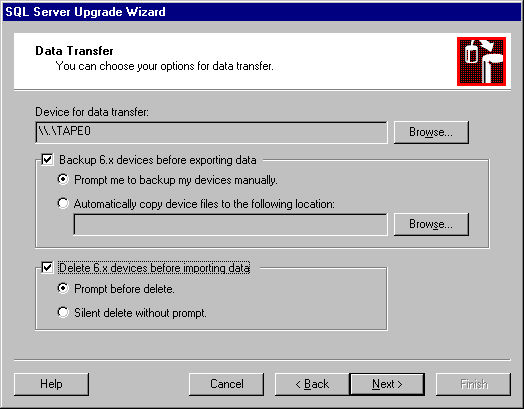
In the Data Transfer dialog box, you can select which tape drive to use if you have multiple tape drives installed, whether to back up the SQL Server 6.x devices, and whether to delete the SQL Server 6.x devices:
Both of these options delete all of the SQL Server 6.x device files, including Master.dat. Use this option only if you are performing a complete upgrade of all databases to SQL Server 7.0. Make sure that you have backed up all of the SQL Server 6.x databases and the SQL Server 6.x device files before selecting this option.
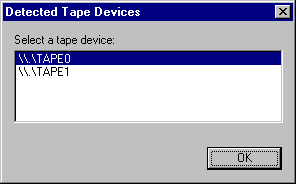
If you click the Browse button next to Device for data transfer, the Detected Tape Drives dialog box lists the names of tape devices. Select the one you want to use to hold the data that will be exported from the SQL Server 6.x databases.
Click Next to view the Upgrade Databases to SQL Server 7.0 dialog box, in which you can select the databases you want to upgrade to SQL Server 7.0.
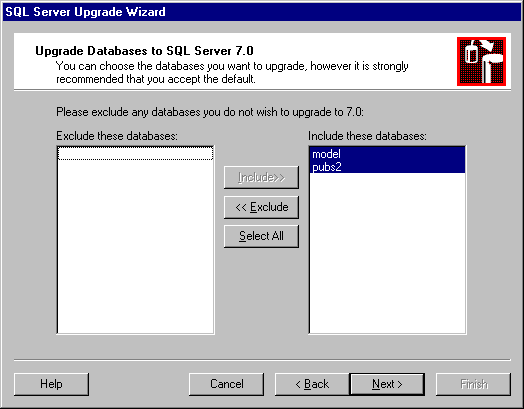
You should upgrade all of the databases in a single pass, which is the default configuration. If you run the SQL Server Upgrade Wizard multiple times, the databases that have been upgraded previously appear in the Exclude these databases list by default.
The model database is selected for upgrade so that custom users or objects in the SQL Server 6.x model database will transfer to in the SQL Server 7.0 model database. Upgrade the SQL Server 6.x model database even if you have not modified it.
A database marked offline cannot be upgraded until the database is placed back online. Additionally, raw partitions are not supported during upgrade; therefore, databases that use raw partitions do not appear in this dialog box.
Click Next to view the Database Creation dialog box.
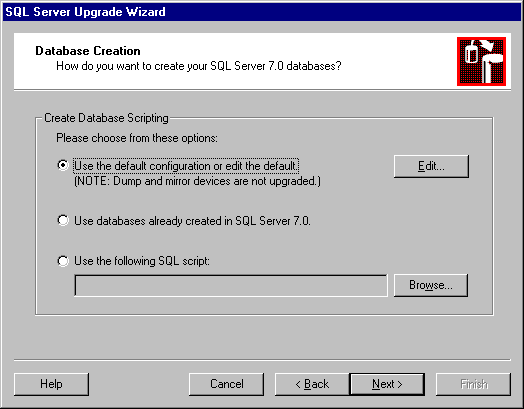
By default, the SQL Server Upgrade Wizard creates databases and files for you in SQL Server 7.0 for each database you have selected to upgrade. The number and layout of the files in SQL Server 7.0 is similar to the number and location of files that are used in SQL Server 6.x. In most cases, this option is recommended for the upgrade.
However, you may want to review or edit the default. Click Edit to configure the names, sizes, and locations of the files.
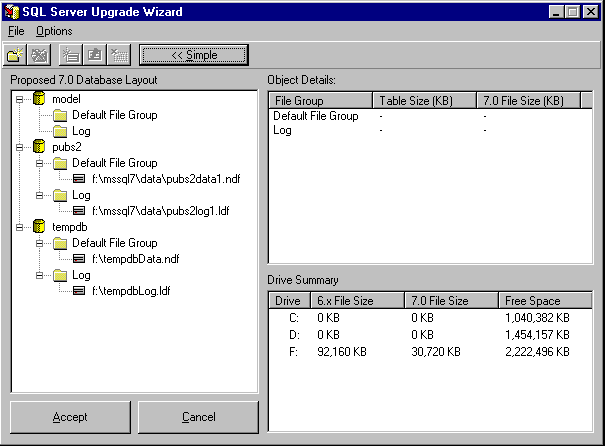
If you want to see the entire dialog box, click Advanced. You can modify the name, location, and size of the file, as well as the autogrowth increment. Right-click each file you want to modify, and change the attributes as needed. Also, you can remove or add files or filegroups as appropriate for your server configuration. When you complete your changes, click Accept.
If you have created the databases in SQL Server 7.0, in the Database Creation dialog box, select Use databases already created in SQL Server 7.0. Using this option is not recommended. The databases are matched by name. If you select this option, make sure that the databases are large enough to hold the data when it is imported into SQL Server 7.0, and configure the database compatibility mode. In addition, you must have a sufficiently large tempdb, assign database ownership, and set the compatibility level of the databases to the version of the export server by using sp_dbcmptlevel dbname, 65 (use 60 if the export server is SQL Server 6.0).
Also, you can specify a Transact-SQL create database script. This option is useful, however, only if you are familiar with SQL Server 7.0 CREATE DATABASE syntax. This is an advanced option and is recommended only for advanced users or ISVs who have tested their scripts carefully (unless you are performing an import-only upgrade from tape).
After you select any changes or accept the default configuration, click Next.
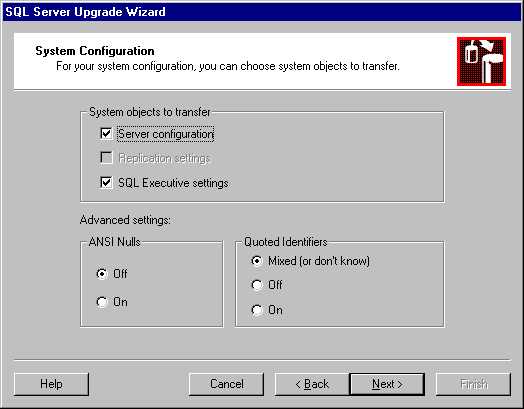
In the System Configuration dialog box, you can specify the system options you want to transfer. These include relevant server configuration options, replication settings, and SQL Server Agent settings (scheduled tasks, alerts, and operators). It is recommended that you transfer the server configuration options and SQL Server Agent settings, which includes tasks such as scheduled backup. If you do not use replication, the Replication settings check box is unavailable. If replication was enabled in the SQL Server 6.5 configuration, this option is selected the first time you run the SQL Server Upgrade Wizard.
You also can determine advanced settings, such as whether to use the ANSI Nulls option during transfer, and whether to use the Quoted Identifiers options. Unless a prior upgrade has failed, accept the defaults.
When you click Next, the syscomments system table in each SQL Server 6.x database you want to upgrade is examined. If a problem is encountered, those objects may not be upgraded.
After syscomments has been selected for integrity in each database you are upgrading, the Completing the SQL Server Upgrade Wizard dialog box appears.
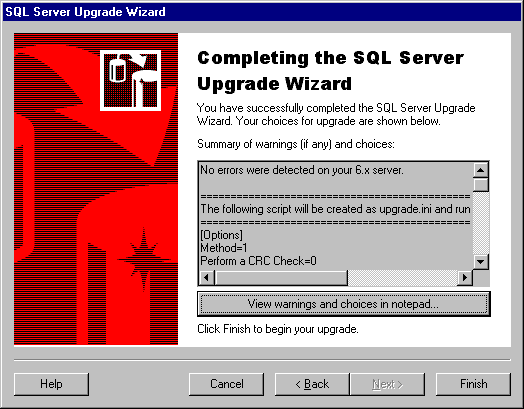
If the message indicating no errors were detected does not appear, click View warnings and choices in notepad to view any problem reports. If problems are reported, repair them before continuing.
After all errors are repaired (the initial state for most configurations), click Finish to start the SQL Server Upgrade Script Interpreter.
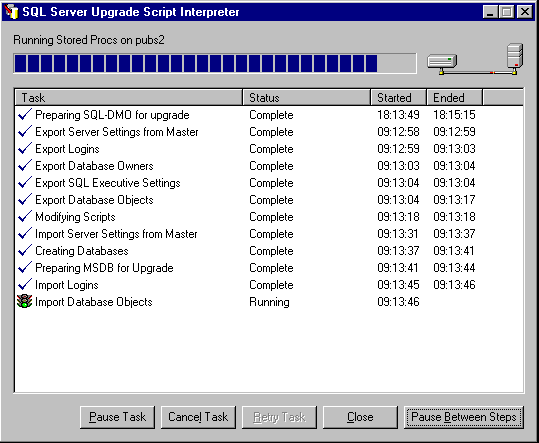
The SQL Server Upgrade Script Interpreter is the program that performs most of the work during the upgrade process. The tasks that run depend on the choices you made in the SQL Server Upgrade Wizard. If you selected a default upgrade path, the first step is to run a script against the SQL Server 6.x database to upgrade the SQL-DMO capabilities. Then, the SQL Server Upgrade Script Interpreter exports the schema for all databases that are to be upgraded and includes the row counts and byte comparison values if you requested those options. System settings, including replication settings, are exported. Next, the process begins on the import server, including creating the database(s), importing the schema for those databases, and then loading the data from the SQL Server 6.x data files. Finally, the schema is verified, and row counts and byte comparison values are verified if you requested this step.