Wizards are a type of add-in that leads a user through a sequence of actions, generates projects and project items, and then goes away. They implement the IDTWizard interface, which has only a single method: Execute.
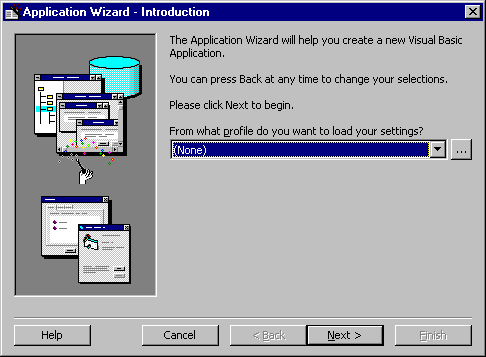
Although they can be constructed any way you like, Microsoft implements its wizards in a specific manner. A Microsoft wizard consists of a number of frames, each frame containing an image in the upper left corner, a label description to the right of the image which may also contain instructions, and an optional area near the bottom in which other controls can be placed, as in this example:

The process of creating a wizard is very similar to creating a regular add-in.
To create a wizard
import com.ms.office97.*
import com.ms.vstudio6.msaddndr.*
import com.ms.vstudio6.dte.*
IDTWizard interface:Public Class MyAddin implements IDTWizard
When you create a wizard, you gain access to the Wizard Extensibility model using an interface called IDTWizard. When you implement the IDTWizard interface in your code and create a .VSZ file in one of the appropriate directories, the IDE can create a wizard and call the Execute method.
void procedure for the Execute method. For example, create this procedure:public void Execute(int RemoveMode, SafeArray custom)
{
}
When you select the wizard, code is added to your add-in to identify its class ID, GUID, and type library ID. The compiler's pre-processor uses this information in conjunction with a method called @com.register to register your wizard. The registration string looks like this:
/**
* @com.register (clsid=710B1AE4-9E3A-1101-883A-B07C0CC10000,
typelib=710B1AE3-9E3A-1101-883A-B07C0CC10000)
*/
Note These numbers are unique to each wizard. Also, you don't need to register your wizard with the IDE with the onCOMRegister procedure as you do with ordinary add-ins.
MyWizard.Connect. Use this name to add a program ID to the newly-generated registration string. Using the example in step 4, your code would look like this:/**
* @com.register (clsid=710B1AE4-9E3A-1101-883A-B07C0CC10000,
typelib=710B1AE3-9E3A-1101-883A-B07C0CC10000, progid="MyWizard.Connect")
*/
Here's how it looks when it's all put together:
import com.ms.office97.*
import com.ms.vstudio6.msaddndr.*
import com.ms.vstudio6.dte.*
/**
* @com.register (clsid=710B1AE4-9E3A-1101-883A-B07C0CC10000,
typelib=710B1AE3-9E3A-1101-883A-B07C0CC10000, progid="MyWizard.Connect")
*/
public class MyAddin implements _IDTWizard {
public void Execute(Object VSInst, int ConnectMode, Object
AddInInst, SafeArray custom) {
}
}
VSWizard 6.0
Wizard=VIDWizard.CblankSiteWizard OR GUID
Param=test1
Param=test2
The wizard then appears in the Add Item and Add Project dialog boxes as a new item that can be added to a solution. You can also refer to the .VSZ file in a .VSDIR file to control how and where it displays in the Add Item and Add Project dialog boxes.
You can place files in the projects and items directories and use them in a solution. To customize which items are displayed in the Add Project and Add Item dialog boxes, as well as the order in which they are displayed, you can use VSDIR files. (Note, however, that VSDIR files are not part of the automation model.)
The IDE looks for files with a .VSDIR extension in the directories that contain new items and projects. VSDIR files provide a sort order for items displayed in the Add Project and Add Item dialog boxes. There can be multiple VSDIR files at each level in the directories that contain new projects and items. The IDE reads all of them at a given level and builds and overall order for displaying items. Items not listed in VSDIR files appear after all items listed in a VSDIR file. For more information about how to construct VSDIR files, see Creating VSDIR Files.
While regular add-ins cannot be used in the projects and items directories, you can, however, place wizards in these directories and have them activate if they have an associated .VSZ file. For information about creating .VSZ files, see Creating VSZ Files.
The IDE also provides a Template Wizard that can be used to prompt users for information and merge that information with template sources to produce new project items. Users can add a new template to the Add Item dialog box by creating a new .VSZ file that refers to the Template Wizard and the sources for the template. For more information on this, see Creating Custom Templates in the Visual Studio documentation.