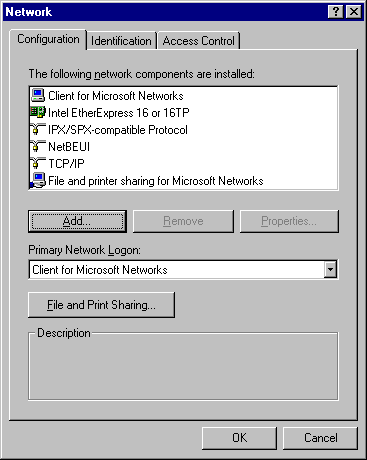

The recommended method for installing networking components for Windows 95 is to ensure that the existing real-mode networking components are running when you start Windows 95 Setup. In this case, Setup detects the existing components and installs corresponding support for Windows 95 automatically and, wherever possible, migrates configuration settings to the Registry. For more information about how to do this, see Chapter 3, "Introduction to Windows 95 Setup."
This section summarizes how to install networking support by using the Network option in Control Panel after Windows 95 is installed. Specific issues for installing various network components are discussed in the other chapters in this part of Windows 95 Resource Kit. The following procedures describe the general steps that are required for installing networking components.


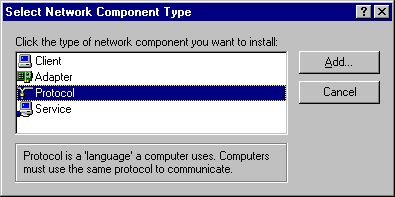
Component | Description |
Client | Installs client software for the types of networks the computer is connected to. You can use either a 32-bit network client (which needs no real-mode components) or older real-mode networking clients. There is no limit to the number of 32-bit network clients you can install, but you can have only one real-mode network client installed at a time. Some networks are supported only as primary networks. For information, see Chapter 10, "Windows 95 on Other Networks." |
Adapter | Installs drivers for the network adapters in the computer. However, the recommended method for installing a new adapter is to use the Add New Hardware option in Control Panel. You can configure the type of driver to use (such as enhanced-mode NDIS, real-mode NDIS, or ODI), specify the resources for the adapters you are using (such as I/O, IRQ, and transceiver type), and define other options for the adapter. For information, see Chapter 12, "Network Technical Discussion." |
Protocol | Installs network protocols and sets related options. For information, see Chapter 12, "Network Technical Discussion." |
Service | Installs peer file and printer sharing services and other types of network services, such as backup agents, additional print services, Microsoft Remote Registry, and Network Monitor. For information, see Chapter 16, "Remote Administration." |
Note Some components require that you shut down and restart the computer after installing them.
You can also install and configure networking components by using custom setup scripts or system policies. For information, see Chapter 5, "Custom, Automated, and Push Installations," Chapter 15, "User Profiles and System Policies," and Appendix D, "MSBATCH.INF Parameters."