Network Neighborhood is the primary way you can browse the network. When you open Network Neighborhood on a computer running a NetWare-compatible networking client, all the NetWare bindery-based servers your computer is connected to are displayed. All computers running File and Printer Sharing for NetWare Networks that use Workgroup Advertising also appear in Network Neighborhood.
Clicking the Entire Network icon displays a list of all NetWare servers on the network. This list also contains a list of workgroups that include computers running File and Printer Sharing for NetWare Networks. You can view the contents of any server without having to map a network drive.
If your computer has both Client for Microsoft Networks and Client for NetWare Networks installed, then you will also see a list of computers running Windows for Workgroups, Windows 95, and Windows NT. The list of NetWare servers is at the beginning of the list of workgroups or domains in the Entire Network window.
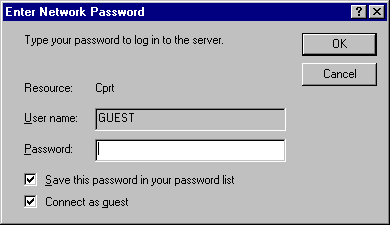
In both the Network Neighborhood and Entire Network views, you can open a server to access its contents without having to map a network drive. You will be asked for security information, if necessary, and you can choose to save your password in the password cache so that you will not have to type it again.
If the computer is running Client for NetWare Networks, drive mappings are limited to the available drive letters. However, Windows 95 supports unlimited UNC connections. (If the computer is running NETX or VLM, it is limited to only eight server connections.)

Tip You can also create a shortcut to frequently used resources. For information, see "Using Network Neighborhood." When you double-click a shortcut, you have to supply only a password to connect to it.
The toolbar on every window includes the Map Network Drive button, which you can use to specify the name of a NetWare server and volume (or directory) that you want to map to a drive letter.
With this option enabled, if you switch to this mapped directory in a VM windows, you will see the prompt as drive:\> not drive:\directory>). You cannot go further up the directory tree from the command prompt.
The context menu for a NetWare server shows everything you can do with the related server, volume, or directory. To view the context menu, in Network Neighborhood, right-click a NetWare server.
The following table describes the commands available on the context menu.
Command | Description |
Open | Connects to that server. |
Explore | Shows the resources available on that server without making a connection. |
Who Am I | Specifies whether the user is logged on or attached to the server; if a user is logged on and the computer is attached, specifies that user's name. |
Log Out | Logs the user off the server. |
Attach As | Presents a dialog box for typing a password to log on to the server. This dialog box allows the user to connect to the server by using a different user name from the one used to log on to the network. |
Map Network Drive | Presents a dialog box for mapping a network drive to a drive letter. |
Create Shortcut | Creates a shortcut on the desktop for the selected server. |
Properties | Shows the properties for the server. Notice that listing the properties of a NetWare server creates an attachment without logging on, thereby using up one of the allowable connections. |
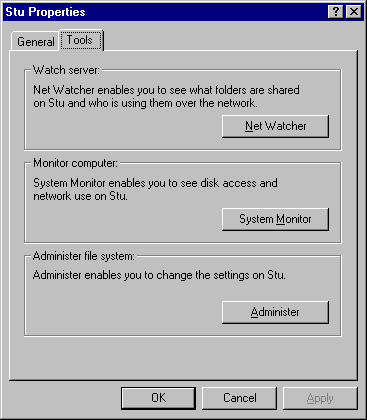
If a computer running File and Printer Sharing for NetWare Networks has been configured to allow remote administration, and if you have the authority to administer that server, you can use the administration options in the computer's properties. To do this, in Network Neighborhood, right-click the computer's icon. In the context menu, click Properties, and then click the Tools tab. Use the buttons to run Net Watcher or System Monitor, or to administer the file system.

For more information about preparing computers for remote administration under Windows 95, and about using Net Watcher and other tools, see Chapter 16, "Remote Administration."