
For Plug and Play-compliant devices, there are no true default settings. Instead, Windows 95 identifies devices and their resource requests, and then arbitrates requests among them. If no other device requests the same resources as another device, its settings should not change. If another device requests its resources, the settings might change to accommodate the request. Consequently, you should never change resource settings for a Plug and Play-compliant device unless absolutely necessary. Doing so will fix its settings, making it impossible for Windows 95 to grant another device's request to use that resource.
All legacy devices have fixed resource settings, which are defined either during Windows Setup from a previous configuration, or afterward in the Add New Hardware wizard in Control Panel.
Certain circumstances might require users to change resource settings after they have been configured. For example, Windows 95 might not be able to configure one device without creating conflicts with another device. In such a case, a message usually appears to explain what is happening and what you can do about the problem turn off a device to make room for the new device, disable the new device, or reconfigure a legacy device to make room for the new device.
The best place for resolving any conflicts that might occur is the Hardware Conflict Troubleshooter in Windows 95 online Help. For more information, see "Troubleshooting Device Configuration" later in this chapter.
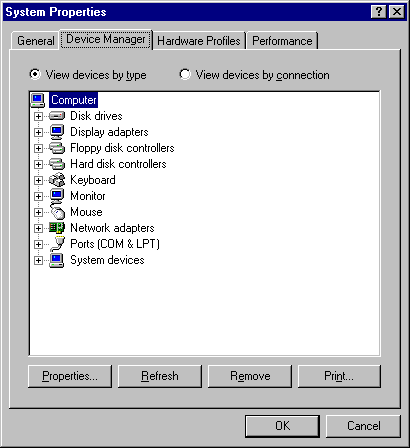
When you must manually change a device's configuration, you can use Device Manager in the System option in Control Panel. Using Device Manager helps you avoid the errors that can occur if you attempt to edit Registry entries directly.
If you need or want to resolve device conflicts manually, you can use Device Manager and try the following strategies:
Caution
Changing default settings using either Device Manager or Registry Editor can cause conflicts that make one or more devices unavailable on the system.
Device Manager and Registry Editor are provided as configuration tools for advanced users who understand configuration parameters and the ramifications of changing settings.
Or
Right-click My Computer, click Properties from the context menu, and then click the Device Manager tab.
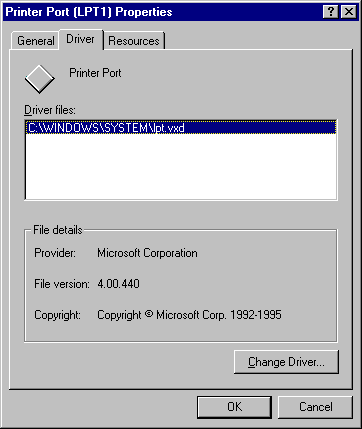
The Driver properties dialog box shows the driver files and current resource setup for that device.
Or
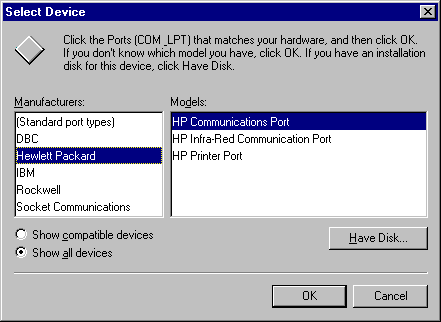
Click Show All Devices to see a list of all the drivers available in Windows 95.
Important Be very careful in selecting a driver in the Show All Devices list. You should select a driver from the Show All Devices list only when you know that you are selecting a driver that is compatible with the device.
In Device Manager, you can print reports about system settings, including reports on the following:
Caution You should quit all MS-DOS based applications before printing the report named All Devices And System Summary because the device detection code might cause problems for some MS-DOS based applications. If you do not do this, some applications might report the system is out of memory.
The tree expands to show the devices of that class available on the computer.
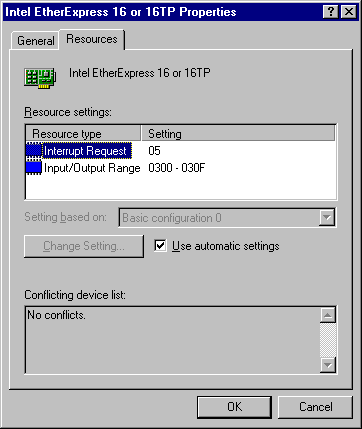
Notice that the Conflicting Devices List shows any conflicting values for resources used by other devices.
Notice that you can select and set the IRQ, I/O, and DMA independently, and that if the option named Use Automatic Settings is checked, you cannot change resource settings.
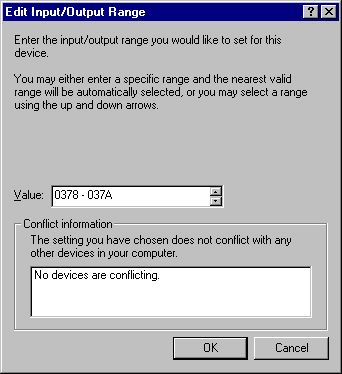
The dialog box shows the various settings that the device supports. Notice that in the Edit Input/Output Range box any interrupt marked with an asterisk (*) will conflict with an existing device. Any interrupt marked with a pound sign (#) indicates that the actual configuration has been tested.
When you clicked the Change Setting button, you might have received an error message saying "This resource setting cannot be modified." If this is the case, you must choose a different basic configuration until you find one that allows you to change resource settings.
Note Most legacy devices have jumpers or switches that set the IRQ, DMA, and I/O addresses. If you change these settings in Device Manager, you must also change the settings on the device to match them.
You can use Registry Editor to change specific values for devices. Use Registry Editor to change system settings in the following cases:
When you make changes in Registry Editor, always make one change at a time, and then test the system for the results. If you have problems with the system after making a change, restart the computer and press F8 when the Starting Windows 95 message appears, and then choose the Safe Mode option. Then you can change the setting back to its previous value.
You can also use the Connect command in Registry Editor to connect to and view the Registry on a remote computer if that computer has the Microsoft Remote Registry service installed. For information about using Registry Editor, see Chapter 33, "Windows 95 Registry."