Configuring TCP/IP to use DNS
If you currently have an Internet connection, most likely there is DNS server located at your facility. If you are installing a new Internet connection and do not plan on having a DNS server of your own, contact your service provider for the IP address of their DNS server.
To configure the TCP/IP protocol using DNS
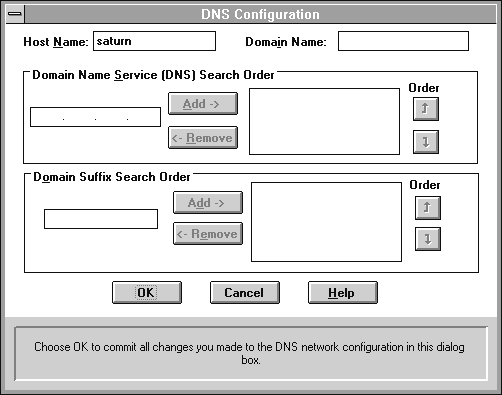
- Use the Network option in Control Panel to configure TCP/IP. In the Microsoft TCP/IP Configuration dialog box, choose the DNS button.
- The DNS Configuration dialog box Host Name box will default to your Internet gateway's computer name. You can optionally type a different host name to identify the local computer by name. Host names are stored on the DNS server in a table that maps to IP addresses for use by DNS.
- Optionally, type a name in the TCP Domain Name box. This is usually an organization name followed by a period and an extension that indicates the type of organization, such as microsoft.com.
- In the Domain Name System (DNS) Server Search Order box, type the IP Address of the DNS server that will provide name resolution, and then choose the Add button. The IP address is displayed in the right column.
- When you are done setting DNS options, choose the OK button.

You can add up to three addresses for DNS servers. The servers running DNS will be queried in the listed order. To change the order of the IP addresses, select an IP address to move, and then use the up and down arrow buttons. To remove an IP address, select it, and choose the Remove button.

