If the Database Wizard doesn’t offer the type of application you want, or if you’ve already created database objects you want to transform into an application, you can build an application on your own. Begin by creating tables, and then create other objects in the order that feels most natural to you. Here’s one approach that works well:
Step One: Plan the tables and relationships Before you begin creating actual objects, take time to plan the tables and relationships you need for your application. Analyze your data and break it down into distinct tables. You can find good examples in the Northwind sample application, or in a database you create with the Database Wizard.
Step Two: Create the tables and add a few records of sample data to each table You can create tables by using the Table Wizard, or by typing either in a datasheet or in table Design view. To ease data entry between related tables, add Lookup fields to tables on the “many” side of one-to-many relationships when you create the tables. After your table structure is complete, entering sample data makes it easier for you to see whether your forms and reports display the data you want.
Step Three: Create one of the forms in your application Start with a form that’s used to enter most of the data in the application. You can use a form wizard to create the form for you, then you can modify the design or layout of the form that the wizard creates.
Step Four: Add the features you need to make the form work Create the macros, event procedures, or functions you need to support the form.

Step Five: Add other forms and reports When the first form stores and displays data the way you want it to, start adding other forms and reports. Work on one object at a time, testing its features until you know it works correctly before going on to the next object.
Step Six: Connect the objects with buttons, hyperlinks, menus, and toolbars Provide a path for users to navigate through your application. Add command buttons, hyperlinks, custom menus, and custom toolbars to your forms, and add macros or Visual Basic code to respond to your users’ input. You may want to add pop-up forms that act as dialog boxes to collect input from your users.
Step Seven: Designate a startup form and put the final touches on your application In this final step, designate the form that appears when the user starts your application and specify other options such as the caption that appears in the title bar.
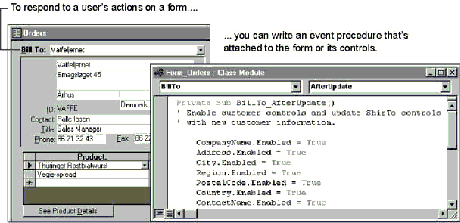
In a Microsoft Access application, forms aren’t just screens for entering and editing data—they make up most of your application’s interface. To your users, forms are the entire application. By building your application around forms, you can control the flow of your application through the events that occur on the form.
Forms provide an additional behind-the-scenes benefit when you use macros or event procedures to tie your objects together. In addition to using forms as your application’s interface, you can use fields on hidden forms to store and pass values from form to form or from operation to operation. For example, suppose you want to provide your users with the ability to enter a range of dates in a dialog box and then print a series of reports based on that range of dates. The dialog box is a form that you create. When the user clicks OK in the dialog box, you hide the form rather than close it. Now the dates that the user enters are available to the macro or code that prints each of the reports.
See Also For an example of hiding a dialog box, see Chapter 3, “Using Forms to Collect, Filter, and Display Information.”