The first two examples in this chapter showed some things that can be done easily with client-side scripting. However, they didn't actually incorporate any of the features of ASP, we only suggested ways that this could be done. In this and the next examples, we'll be using ASP in conjunction with script code on the client.
While ASP is great at building the individual pages for a web application dynamically, its features are rather limited when it comes to handling the frameset pages that are so common to today's sites. Using the Redirect method of the Response object we can redirect to a single page, but we can't target it to a specific frame—only the browser can do that. The combination of client and server code in this example shows how scripting languages on both sides of the Web connection can, together, manage framesets and the pages inside the frames.
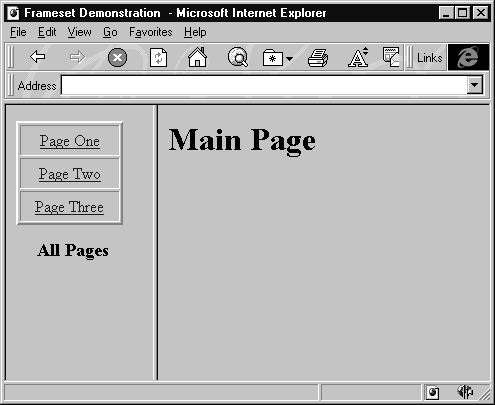
This is more complicated than the first two examples we looked at. Before we launch into an explanation of what this example does, you might like to bring up frameset.asp in your browser and see for yourself. Experiment by clicking on a few of the links in the left hand pane. We'll spend some time discussing the code that makes this sample work, and you'll understand it better if we're familiar with the samples behavior in the browser. Since this is now an ASP file, you also need to be sure that it comes from your server and is loaded via HTTP.
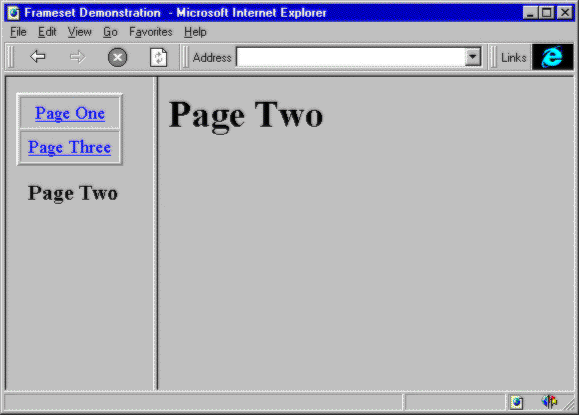
You'll notice that clicking on a page link on the left hand side loads that page into the right hand frame, and also updates the left frame itself so that only links to the pages not currently shown are available. This makes sense—if we're already viewing the second page we shouldn't be able to jump to it again.

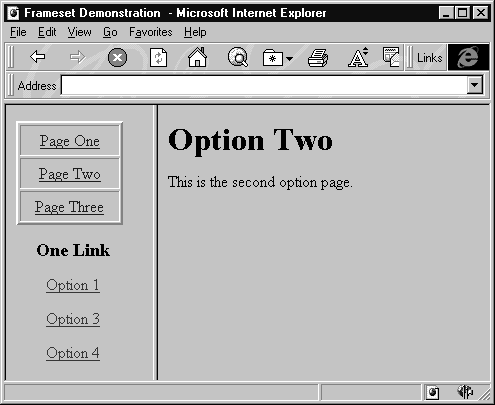
Since we're viewing page two in the right hand frame, it's not visible in the list in the left hand frame.
Now click over to the third page, and you'll see a list of options in the main frame. If you choose one of the Option links, rather than a Page link, you'll see the left frame refresh with a list of the remaining options, and the right frame with the actual page you selected. If you watch closely, you'll see that the left frame is refreshed a split second before the right frame is updated. We'll talk about why this happens later in this section.
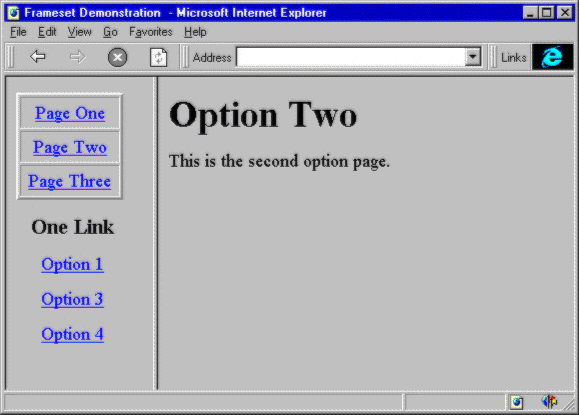
So that's what this example does: it displays a variety of pages in the main section of a two-pane frameset and keeps the left-hand pane in sync—and it uses both client and server-side scripting to accomplish this.
If you've designed a site with frames before, you know that creating a two-pane frameset with a navigation frame and contents frame isn't too difficult. The frameset HTML file contains the size and URL information for the frames, so that they can be created and laid out. Each of the pages is a separate file, as specified in the frameset file, and these are loaded into the frames just created.
Once the pages have been rendered, new pages are targeted to a specific frame by adding the TARGET attribute to the links that modify the other frame. For example, our frameset has two frames called NavBar and MainFrame. To change the contents of MainFrame from a click on a link in NavBar, we'd just use:
<A HREF="mypage.htm" TARGET="MainFrame">Go To My Page</A>However, with this method, the left-hand frame doesn't change to reflect what is shown in the main frame. Our example does allow this, and this significant improvement comes from the combination of ASP and client-side code.
Where would we use something like this? The answer is any place that we currently use (or could use) frames, but want to give the viewer of our site more feedback as to what is happening. Or perhaps we'd like to customize the available options based on which user is accessing our site, or what part of the site they're viewing. We can easily extend this example to the specific needs of our site, but first we should understand how the code works.
In contrast to the first two examples (and the next one), this sample consists of more than a few files, although the interesting work takes place primarily in two files: frameset.asp and navbar.asp. It's no coincidence that these files are the only Active Server pages of the whole lot. The rest of the pages are simple HTML files—that in the real, non-book-example, world would hold the site's content. So we can keep things straight, all of the files are listed below:
| Filename | Purpose |
frameset.asp |
The top-level frameset page |
navbar.asp |
Navigation bar (left-hand pane) page |
pageone.htm |
Page one |
pagetwo.htm |
Page two |
pagethree.htm |
Page three (with option links) |
option1.htm |
Option page one |
option2.htm |
Option page two |
option3.htm |
Option page three |
option4.htm |
Option page four |
We first need to understand how the frameset.asp page works. This is the page you loaded into your browser earlier, and it's where everything starts. The ASP code in the page sets the values of two variables, NavBarPage and MainFramePage, depending on the value passed to the page in the URL. We'll see this in a while—just accept for now that they are set up correctly. So, frameset.asp sets up the frameset with different pages:
... the ASP code that sets NavBarPage and MainFramePage goes here ...
<HTML>
<HEAD>
<TITLE> Frameset Demonstration </TITLE>
</HEAD>
<FRAMESET COLS="150,*">
   <FRAME NAME="NavBar" SRC="<%= NavBarPage %>" SCROLLING="AUTO">
   <FRAME NAME="MainFrame" SRC="<%= MainFramePage %>" SCROLLING="AUTO">
</FRAMESET>
</HTML>
The <FRAMESET COLS="150,*"> line creates a frameset consisting of two columns. The width of the left-hand column is 150 pixels, and the right hand column takes up the remainder. The two <FRAME> tags provide the information about each frame. The NAME attribute defines the frame's name, and is important because it's what we use in our links and script code to refer to the frame. The SCROLLING attribute turns scrolling on if needed. But what of the SRC attribute with that familiar ASP code string <%= ... %> ?
We're telling ASP to insert whatever is in the variables NavBarPage and MainFramePage into the <FRAME> tags. The important thing is how these variables are set, and to understand this we need to look at the code we didn't show in the listing above. The page expects to find an argument in the query string, containing a parameter called Nav. In other words, it expects to be called with a URL like this:
http://www.yoursite.com/frameset.asp?Nav=allHere's the code itself:
<%  'get Nav and use it to determine which frames to display
    'and which parameter to call navbar.asp with
NavChoice = Request.QueryString("Nav")
Select Case NavChoice
   Case "pageone"
      NavBarPage = "navbar.asp?BarChoice=pageone"
      MainFramePage = "pageone.htm"
   Case "pagetwo"
      NavBarPage = "navbar.asp?BarChoice=pagetwo"
      MainFramePage = "pagetwo.htm"
   Case "pagethree"
      NavBarPage = "navbar.asp?BarChoice=pagethree"
      MainFramePage = "pagethree.htm"
   Case "all"
      NavBarPage = "navbar.asp?BarChoice=all"
      MainFramePage = "main.htm"
   Case Else   'choose all
      Response.Redirect "frameset.asp?nav=all"

End Select  %>
... HTML code is here ...
The first line of real code uses the QueryString collection of the Request object to get the value of the Nav parameter, if it exists, from the URL. We store that value in the variable called NavChoice. With this information the code uses a Select Case statement to set the variables depending on what was specified in the URL. By using all, we can ask for the main content page (main.htm) to be displayed in the main frame, and the navigation bar to show links to all three pages.
If there is no value for Nav in the query string, as when we first loaded the page, the Else part of the Select Case construct is executed. This uses the Response object's Redirect method to refresh the page, showing the main content page and all of the links. Of course, we could have copied the code down from the all clause immediately above it—it has exactly the same effect. However, this is better style because it means we only have to change our code in one place if we decide to modify the default action.
Looking at the clauses themselves, it's easy to understand what they are doing. They put the name of the file that should be loaded into the main frame into MainFramePage. When our Nav option is pageone it's logical to think that pageone.htm should be the page we see, and so on. However, notice that setting the NavBarPage variable is a little different—we're loading the same file navbar.asp in each case. What our code does, however, is add a different parameter to the query string each time.
This is because the navbar.asp file changes its behavior, depending on the BarChoice value included in the URL. The part of navbar.asp that we're interested in is this:
<% BarChoice = Request.QueryString("BarChoice")
Select Case BarChoice
   Case "pageone" %>
      <TABLE WIDTH="100%" BORDER="2" CELLPADDING="5" CELLSPACING="2">
         <TR>
            <TD ALIGN="CENTER"><A HREF="javascript:GoPageTwo()">
            Page Two</A></TD>
         </TR>
         <TR>
            <TD ALIGN="CENTER"><A HREF="javascript:GoPageThree()">
            Page Three</A></TD>
         </TR>
      </TABLE>
      <P><CENTER><H3> Page One </H3></CENTER>
... similar code for "pagetwo", "pagethree" and "all" goes here ...
This works almost identically to the code in frameset.asp. First it stores the value of the BarChoice part of the URL in a variable of the same name, and then uses this variable in a Select Case construct to output the appropriate set of <TABLE> and <A> tags. When BarChoice equals pageone, the code only outputs links to pagetwo.htm and pagethree.htm. The code for the pagetwo, pagethree, and all options is nearly identical to the code here, so we haven't listed it. You can check it out in the navbar.asp source.
Now that we've talked about how the two most important pages are created, we can discuss that new enigma we've unearthed: the use of javascript:function-name() in the anchor tags in navbar.asp. As we said earlier, it's possible to change the contents of one frame, when a link in another is clicked, by using the TARGET attribute in normal HTML. However, in our case, what we want to do is update both of the frames in our frameset, and HTML doesn't provide a way to do this. Fortunately, our task can be accomplished with a little client-side code. We show two different methods to accomplish this in the sample, and we're ready to discuss the first now.
If you remember back to the object model discussion in the last chapter, you'll recall the Frames collection of the Document object, and the Location object. Frames provides an interface to each frame in a frameset, while the Location object gives information about the current page displayed in the frame. Each frame and window has a Location object. It's no surprise, then that two lines of code can change the contents of both of our frames:
parent.frames("NavBar").location.href = "navbar.asp?BarChoice=pageone"
parent.frames("MainFrame").location.href = "pageone.htm"
We need to remember that, to access the Location objects of the frames in our frameset, we need to go back one step to the top-level frame. The Frames collection of the NavBar and MainFrame frames are both empty because these frames don't have any sub-frames. However, the parent frame of NavBar and MainFrame includes both NavBar and MainFrame. In the code above we use the Parent property of the (default) Window object to access the correct collection. Once we have the reference to the correct frame, setting the HRef property of the Location object causes the current window to display whatever URL is specified.
The only thing we haven't talked about is how the code above actually gets executed. Normally we connect client-side code to an event raised by an object. For example, we might execute code when form button is clicked, i.e. the onClick event is fired. In this case we'd like to execute the code when a link is clicked. Link objects do have an event called onClick, and we could specify that our relocation code be executed in response to this event. We're not going to use it in this case, because then we'd have to follow the unsightly practice of specifying an HREF attribute whose value is the empty string (because our code would be doing all the work). Holding the mouse over a link with no value can confuse viewers who depend on the status bar to see where they're going. In addition, in a more graphical site we might want to do the same thing but with an image map, and these don't have onClick events like Link objects do. Instead we'll directly specify the code to executed in the HREF attribute. This is where the javascript:function-name() syntax comes into our lives.
We've been using VBScript in the last few chapters, but Internet Explorer doesn't support the vbscript:subroutine-name syntax. It does support the equivalent javascript:function-name(). The clever part if that, if we specify the name of a VBScript subroutine instead of a JavaScript function it still works. The VBScript routine is executed correctly, and this is exactly what we do in on this page of the sample. The parts of navbar.asp we haven't see yet contain these routines:
<SCRIPT LANGUAGE="VBScript">
<!--
Sub GoPageOne()
   parent.frames("NavBar").location.href = "navbar.asp?BarChoice=pageone"
   parent.frames("MainFrame").location.href = "pageone.htm"
End Sub
... more similar routines here ...
-->
</SCRIPT>
...
<TD ALIGN="CENTER"><A HREF="javascript:GoPageOne()">Page One</A></TD>
Putting this all together, we can see that clicking the Page One link causes the browser to execute the code in the GoPageOne subroutine, and this code loads pageone.htm into the main frame and reloads navbar.asp with BarChoice equal to pageone. The rest of the Page links follow the same format. They call a VBScript function that changes the HRef properties of both frames to the correct URLs. When navbar.asp reloads, it changes the page links displayed, and everything is ready to go again.
The last major feature of this example, which we haven't talked about yet, is the set of option links on page three. If you haven't already seen these, open up page three by clicking on the appropriate link.
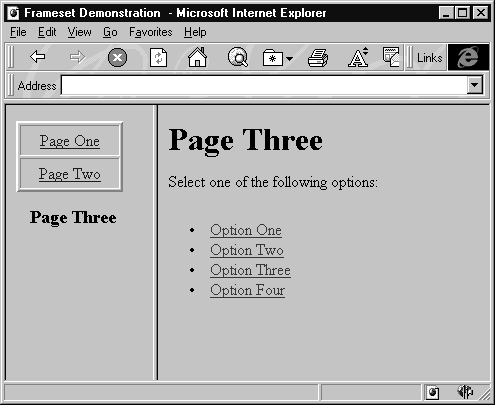
Click on one of the option links in the main frame. The NavBar frame reloads, displaying links to all three pages and to the options that weren't selected. The page for the option we clicked is displayed in the main frame.
We could have implemented this in the same way we did the page navigation, but we've chosen an alternative method so that we can keep all of the navigation code in navbar.asp. If we used the first method, we would have to add many additional functions to the third page, making the content more difficult to modify independently of the script code, and further melding the site's logic and content—not a good thing.
In addition, suppose we had option arrays like this on each of our three pages. All of a sudden we need to maintain navigation code in four documents instead of one. Finally, as you'll see when we look at the code that implements this in navbar.asp, we are able to use the similarities between the text strings to move most of the code into a loop, further simplifying our design. In a real world situation we'd be far more likely to use entries from a database to populate this list, but even then the same code can apply—using the unique identifier for each database record instead of our arbitrary series of options from 1 to 4.
Those are the benefits, but how exactly does this second scheme work? Our first clue is the HREF attribute of each of the links on page three. Here's the code for the first link:
<LI><A TARGET="NavBar" HREF="navbar.asp?BarChoice=onelink&id=1">Option One</A>
We're using the TARGET attribute, which is the good old HTML-only way of targeting a page with a frame different to the one containing the link. The HTML here changes the contents of NavBar (which, since this code is in MainFrame, is the other frame) to the URL "navbar.asp?BarChoice=onelink&id=1". This code doesn't do anything about changing the page loaded into MainFrame, yet the page itself does indeed change.
It's only possible to directly change one frame or window with the TARGET attribute of the anchor tag. However, with some strategically placed client-side code, we can change more than that. In our example, code in navbar.asp is changing the contents of MainFrame, using the value of the BarChoice parameter—onelink in this case—to determine which block of code to execute. The value id parameter that follows it is used by the onelink code, as we'll see in a moment. Think about that for a second. The sequence is:
MainFrame that points to NavFrame and navbar.asp,navbar.asp page reloads and NavFrame is updated,navbar.asp reloads MainFrame.
For example, the first link on page three passes the query string BarChoice=onelink&id=1 to the navigation bar file navbar.asp. We've already looked at the pagexxx values of the BarChoice parameter that this code can handle, so let's look now at the final choice, onelink. The Select Case clauses for the other pages consisted of a block of HTML. The clause for onelink is a little more complicated, including two sets of ASP script in addition to the same HTML. We'll start with the familiar and move quickly into new territory.
We see the same old table listing page options at the top of the finished onelink frame, and it's no surprise—the first visible HTML generated by navbar.asp for this option is the same as we've seen before in the other categories. After this table we display the list of options that aren't currently displayed. If we're currently showing Option3.htm in the main frame, we'd like to display links to options one, two, and four in the navigation bar. Our ASP code for this looks like:
<% For i = 1 to 4
      If CInt(CurrOption) <> i Then  'print link %>
         <A HREF="navbar.asp?barchoice=onelink&id=<%= i %>">
         Option <%= i %></a><p>
<%    End If
   Next %>
And it generates this HTML:
<A HREF="navbar.asp?barchoice=onelink&id=1">Option 1</a><p>
<A HREF="navbar.asp?barchoice=onelink&id=2">Option 2</a><p>
<A HREF="navbar.asp?barchoice=onelink&id=4">Option 4</a><p>
The code loops once for each element in our array of options, printing out a link every time, except for when the value stored in CurrOption is the same as our loop index. At the top of the onelink code we set a local variable called CurrOption to the value of the id portion of the query string. So calling onelink with an additional &id=3 causes CurrOption to be set to 3. This is the first use of the id parameter we've talked about—the second is in the code that loads the main frame.
If you've looked at the entire code for the onelink clause you noticed this somewhat nasty looking section right at the beginning of the block:
Response.Write "<SCRIPT LANGUAGE=" & Chr(34) & "VBScript" & Chr(34) & ">" _
                & Chr(13) & Chr(10)
Response.Write "<!--" & Chr(13) & Chr(10)
Response.Write "Sub Window_OnLoad()" & Chr(13) & Chr(10)
Response.Write "On Error Resume Next" & Chr(13) & Chr(10)
strTemp = "Parent.frames(" & Chr(34) & "MainFrame" & Chr(34) _
        & ").location.href = " & Chr(34) & "Option" & CurrOption _
        & ".htm" & Chr(34)
Response.Write strTemp
Response.Write Chr(13) & Chr(10)
Response.Write "End Sub" & Chr(13) & Chr(10)
Response.Write "-->" & Chr(13) & Chr(10)
Response.Write "</SCRIPT>" & Chr(13) & Chr(10)
But, before we let ourselves be scared away by this mess, take a look at the nice and simple HTML code it generates for the browser:
<SCRIPT LANGUAGE="VBScript">
<!--
Sub Window_OnLoad()
   On Error Resume Next
   Parent.frames("MainFrame").location.href = "Option3.htm"
End Sub
-->
</SCRIPT>
What we have here is a block of ASP code on the server that generates a block of code that is to be executed on the client. This is very powerful—we're actually changing our client-side code 'on the fly' to suit our purposes.
Let's first understand how navbar.asp is using this code to reload MainFrame, and then we'll talk a little more about the ASP code that generated the code in the first place. The client-side code we end up with is relatively simple. Immediately after the HTML page has finished loading, the Window_onLoad event fires. In the code that is executed, we're using the Frames collection and Location object to load the contents of Option3.htm into our main frame. The only wrinkle is the handy placement of On Error Resume Next to avoid any unsightly errors in the navigation frame if a non-existent URL is accidentally specified in the next line.
All the ASP code does is to generate this small four-line subroutine by using a series of Response.Write calls. It uses Chr(34) to generate double quotes that can't be specified directly in the code because they will be interpreted as server-side code, and the line feeds and carriage returns so the final output is neatly placed on separate lines.
That's all for this sample. We've covered a lot in the last few pages, and really showed how ASP can be used with client-side code to generate pages that weren't possible with just HTML or client-side code alone.
In moving the concepts in this example to your own site, you would keep much of the existing frameset.asp and navbar.asp code, modifying it to point to the actual files in your site. The rest of the files (page* and option*) would be replaced by your content.