So now we know what Secure Channel Services are, and how they works in outline. The next step is to see how we configure IIS 4.0 Web services and Internet Explorer to use Secure Channels.
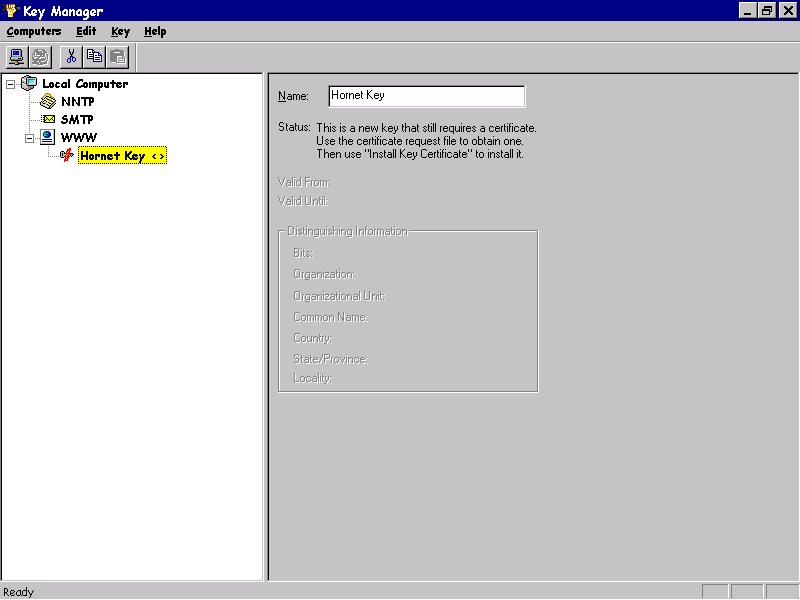
Enabling SSL security on IIS 4.0 requires us to first obtain a digital certificate that contains the details of our organization and is verified by a CA. The configuration of certificates with IIS 4.0 is handled by the Key Manager utility, which can be found by selecting the key manager tool button within the Internet Service Manager (MMC).
To create a new public/private key pair, click on the Web service and then select the Create New Key option from the Key menu; this invokes the Create New Key wizard.
The wizard will generate a key pair and a certificate request message that is sent to a CA to generate the digital certificate for our Web server. Over a series of wizard dialogs, we have to enter information about our organization and the key requirements.
The information we shall enter is:

At this stage, we must enforce the changes by selecting the Commit Changes Now option from the Computers menu.
Once the wizard has completed creating the key pair, we must send the generated Certificate Request details to our CA for the digital certificate to be generated. Here are the contents of a request file generated for some example details that we entered into the wizard:
Webmaster: rich@cyberdude.com
Phone: 1234567890
Server: Microsoft Key Manager for IIS Version 4.0

Common-name: hornet.wrox.com
Organization Unit: Hornet
Organization: Wrox Press
Locality: Chicago
State: Illinois
Country: US

-----BEGIN NEW CERTIFICATE REQUEST-----
MIIBMDCB2wIBADB2MQswCQYDVQQGEwJVUzERMA8GA1UECBMISWxsaW5vaXMxEDAO
BgNVBAcTB0NoaWNhZ28xEzARBgNVBAoTCldyb3ggUHJlc3MxDzANBgNVBAsTBkhv
cm5ldDEcMBoGA1UEAxMTd3d3Lmhvcm5ldC53cm94LmNvbTBcMA0GCSqGSIb3DQEB
AQUAA0sAMEgCQQCKMk2YPhZCl0L4wAa5MdUHw85DgUGHExtIk/m43j1kuCfvlSa7
GkfBwG2X2FpJerhFrmHzlO81NhPr6WK9nhyNAgMBAAGgADANBgkqhkiG9w0BAQQF
AANBAFxwC8ST08adPnc5g/M1KW3DGcOhOpw8JAdiHuuFjAt46bQzg73JIIulAqZC
4FOHtTulelvgcUQ8MMtxK6D8Fgk=
-----END NEW CERTIFICATE REQUEST-----
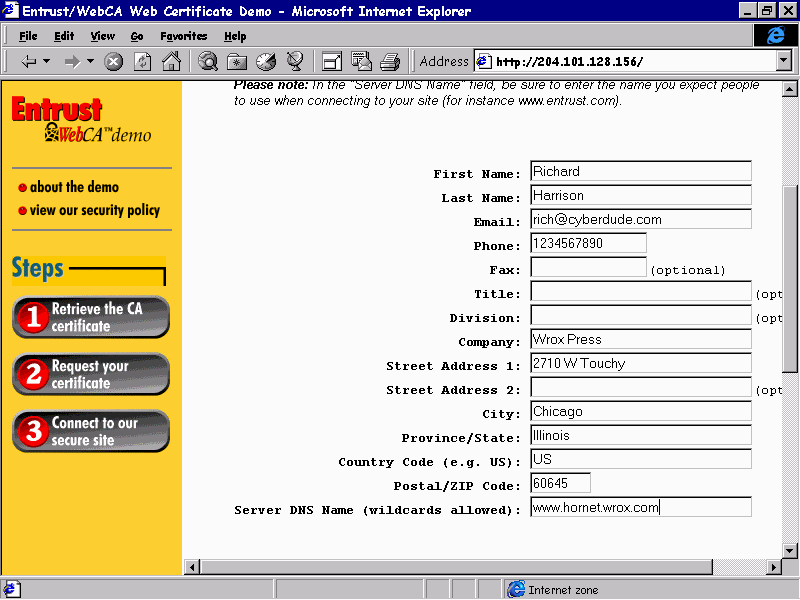
A useful CA for the creation of certificates that can be used for demonstration and testing purposes is Entrust (http://www.entrust.com/) who, at the time of writing, provide the service free of charge. By navigating through the hyperlinks promoting demonstration certificates, we get to a screen where we can input our generated Certificate Request details.
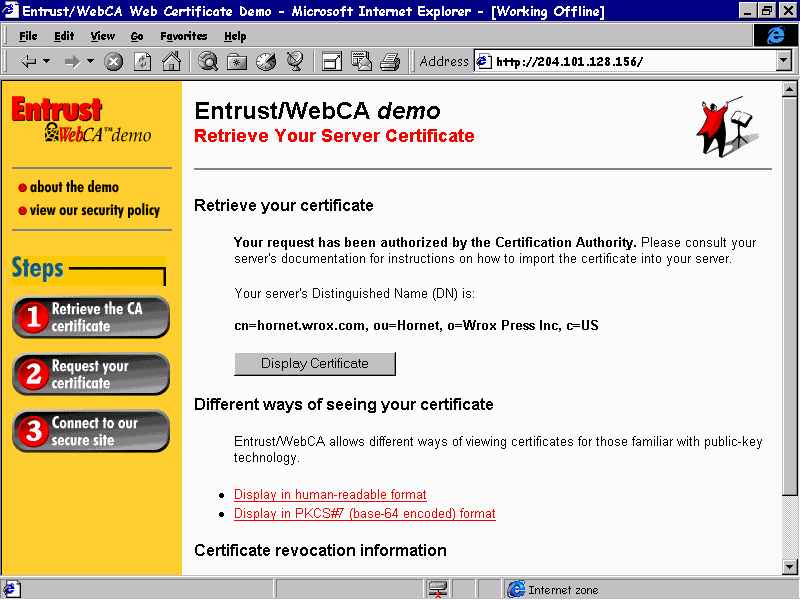
The response screen generated from Entrust for the above request is as follows—selecting the Display Certificate button displays the CA generated X.509 digital certificate containing our details plus the CA's digital signature.
We just copy the section between, and including the -----BEGIN CERTIFICATE----- and -----END CERTIFICATE----- lines from the email message, paste it into a standard text file using, for example, NotePad, and save it on the server's hard disk.
To install the digital certificate, right-click on it in Key Manager and select the Install Key Certificate menu option. A standard File Open dialog will now request the name of the file that we have just created and it will then request the key's password.
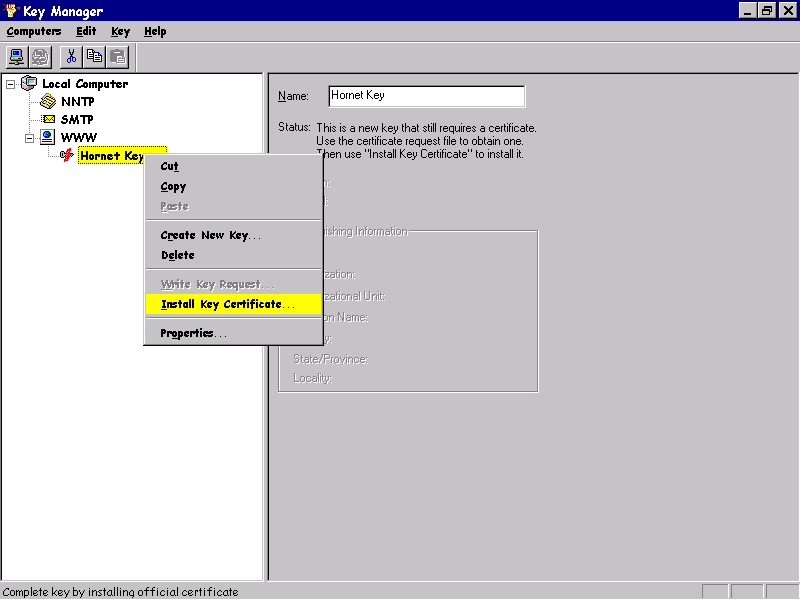
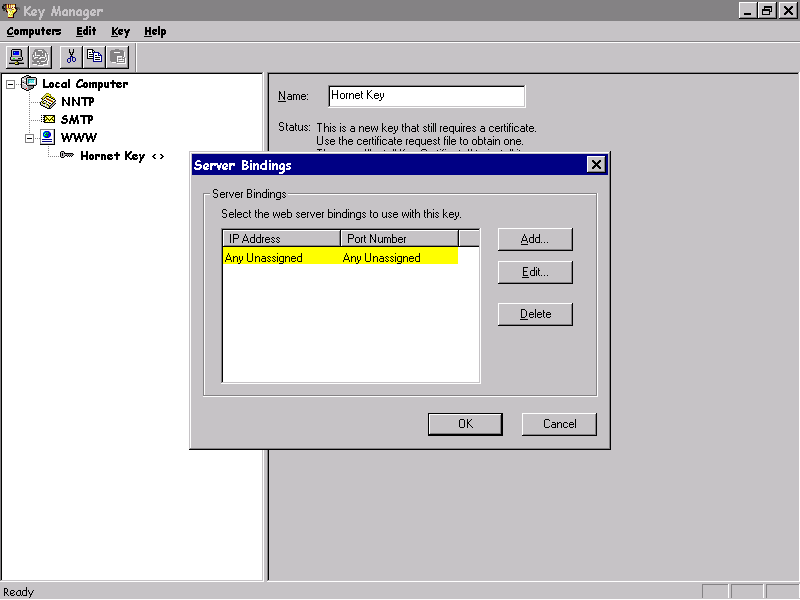
The next dialog allows us to specify which IP address the digital certificate is to be applied. Note that multiple IP addresses can be assigned to a certificate—but a maximum of one certificate can be applied to a single IP address. In our case, we shall keep things simple and assign all addresses to our digital certificate.
Finally, we must then enforce the changes by selecting the Commit Changes Now option from the Computers menu. If the key installation has completed successfully, Key Manager will show the key as being installed, and display the certificate details.
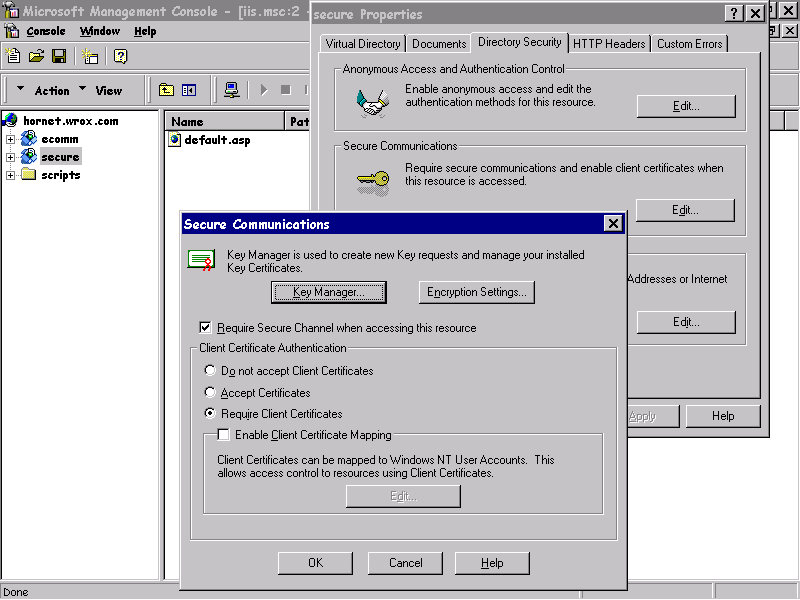
Once the certificate has been installed, we can enable SSL (one of the security protocols within SCS) on any directory using Internet Service Manager. This is done by selecting the Secure Communications option on the Directory Security property sheet within the WWW Properties dialog—on the Secure Communications dialog we must check Require Secure Channel. In addition, this dialog provides the Require Client Certificates check box. When this is checked, IIS 4.0 will instruct the browser to send a copy of its client certificate. We will see later how ASP can utilize the details in this certificate.
All we have done so far is install the Entrust generated digital certificate that contains our public details endorsed with the Entrust digital signature. We will next see how to install a CA Certificate on a browser that gives the Web user the Entrust public key—this is needed so that the browser can decode and verify digital certificates generated by Entrust. This also includes our own, which we have just created.
Then we will look at how we install a client certificate. A little earlier we set our server up so that it will require client browsers to supply a certificate—i.e. the details of the client browser user—when they request files from our server.
The Entrust site certificate is installed on the browser by accessing their web site at http://www.entrust.com/, and following the instructions to the Client Certificate Demo page.
Once the process is complete, we get a confirmation message and can choose to accept and enable the site certificate.
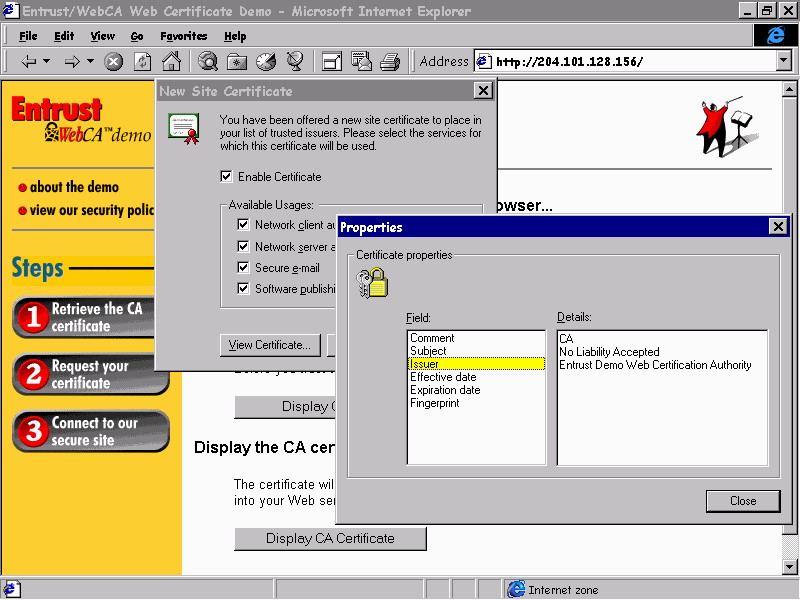
We can also inspect the browser's currently installed site certificates by selecting Internet Options from the View menu, opening the Content tab, and clicking the Authorities button. Here, we can see that the Entrust demo CA certificate has been successfully installed. Now, when we log on to a site that uses the Entrust demo CA for their server's digital certificates, our browser will understand the contents of the certificates. In other words, we are telling the browser that we trust any sites that have this certificate.
Since no verification of the server's credentials is done for the generation of Entrust demo certificates, we would suggest that you normally have the Entrust demo CA certificate disabled in your browser when surfing around the Internet. If you arrive at a site that claims it need this CA certificate enabled then you must be fully aware that this is not really a secure site that you can trust!
The next task is to install a client certificate in our browser, which will be used when we access a site that requires them, i.e. has the Require Client Certificates checkbox set, like we did on our server earlier. At the time of writing, VeriSign are providing client certificates free of charge for Internet Explorer 4.0 users. These can be obtained from the VeriSign web site at
http://digitalid.verisign.com/class1MS.htm.
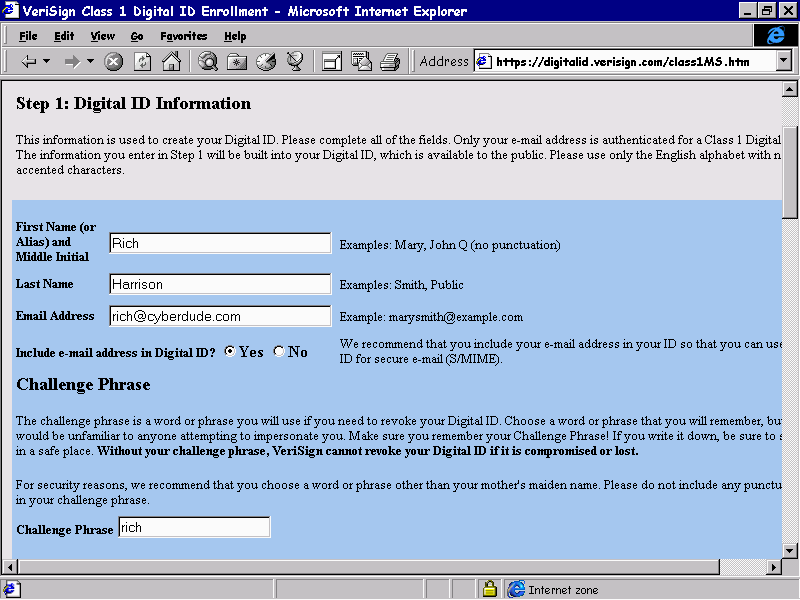
To create a client certificate, we will be required to provide our:
On submission, private key information is stored on our computer and any public information is sent to Verisign.
Once the details have been submitted, a confirmation screen is received informing us to expect an email message with further details for installing the digital certificate.
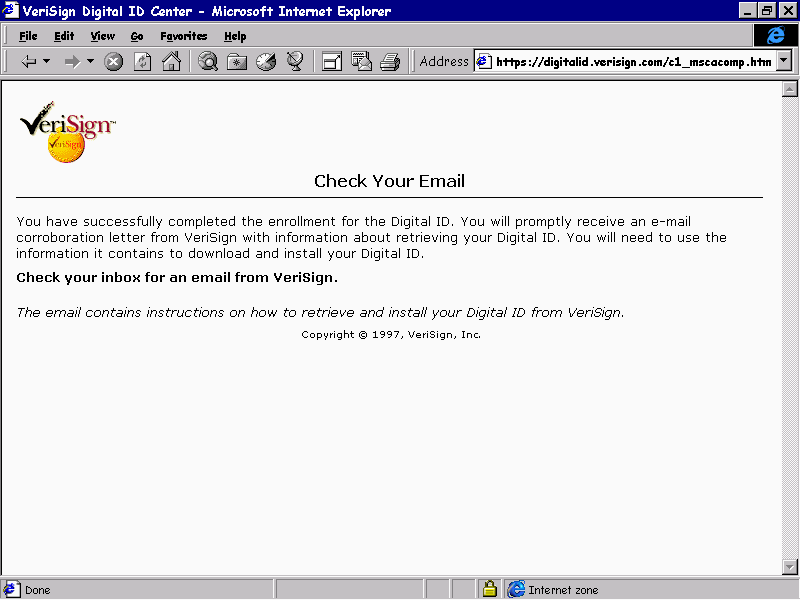
In our example, the following email message was received.
To: rich@cyberdude.com
From: VeriSign Digital ID Center <onlineca@verisign.com>
Subject: Trial Class 1 VeriSign Digital ID
Reply-To: ID-Center@verisign.com
Errors-To: onlineca-errors@verisign.com
Sender: ID-Center@verisign.com
MIME-Version: 1.0
Content-Type: text/plain; charset=us-ascii
Content-Transfer-Encoding: 7bit

QUICK INSTALLATION INSTRUCTIONS
-------------------------------

To assure that someone else cannot obtain a Digital ID that contains your
name and e-mail address, you must retrieve your Digital ID from
VeriSign's secure web site using a unique Personal Identification
Number (PIN).

Be sure to follow these steps using the same computer you used to
begin the process.

Step 1: Copy your Digital ID PIN number.
Your Digital ID PIN is: 99253a26b15a77dd2a9fd0346062cddf

Step 2: Go to VeriSign's secure Digital ID Center at
https://digitalid.verisign.com/mspickup.htm

Step 3: Paste (or enter) your Digital ID personal identification
number (PIN), then select the SUBMIT button to install
your Digital ID.
That's all there is to it!
So if we follow the instructions in the email message, our personal digital certificate is installed into our Internet Explorer configuration. This involves navigating to https://digitalid.verisign.com/mspickup.htm and entering the Personal Identification Number (PIN) specified in the email message.
The digital certificate that is to be received is related to the private key information that was originally generated and stored on the computer – thus the certificate retrieval procedure must be undertaken on the same machine and with the same logged on user.
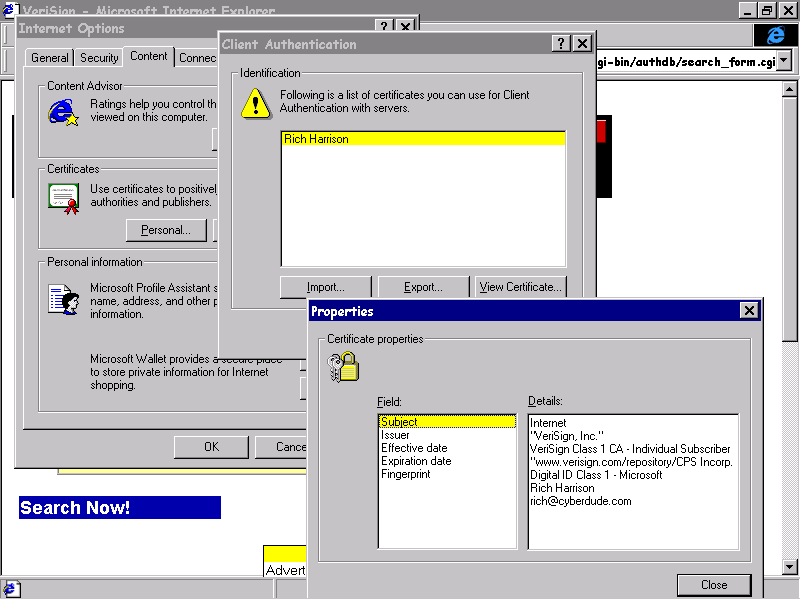
Now we can inspect the browser's personal certificates by selecting Internet Options from the View menu, opening the Content tab, and clicking the Personal button. Here we can see that the client certificate has been successfully installed. When we access a site that requires client certificates, Internet Explorer will present the user with a list of installed personal certificates—the user can then select the one that they wish to be submitted to the Web server.
