The first and most important point is that the debugger is not a tool to be used only after the software is complete; good use of the debugger should be integrated into the development process. Typically, primers which introduce the debugger provide you with code which is broken and walk you through the steps of finding the bug. While we'll do that in a moment, let's start by using the debugger, not to find a bug, but to understand a complex bit of code.
The code we're going to look at for this example is the implementation of a linked list. This creates enormous confusion for novice programmers; until they "get" the idea of how a linked list works, it is difficult to understand what is going on (see the discussion of linked lists in the section on data structures in Chapter 6).
A simple object-oriented implementation of a singly linked list will consist of a series of nodes, each node containing a pointer to the object to be held in the list and a pointer to the next node, if any.
The TopOfListNode has a special job. It does not contain data, but it does point to the next node in the list. The EndOfListNode also has a special job, it is a sentry of the end of the list and also does not contain data, but it does not have another node to point to either. The job of the EndOfListNode becomes critical when nodes are added to the list. The class diagram is straightforward:
Every linked list has one TopOfListNode. When the list is created, that TopOfListNode points to the EndOfListNode, and the list is empty:
When it is time to insert data, the data is handed to the TopOfListNode. The TopOfListNode always does the same thing — it passes the data to whatever node is pointed to by its pNextNode pointer, calling Insert() on that node. Then it sets its own pNextNode pointer to point to the result of that operation.
In the case of the empty list, it will pass the new data to the EndOfListNode. The EndOfListNode always does the same thing when it is given data to insert — it creates a new DataNode and returns that pointer to whomever called it. In this first use of the list, this will be the TopOfListNode, thus the TopOfListNode has its pNextNode pointer set to point to the new DataNode The parameters to the DataNode constructor are the pointer to the data and a pointer to the EndOfListNode itself.
The DataNode constructor initializes its pData pointer to the new data and its pNextNode pointer to the second parameter (in this case the EndOfListNode).
Thus, adding the first data item is easy. You pass the data to the TopOfListNode, which passes it to the EndOfListNode. This creates a new node and tells that node to point to the EndOfListNode. The return value to the TopOfListNode is the new node, and thus the new node is inserted.
When the next item of data is inserted into the list, the TopOfListNode, as usual, passes it to the node that its pNextNode pointer points to. In this case, it passes it to the DataNode. The DataNode's Insert() method tells its data to compare itself with the new data, and if the new data is less than or the same (defined by the data object itself!) then the new node must be inserted before this node. Thus, a new DataNode is created and told to point to the existing DataNode as the next node in the list. A pointer to the new node is in turn passed back to the TopOfListNode:
Said in words, this explanation is rather complex. The code is also difficult to grasp at first reading, but if you put the code into a debugger, then the operation becomes much easier to understand. The code is listed below:
#include <iostream.h>

enum { IS_SMALLER, IS_LARGER, IS_EQUAL };

   class ValueObject
   {
   public:
       ValueObject(int theVal):mValue(theVal){}
       ~ValueObject(){}

       int Compare(const ValueObject &);
       void Display() { cout << mValue << endl; }

   private:
       int mValue;
   };

   int ValueObject::Compare(const ValueObject & rhs)
   {
       if (mValue < rhs.mValue)
           return IS_SMALLER;

       if (mValue > rhs.mValue)
           return IS_LARGER;

       return IS_EQUAL;
   }

   // forward declarations

   class Node;
   class TopOfListNode;
   class EndOfListNode;
   class DataNode;

   class Node
   {
   public:
       Node(){}
       virtual ~Node(){}
       virtual Node * Insert(ValueObject * theData)=0;
       virtual void Display() = 0;
   private:
   };

   class DataNode: public Node
   {
   public:
       DataNode(ValueObject * theData, Node * pNext);
       ~DataNode(){ delete pNextNode; delete pData; }
       virtual Node * Insert(ValueObject * theData);
       virtual void Display() { pData->Display(); pNextNode->Display(); }
   private:
           ValueObject * pData;
           Node * pNextNode;
   };

   DataNode::DataNode(ValueObject * theData, Node * pNext):
   pData(theData),pNextNode(pNext)
   {
   }

   Node * DataNode::Insert(ValueObject * theData)
   {
      int result = pData->Compare(*theData);

      Node * pNode;

      if ( result == IS_LARGER)
      {
         pNode = new DataNode(theData, this);
      }
      else
      {
         pNextNode = pNextNode->Insert(theData);
         pNode = this;
      }

      return pNode;
   }

   class EndOfListNode : public Node
   {
   public:

       EndOfListNode(){}
       ~EndOfListNode(){}
       virtual Node * Insert(ValueObject * theData);
       virtual void Display() { }
   private:
   };

   Node * EndOfListNode::Insert(ValueObject * theData)

   {
       Node * dataNode = new DataNode(theData, this);
       return dataNode;
   }

   class TopOfListNode : public Node
   {
   public:
       TopOfListNode();
       ~TopOfListNode() { delete pNextNode; }
       virtual Node * Insert(ValueObject * theData);
       virtual void Display() { pNextNode->Display(); }

   private:
       Node * pNextNode;

   };

   TopOfListNode::TopOfListNode():
   pNextNode ( new EndOfListNode )
   {
   }

   Node * TopOfListNode::Insert(ValueObject * theData)
   {
       pNextNode = pNextNode->Insert(theData);
       return this;
   }

   class LinkedList
   {
   public:
       LinkedList();
       ~LinkedList() { delete pHeadNode; }
       void Insert(ValueObject * theData);
       void DisplayList() { pHeadNode->Display(); }
   private:
       TopOfListNode * pHeadNode;
   };

   LinkedList::LinkedList():
   pHeadNode( new TopOfListNode )
   {
   }

   void LinkedList::Insert(ValueObject * pData)
   {
       pHeadNode->Insert(pData);
   }

   int main()
   {
       ValueObject * pData;
       int testValue;
       LinkedList theLinkedList;
       for (;;)
       {
           cout << "Please enter a value to add to the list (0 to quit): ";
           cin >> testValue;
           if (!testValue)
               break;
           pData = new ValueObject(testValue);
           theLinkedList.Insert(pData);
       }

       theLinkedList.DisplayList();
       return 0;  // theLinkedList falls out of scope and is destroyed!
   }
This program, SinglyLinkedList.cpp is shipped as a single file (with the header information in with the implementation) to simplify this example. It is designed to be run as a console application — that is, it uses standard input and output and is not a Windows application.
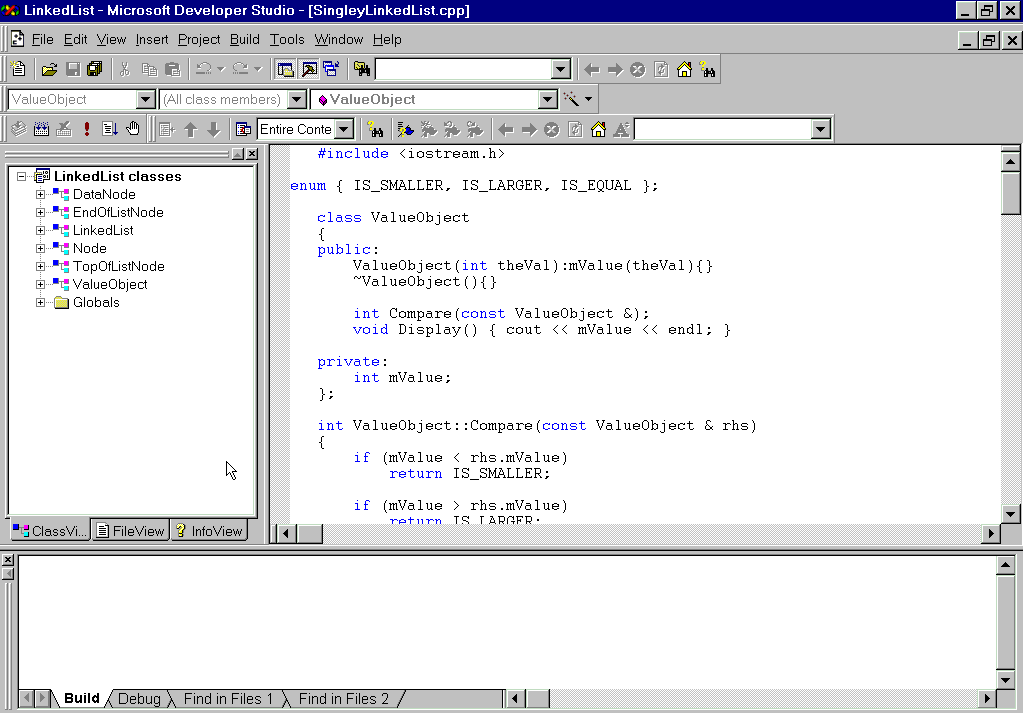
To begin, create a console application project, type in the code (or download the code from the Wrox Press website: http://www.wrox.com). Compile and link it. Your window should look more or less like this:

Execute the program to by pressing either Ctrl+F5 or the Execute Program button:

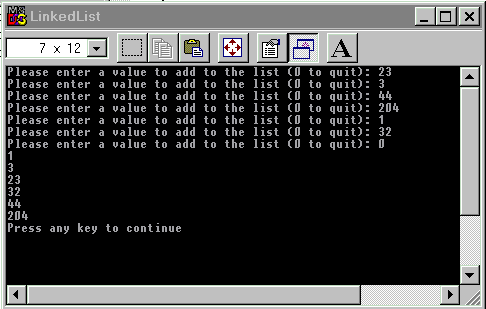
This will cause the program to begin. Interact with the program a couple of times to get a sense of what it is like:
We're going to explore exactly how the linked list works using the debugger. One of the most powerful debugger options is the breakpoint. This simply instructs the debugger to run the program right up to the debug point, and then to stop. Once you stop, it is possible to step into your function calls, which causes the debugger to follow the thread of execution into and through each function call. At times you won't want to plunge into a particular function, so instead you can step over that call, which causes the debugger to run until the next line in your current function.
I'll be using the Microsoft debugger with Visual C++ for this example, and all of the screenshots will reflect this. Other debuggers will display things a bit differently, but the ideas will be the same. If you find yourself in code which isn't yours (or worse, if you've not installed the Microsoft libraries, if you find yourself in assembler!) then just press Step Out (Shift+F11) to get back to your code.
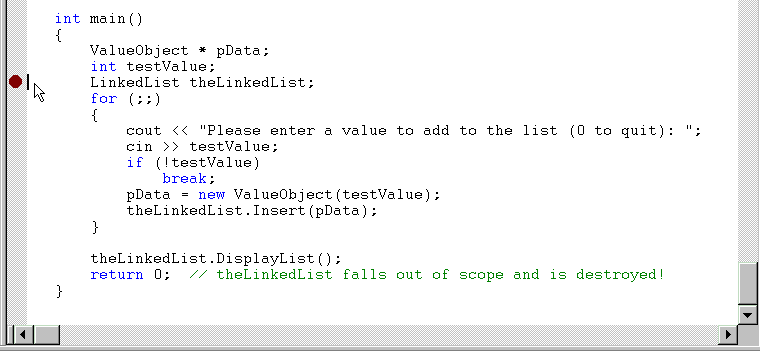
To get started, you'll want to see the creation of the linked list itself. The third line of main() is where the linked list is created, so put a breakpoint there. Place the cursor in this line and press the Insert/Remove Breakpoint button (or alternatively, press F9):
{bmp 0711.bmp}
You should see a red dot in the margin of the line with a breakpoint, and your code window should look like this:
Press the Go (or F5) to start the debugger running the program:

The program should run uninterrupted until the line in which you placed the breakpoint:
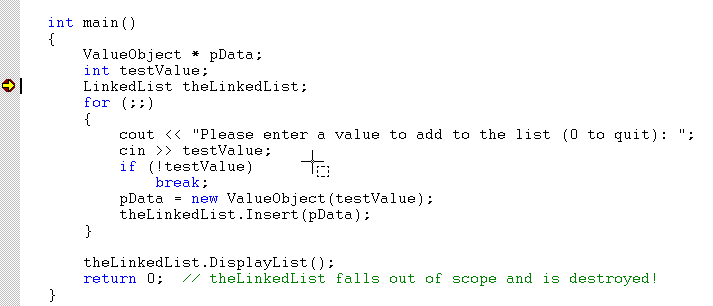
The yellow arrow within the red dot now indicates that the debugger has stopped at the line you've requested. Before you step into the code, take a look around. You should find that you have a number of useful windows. If not, you can open them from the Debug toolbar.
If you can't see the Debug toolbar, you should go to Tools/Customize and select the Toolbars tab. Check the box against Debug and close the dialog.
The first and most immediately useful window is the variables window:
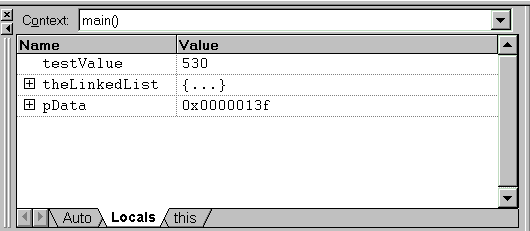
There are a couple things you should notice about this window. First, this is a tabbed window, with three tabs visible, Auto, Locals and this. Locals is the default and it displays the local variables. At the moment there are three local variables. pData is the pointer to a ValueObject. Like testValue, it is uninitialized, and thus has whatever garbage happened to be in memory. theLinkedList is the locally defined linked list variable. Note the + sign next to these variables. You can "open" a variable to see its internal structure. Expanding the plus sign next to theLinkedList at the moment won't do much good, as the list hasn't been created.
Press the Step Into button (or F11):

This should take you to the constructor for a linked list:

You can see that the constructor creates a new instance of TopOfListNode. If you press F11 again, you'll end up stepping into the code for the keyword new, which you are probably not interested in at the moment — whenever something like this happens, just use Step Out (or Shift+F11) to get out of the function and continue on:

The next time you press F11, you should step into the code for the constructor of TopOfListNode. Of course, since TopOfListNode is a Node object, you'll first step into the constructor for the base class.
TopOfListNode's constructor creates a new EndOfListNode. Keep stepping through the code until you are back into main() again, and by this time, you should have created both the TopOfListNode and EndOfListNode .
The new object, theLinkedList has now been initialized. If you press the + symbol next to theLinkedList in the variables window, its structure will be revealed. You see that theLinkedList has a TopOfListNode, which is comprised of two components, Node and pNextNode. Node is its base class. pNextNode has, in turn, a member variable, which is of type EndOfListNode, which is just what we'd expect:
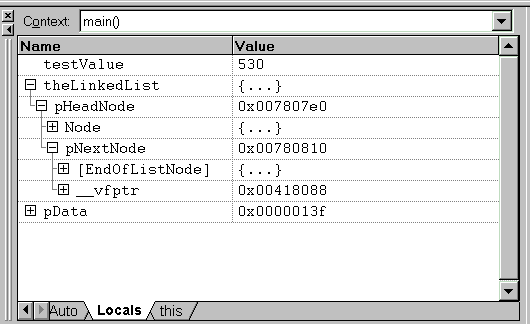
Continue stepping along and you will pass the line which calls cin. This will force you to enter a value in a console window. Enter the value 18. If you look in the variables window now, you will see that the variable testValue has been set to this value. After you've typed in this number, you will return to the debugger and can continue stepping. Step to the line which says:
pData = new ValueObject(testValue);
A ValueObject will be created with this integer, and the next line will insert it into theLinkedList:
theLinkedList.Insert(pData);
Step into this call to Insert():

The debugger immediately jumps to the LinkedList's Insert() method, where we see that the effect of this call is only to call Insert() on the LinkedList's pHeadNode pointer. Step into the code again, and you will end up in the TopOfListNode's Insert() method, which does nothing but call Insert() on its pNextNode member. Press Step Into again and we step into the EndOfListNode's Insert() method (which makes sense, if you think about it, because the TopOfListNode is pointing to the EndOfListNode):

This creates a DataNode to hold the ValueObject, and passes the EndOfListNode node as a parameter. Step into the constructor:

We see that the new node is created, holding the data and pointing to the tail of the list
The new node is pointing to the EndOfListNode, and the head node is pointing to this node as well. Press Step Out or Shift+F11.

We see that a pointer to the new node will be returned from the EndOfListNode::Insert() method. Clicking Step Out once more reveals that the pointer returned is assigned to TopOfListNode's pNextNode.

This breaks the connection from TopOfListNode to EndOfListNode and replaces it with a connection from TopOfListNode to dataNode:
The insertion is now complete. Continue stepping through the code and you will return to LinkedList::Insert() and then back to main(). You will then be prompted to enter another value, and you can watch as the new node is added into the list.