Let's now look at a concrete example of the power of DHTML, one where the need for code reusability arises and becomes a central issue. We'll then look at how scriptlets and scriptlet programming can start to solve our problems.
A few lines above, we stated that, using DHTML, you can have, say, bitmapped anchors that behave like buttons when pressed and released. Furthermore, the bitmap might be replaced to denote a 'hot' or disabled state—behaving exactly as the flat toolbars in many Windows 95 programs do.
How can we do this? Let's say you're using a bitmap as an anchor to reference something. No matter, at this point, whether it is a link to a paragraph inside the same page, to a remote URL or to another HTML page. What's important is that now you have a bitmap that represents a clickable object. In fact, when you move the mouse over it, the mouse pointer changes to the usual pointing-hand.
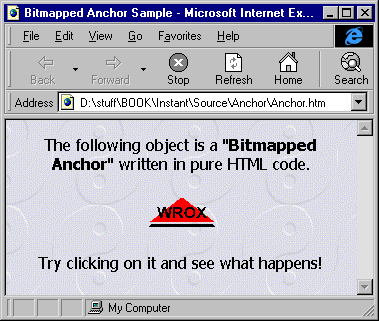
Suppose you are unsatisfied with it and want something more. At the moment, you have a simple clickable bitmap that sends you on to another page, as in the following picture.
You can download or run this page from our Web site at:
http://rapid.wrox.uk.com/books/138X

Fig. 4.1 – A simple bitmapped anchor.
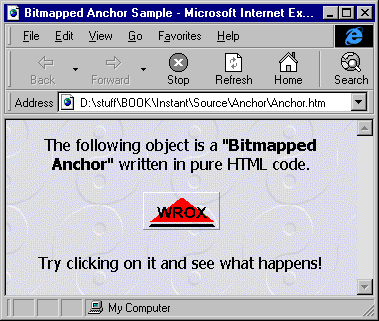
If you run the page and move the mouse over the WROX logo, you get something like the next picture, which is not standard behavior for a simple bitmap anchor: the picture raises itself, like a toolbar button:
Place here fig04_01a.bmp
The practical effect is the same as the usual underlined hyperlink, but a bitmap can be far more expressive than just a word. However, while the classic hyperlink is recognized all over the world, and is universally known as a clickable string, our bitmapped anchor is not. Or rather, not yet! For the moment, though, we just want to enhance its interaction with the user, making it a bit more responsive. The model is the flat buttons of the new Windows toolbars: they seem to be static bitmaps, but animate and react when the mouse goes over them.
A similar effect can be obtained even without DHTML. However, by using DHTML we can prepare it to be a scriptlet, reusable as a component in any other HTML page with a single line of code.
DHTML exposes a number of events, and bubbles them up to any identifiable object. So if you want to catch a system notification, such as onclick, onmouseup, onmouseover and the like, when it occurs over a given object within the page, then you first have to give that object with a unique ID. Such IDs may be numbers as well as descriptive strings. Usually, they are made up of a single word, like a Visual Basic control's name. Let's take a look at a small portion of the HTML code for the page seen above:
<html>
<head>
<title>Bitmapped Anchor Sample</title>
</head>
<body background="Tao.gif">
<p align="center">
<font face="Tahoma">
The following object is a "<strong>Bitmapped Anchor</strong>" written
in pure HTML code.
</font>
</p>
<p align="center">
<a href="anchor.htm">
<img id="anchor" src="wrox1.gif" border="0">
</a>
</p>
<p align="center">
<font face="Tahoma">
Try clicking on it and see what happens!
</font>
</p>
</body>
</html>
In the sample, the page simply links to itself, (provided the page is called anchor.htm, but this is not at all a problem: just have the href property point elsewhere! The most interesting part of this page is the following lines:
<a href="anchor.htm">
<img id="anchor" src="wrox1.gif" border="0">
</a>
We defined an anchor around an image. The image is inserted using the <IMG> tag, as usual. We assigned this image an ID, in this case anchor. All over the page, this image can be referred to by means of it. But what would need to refer to this image, or any other element in the page? Elementary: the scripts!
Scripting comes into play when it's time to respond to events. Of course, this is exactly what we want our anchor to do. Wouldn't it be nice if the anchor itself was capable of reacting when the mouse passes over it, or when it gets pressed or released?
Isn't it true that this way such an anchor would begin to resemble to a real—and above all, custom—object, rather than an ordinary HTML hyperlink?
But there is more! Let's expand our example:
<html>
<head>
<title>Bitmapped Anchor Sample</title>
</head>
<script language="vbscript" for="anchor" event="onmousedown">
anchor.src="wrox_down.gif"
</script>
<script language="vbscript" for="anchor" event="onmouseup">
anchor.src="wrox_up.gif"
</script>
<script language="vbscript" for="anchor" event="onmouseout">
anchor.src="wrox_flat.gif"
</script>
<script language="vbscript" for="anchor" event="onmouseover">
anchor.src="wrox_up.gif"
</script>
<body background="Tao.gif">
<p align="center">
<font face="Tahoma">
The following object is a "<strong>Bitmapped Anchor</strong>" written
in pure HTML code.
</font>
</p>
<p align="center">
<a href="anchor.htm">
<img id="anchor" src="wrox_flat.gif" border="0">
</a>
</p>
<p align="center">
<font face="Tahoma">Try clicking on it and see what happens!
</font>
</p>
</body>
</html>We've only added a few lines to the previous HTML page, all of which relate to event handling. We're basically interested in four different events:
onmousedownonmouseuponmouseoveronmouseoutWe need to trace when the mouse is pressed or released over the element and when it enters or leaves the same area. All these events have been defined in the DHTML object model and are bubbled up from the element that has the event to its parent objects.
As you can see, we don't need to do much responding to the events. To animate the anchor, all that we need to do is replace its bitmap as it responds to events .

Fig. 4.2 – The various GIF images used for the anchor
The above picture shows four images we could use to simulate an animated push button. The second picture is the button's normal state, the third is its depressed state and the fourth is the 'raised' button you get when the mouse pointer is over the button. The first bitmap is useless at the moment, since it renders the anchor in a disabled state. (The reasons for this will soon become clear, so stay tuned!)
The picture presents the bitmaps side by side as if they form a single image. This happens sometimes in Windows programming through a common control called 'imagelist'. Such a component allows you to pack multiple little bitmaps into a single file. However, here we used such a notation only for ease of presentation. DHTML doesn't allow us to access portions of a single image like we could using Win32. Thus, in the code the bitmaps are distinct files.
<script language="vbscript" for="anchor" event="onmouseover">
anchor.src="wrox_up.gif"
</script>
The standard look of the anchor is given by the file wrox_flat.gif, which is transparent with respect to white—that is, no white pixels get drawn. When the mouse is moving over the anchor, IE4 fires the event onmouseover, which is handled by the code above. The for and event clauses link the code to the occurrence of the given event on the given element. The element is identified via its ID.
Changing the image is very easy, and is accomplished by:
anchor.src="wrox_up.gif"
The src property contains the name of the image to display for the <IMG> element. Each time it gets modified by the user, it causes an immediate refresh of the page. The effect is visible in the next figure.

Fig. 4.3 – The anchor's bitmap changes when the mouse is over the image.
With a little graphic work, you can simulate a pop-out frame around the image. Apparently, we simply draw a frame directly on the window's device context. Instead, we replace the bitmap with an identical one that includes the frame.
To get transparency, use GIF files, and set the transparency option when creating them. As you can see, the files we're using have a common background color. That color is set as the transparent color for the image. This means that when drawing the image IE4 will ignore all the pixels of that color. Consequently, any area in the image with such a color will result transparent with respect to the page background!
When the mouse exits, we're notified of an onmouseout event. The only thing that changes is the name of the bitmap. In this case, we've simply restored the original image.
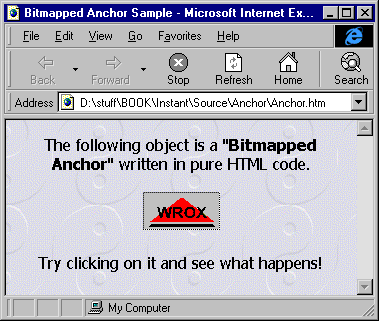
A mouse click is composed of two distinct events: a mouse-down and a mouse-up. Sometimes you just want to know about the global event (the click), but here we need more detailed information. We will keep on replacing bitmaps but we do need to distinguish between onmousedown and onmouseup. In the first case, we want such an effect to produce:

Fig. 4.4 – The anchor's bitmap changes when the mouse is clicked down.
Responding to the mouse-up notification we don't restore the original bitmap, but the raised one, because the mouse is still over the element.