Whenever the Agent server is active, you will see the Agent icon on the Taskbarís icon tray:

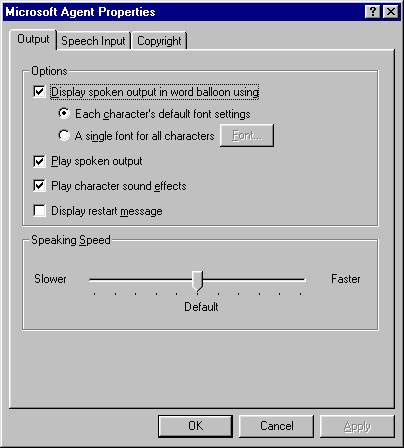
Double-clicking on the Agent icon in the icon tray displays the Microsoft Agent Properties dialog box, as shown in Figure 14.4. By setting properties in this dialog box, you can specify how the character will act:
Note that these adjustments are global and will affect all characters.
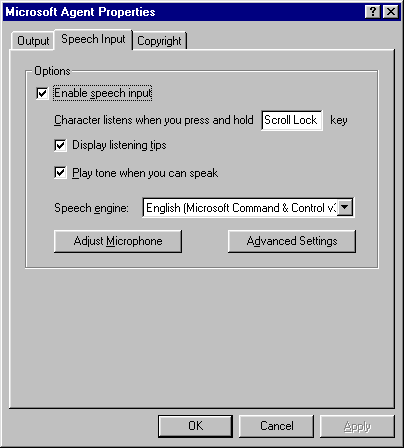
The Speech Input tab, shown in Figure 14.5, contains all the properties related to speech input. If you didnít install the Microsoft Command and Control speech engine, these properties will be disabled.

Figure 14.4: The Output tab of the Microsoft Agent Properties dialog box

Figure 14.5: The Speech Input tab of the Microsoft Agent Properties dialog box
By default, the character will only hear commands when the user presses and holds the Scroll Lock key. You can change this value to another key or set it to None, which means that the character is continually listening for commands. Other properties let you display a listening tip, play a tone when the character is waiting for speech input, and select the speech engine you wish to use. A listening tip visually cues the user to when the character is listening to speech input, like this:

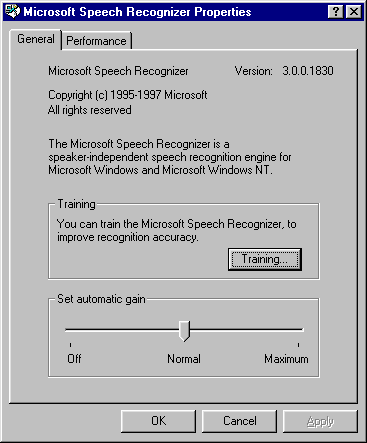
You can start the Microphone Wizard from the Speech Input tab by clicking the Adjust Microphone button. You can also click the Advanced Settings button to reach the Microsoft Speech Recognizer Properties dialog box, as shown in Figure 14.6.

Figure 14.6: The Microsoft Speech Recognizer Properties dialog box
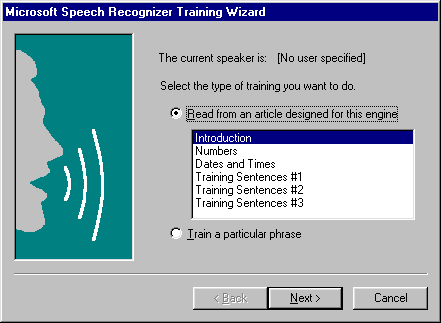
From here, you can click the Training button to help train your computer to better understand your speech. The Training Wizard, shown in Figure 14.7, will ask you to read from a variety of documents that will allow the speech recognition engine to analyze your speech and try to improve the performance of the speech engine.

Figure 14.7: The Microsoft Speech Recognizer Training Wizard