Installing the software is merely a matter of running each of the file-installation programs. Each of the software packages is saved in a self-installing .EXE file. You should install the services in the order they are presented here.
TIP: Close before installing: None of the Microsoft Agent installation programs require you to reboot your system. However, you should exit any programs just as a precaution before installing any software.
Run the MSAGENT.EXE program to install the basic Microsoft Agent services. The program will begin by asking you if you want to install Microsoft Agent 1.5. Click on the Yes button. Then the End User License Agreement will be displayed. Click Yes to accept the license. Finally, the installation program will run, extracting and installing the files necessary to use Microsoft Agent.
Run the CGRAM.EXE program to install the Lernout & Hauspie TruVoice text-to-speech engine. The program will ask you if you want to install this software. Click the Yes button. Then the End User License Agreement will be displayed. Click the Yes button, and the installation program will install the file for the text-to-speech engine.
Run the ACTCNC.EXE program to install the Microsoft Command and Control speech engine. The program will show you the End User License Agreement. As with the other installation programs, after you accept the terms of the license, the installation will proceed to install the command and control files.
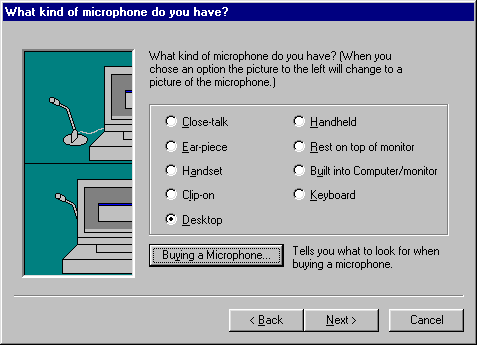
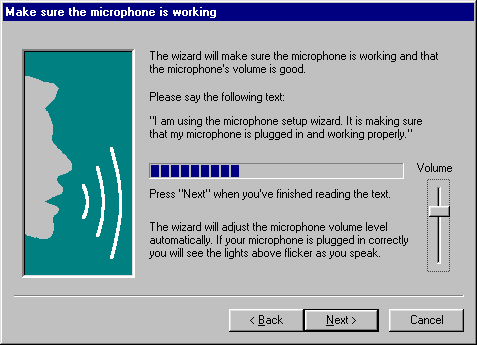
After the files have been installed, the Microphone Wizard will help you configure the microphone. First, you choose the type of microphone, as shown in Figure 14.2. Click Next a few times, and you will be asked to read a sentence into the microphone, as shown in Figure 14.3. The system will attempt to adjust the microphone levels for optimal speech recognition. The wizard may prompt you to read the sentence several times while optimizing the settings. Just follow the instructions until the wizard completes.

Figure 14.2: Selecting the type of microphone

Figure 14.3: Making sure that themicrophone is working
TIP: Step up to the mike: The closer the microphone is to your mouth, the more accurately the speech recognition engine will work. The close proximity to your mouth means that the microphone will pick up less background noise. The best type of microphone to use is a close-talk microphone, where the microphone is placed just in front of your mouth. If you donít have a close-talk microphone, then try to keep the room as quiet as possible.
If you want to change the microphone settings later, you can run the wizard again. Double-click on the Microsoft Agent icon in the Taskbarís system tray and select the Speech Input tab on the Microsoft Agent Properties dialog box. Click the Adjust Microphone button to begin working with the wizard again. Iíll talk more about the Microsoft Agent server properties you can adjust after finishing up with the installation steps.
The Microsoft Agent Character Editor is an optional component that you only need if you plan to create your own characters. To install it, run the ACE.EXE program. It will ask you if you wish to install the software. If you click Yes, it will then ask if you agree with the End User License Agreement. Clicking Yes again will install the software.
You only need the Microsoft Agent Linguistic Information Sound Editing Tool (LISET) if you want to optimize the Agentís speech. To install LISET, simply run LISET .EXE and reply Yes when it asks if you want to install the software. Click Yes again if you agree to the licensing terms. Then the software will be expanded and installed onto your system.