The HTML file for this web page consists of some simple text and graphics and an HTML Layout control. In this page, you will limit the active region of the HTML Layout control instead of using the entire page. The interactive action of the web page involves only the product selection portion, not the informational text and other images, such as the web page banner.
Create a folder named bytecomp in a convenient location on your computer. This web page uses several images that can be found on the companion CD, in the project4\bytecomp folder. Copy all the gif files from this folder on the companion CD into the bytecomp folder that you just created.
Start a new HTML file in ActiveX Control Pad. Change the title of the page in the default HTML to the company name ByteComp, Inc., and add the BGCOLOR="WHITE" attribute to the <BODY> tag. Your HTML code should look like what you see at the top of page 371:
<HTML>
<HEAD>
<TITLE>ByteComp, Inc.</TITLE>
</HEAD>
<BODY BGCOLOR="WHITE">

</BODY>
</HTML> Add the following code to the body section of your web page to place one of the image files as a banner at the top:
<CENTER>
<IMG SRC="banner.gif" ALT="ByteComp Order Form"
HEIGHT=100 WIDTH=500><P> The HTML Layout control will be contained within a form. Add the form to your page by adding the following code after the banner in the body section:
<FORM NAME="frmBytes">

</FORM>
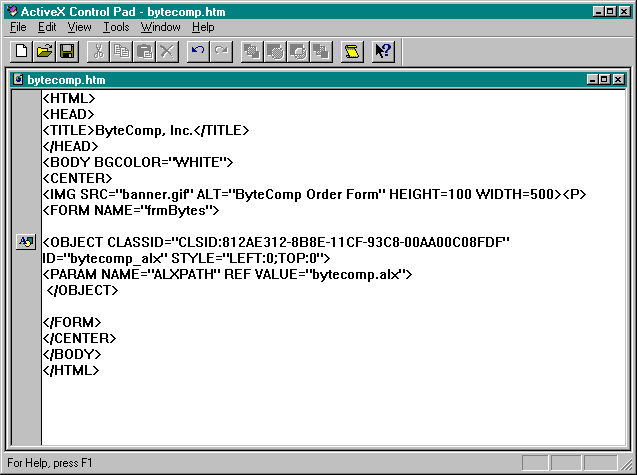
</CENTER> Place your cursor between the <FORM></FORM> tags. Add an HTML Layout control to your page by selecting Insert HTML Layout from the Edit menu. In the new HTML Layout dialog box, navigate to your bytecomp folder, name the file bytecomp.alx, and click the Open button. A message box should be displayed, indicating that the file does not exist and asking whether you want to create it. Click the Yes button. This action creates the HTML layout file, bytecomp.alx, in your bytecomp folder and returns you to the HTML Source Editor. The HTML Layout control is inserted between the <FORM></FORM> tags. Delete the absolute path from the ALXPATH property. This action will cause the HTML Layout control to search the current folder for the alx file (instead of searching a specific folder), which will make your web page more portable. Note that you can use any valid URL to specify the location of the alx file. Your HTML file is now complete, and you can save it as bytecomp.htm in your bytecomp folder. Figure 9-21 (page 372) shows the code for bytecomp.htm in the HTML Source Editor.

Figure 9-21.
The bytecomp.htm file in the HTML Source Editor.