Beyond simple style enhancements to HTML documents lies re-organising how the existing document parts are laid in the browser window. Changing the layout of an HTML document comes down to manipulating the CSS-P style attributes of absolutely and relatively positioned elements.
The important style properties for this class of effect are:
The position style property is absolutely critical. If it is not set to 'relative' or 'absolute', then the element that the style applies to will not be movable at all. Setting the position property 'frees' the element for movement, otherwise it is 'embedded' in the rest of the document.
The idea of 2.5-D animation pervades this kind of Dynamic HTML. For complex movement effects, the z-order must be carefully planned for all the movable elements in the page. However, for simple effects this is not usually necessary.
A further restriction on moving HTML around is that of coordinate systems: there must be some way to tell the difference between 'here' and 'there'. You need to decide at the start whether to fit in with the browser's layout of the document and use percentage measures, or whether to go straight to specific pixel-by-pixel measurements. If the user can resize the window displaying the document, or if the document must work for browsers running at many different screen resolutions, then choose percentage measures. If you want to do highly accurate movement, then you should create a non-resizable browser window using window.open() and perform all your movement within that window on a pixel-by-pixel basis.
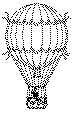
Movement of HTML elements can be expressed in several different ways. In the following examples, balloon.gif looks like this:
Of course, movement is not restricted to images—any kind of content can be used, from simple text to complex chunks of HTML markup.
User input isn't always required before HTML elements can move around. Via JavaScript, motion can be had automatically. This first example illustrates:
<HTML><HEAD>
<STYLE>
#zephyr { position: absolute; left: 0; top: 0; }
</STYLE>
<SCRIPT>
function drift()
{
  var z = document.all.zephyr.style;
  if ( z.pixelTop < 200 && z.pixelLeft == 0 ) z.pixelTop +=5;
  else if ( z.pixelLeft < 200 && z.pixelTop == 200 ) z.pixelLeft +=5;
  else if ( z.pixelTop <= 200 && z.pixelTop > 0 ) z.pixelTop -=5;
  else if ( z.pixelLeft <= 200 && z.pixelLeft > 0) z.pixelLeft -= 5;
}
</SCRIPT></HEAD>
<BODY ONLOAD="setInterval('drift()',1)">
<DIV ID="zephyr">
  <IMG SRC="balloon.gif"><BR>
  Out, out and about!
</DIV>
</BODY></HTML>
When viewed in Internet Explorer 4.0, this example displays the balloon moving in a square with diagonally opposite corners at pixel coordinates (0,0) and (200,200). There are several points to note here:
setInterval() delay is one millisecond; if the computer could perform at that pace, the balloon would travel around the square about 7 times a second, which it clearly does not.setInterval() timing mechanism with a while() or for() loop inside the drift() function, it won't work, because JavaScript will always be in charge.20px' is a valid positional value, but that format is not as easy to work with as a plain number.To make the example work in Netscape Navigator 4.0, replace the main function with this alternative:
function drift()
{
  var z = document.layers[0];
  if ( z.top < 200 && z.left == 0 ) z.top +=5;
  else if ( z.left < 200 && z.top == 200 ) z.left +=5;
  else if ( z.top <= 200 && z.top > 0 ) z.top -=5;
  else if ( z.left <= 200 && z.left > 0) z.left -= 5;
}
This example shows very typical differences between the two browsers. One of the detection techniques described in Chapter 2 could be used to make both browsers workable from the one HTML document.
This next very similar example shows how z-order can be used to plan overlapping animated areas:
<HTML><HEAD>
<STYLE>
#zephyr { position: absolute; left: 0; top: 0; z-index: 1; background-color: yellow;}
#sirocco { position: absolute; left: 150; top: 150; z-index: 2; }
</STYLE>
<SCRIPT>
function drift()
{
  var z = document.all.zephyr.style;

  if ( z.pixelLeft == 0 && z.pixelTop == 0 )
    z.zIndex = ( z.zIndex == 1 ) ? 3 : 1;

  if ( z.pixelTop < 200 && z.pixelLeft == 0 ) z.pixelTop +=5;
  else if ( z.pixelLeft < 200 && z.pixelTop == 200 ) z.pixelLeft +=5;
  else if ( z.pixelTop <= 200 && z.pixelTop > 0 ) z.pixelTop -=5;
  else if ( z.pixelLeft <= 200 && z.pixelLeft > 0) z.pixelLeft -= 5;

  z = document.all.sirocco.style;
  if ( z.pixelTop < 250 && z.pixelLeft == 150 ) z.pixelTop +=5;
  else if ( z.pixelLeft < 250 && z.pixelTop == 250 ) z.pixelLeft +=5;
  else if ( z.pixelTop <= 250 && z.pixelTop > 150 ) z.pixelTop -=5;
  else if ( z.pixelLeft <= 250 && z.pixelLeft > 150) z.pixelLeft -= 5;
}
</SCRIPT></HEAD>
<BODY ONLOAD="setInterval('drift()',1)">
<IMG ID="zephyr" SRC="balloon.gif"></IMG>
<DIV ID="sirocco"><IMG SRC="balloon.gif"><BR>In, in with a spin!</DIV>
</BODY></HTML>
Non-obvious in the first balloon example was the transparent nature of the balloon image. 'Black' and 'transparent' are the only colors in that example, not 'black' and 'white'. In this second example, the original image now has a z-order that switches with each pass around the square, and a solid background color. The result is that on odd-numbered passes around the square, the first image can be seen 'through' the second image, but on even-numbered occasions, the first image blocks out the second image due to its solid background color.
Rather than rely on the browser, sometimes the users want to move an HTML element around on the page themselves. This is more likely to be the case if the Web page provides puzzles or games. There is an important distinction between dragging an item from outside the browser onto a browser window (such as a file icon), and just moving an element around inside the window it belongs to. Only the latter case is discussed here, since the former leads into the complexities of operating systems.
For the latter case, the script writer needs to provide the magic—there is no direct drag-and-drop support in the browser for moving positioned HTML elements. This can be a bit confusing to understand, so an analogy may help. Suppose the user is at a picnic, and sees a biscuit they want on the grass. Their hand reaches for the biscuit, but it moves. No matter how hard they try to grab the biscuit, it moves away. Eventually the picnickers organize to box the biscuit in, revealing thousands of bored ants underneath engaged in psychological warfare against the human race. The ants are moving the biscuit in response to the user's hand movements.
Back in the browser it works almost the same, except the scriptwriter acts for the ants. When the user moves the mouse over the item to be dragged, the item moves in the mouse direction because JavaScript code underneath detected the mouse movement and moves the HTML item accordingly. The steps are:
In other words, like this (for Internet Explorer 4.0):
<HTML><HEAD>
<STYLE> #zephyr { position: absolute; left: 0; top: 0;} </STYLE>
<SCRIPT>
var primed = false;
var new_x = 0;
var new_y = 0;

function set_drag() { window.primed = !window.primed; }

function handle_move()
{
  if ( window.primed == true)
  {
    window.new_x = window.event.x;
    window.new_y = window.event.y;
    setTimeout("drag_it()",1);
  }
}

function drag_it()
{
  with ( window.document.all.zephyr.style )
  {
    pixelLeft = window.new_x - pixelWidth/2;
    pixelTop  = window.new_y - pixelHeight/2;
  }
}

</SCRIPT></HEAD>
<BODY ONMOUSEMOVE="handle_move()">
<IMG ID="zephyr" ONCLICK="set_drag()" SRC="balloon.gif"></IMG>
</BODY></HTML>
This example lets you position the balloon anywhere you wish on the page, using the mouse. This is very specific to Internet Explorer 4.0.
There are three functions in this example. set_drag() is just a switch to turn dragging on and off; in this case the onClick handler is chosen, so the user must press and release the mouse button before dragging starts, and again on finishing. handle_move() picks up all move events from the window and updates the image. It uses a separate function drag_it() in a timer, not because of the limitation that JavaScript must 'let go' before the image's position changes, but because it gives the user time to move the mouse away from the dragged item. Try collapsing drag_it()'s statements into handle_move() and see how the dragged item 'sticks' to the mouse pointer in a frustrating way.