The banner heading page,
, is loaded at the start of the application, and contains a simple animation designed to catch the user's eye. All the techniques are standard IE4 Dynamic HTML, so we wonít be spending time describing them in detail. For more information, check out our sister publication, Professional IE4 Programming (ISBN 1-861000-70-7). Here's the main section of the HTML code that creates the page:banner.htm
<DIV ID="BannerDiv" STYLE="position:absolute; left:0; top:0; width:100%">
<IMG ID="CarImg" SRC="images/wcctowcar.gif" WIDTH="134" HEIGHT="61"
STYLE="visibility:hidden; position:absolute; left:-150; top:5">
<IMG ID="CarImg2" SRC="images/wcctowcar2.gif"STYLE="visibility:hidden">
<IMG ID="HeadImg" SRC="images/wccheader.gif" WIDTH="370" HEIGHT="61"
STYLE="visibility:hidden; position:absolute; left:-520; top:5">
</DIV>
Notice the
named <DIV>
, which encloses the entire content. We're going to move a graphic from left to right when this page loads, and then fade in a slogan when it disappears off the right-hand end of the page. This means that we need to know how wide the page is in pixels. While Netscape Navigator is good enough to expose this directly as a property, IE 4 isn't.BannerDiv
What we do is simply read the
style property value of the enclosing pixelWidth
element. As the <DIV>
is positioned at the extreme left and set to <DIV>
of the page width, this returns the width of the page in pixels:100%
'the DIV holding the page contents is sized to 100% of page width, so
intWindowWidth = document.all("BannerDiv").style.pixelWidthThe Banner Page Animation
The animation consists of a series of actions:
As is usual in this kind of scenario, the timing of movement are controlled by the
method of the browser. Here's the global variables that we use to hold references and flags between each timer event, and the code that initializes them:setInterval
<SCRIPT LANGUAGE="VBScript">
'declare the global variables
Dim objMyTimer 'reference to window.setInterval timer
Dim objCar 'reference to 'old car' image
Dim objHead 'reference to Wrox Car Co banner image
Dim blnLoaded 'flag to show if images are finished loading
Dim blnSwapped 'flag to show we've swapped to the 2nd car image
Dim intWindowWidth 'width of client window
Sub window_onload()
window.status = "Welcome to the Wrox Car Company"
Set objCar = document.all("CarImg")
Set objHead = document.all("HeadImg")
blnLoaded = False 'not yet loaded
blnSwapped = False 'using first car image
'the DIV holding the page contents is sized to 100% of page width, so
intWindowWidth = document.all("BannerDiv").style.pixelWidth
'start the interval timer
objMyTimer = window.setInterval("moveImages()", 100, "VBScript")
End SubMoving the Images
Each time the
method fires an event, we run the setInterval
subroutine. This is the full code:moveImages
Sub moveImages()
If Not blnLoaded Then 'pictures not yet loaded so check again
blnLoaded = (objCar.readyState = "complete" _
And objHead.readyState = "complete")
objCar.style.visibility = "visible" 'make offscreen images visible
objHead.style.visibility = "visible"
Else
If objCar.style.pixelLeft > intWindowWidth Then 'car is at right end
window.clearInterval (objMyTimer) 'so stop timer
objCar.style.visibility = "hidden" 'and hide it
window.status = "Select a car and click 'Details' for information"
startTransition 'start to fade in the slogan image
Else
objCar.style.left = objCar.style.pixelLeft + 3 'move the images
If objHead.style.pixelLeft < 10 Then
objHead.style.left = objHead.style.pixelLeft + 3
Else
If Not blnSwapped Then 'swap to second car image (no towrope)
objCar.src = document.all("CarImg2").src
blnSwapped = True
End If
End If
End If
End If
End SubAnd here's the result part-way into the animation:

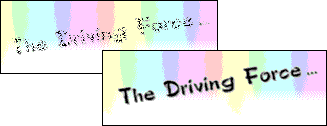
Fading In The Slogan
The slogan is faded in using a transition filter. We add the filter to our image in the HTML that creates the page. The image isnít visible when loaded, because we include the
style property:visibility:hidden
<IMG ID="Force" SRC="images/force.gif" WIDTH="200" HEIGHT="40"
STYLE="visibility:hidden; position:absolute; left:420;
top:15; filter: revealTrans(Transition=12, Duration=5)">
Once our car image has moved off-screen, our
code calls our moveImages
routine. This is the code:startTransition
Sub startTransition()
'apply transition to 'lock' the image
document.all("Force").filters(0).apply()
'make it visible, but it's still locked
document.all("Force").style.visibility = visible
'play the transition to make it appear
document.all("Force").filters(0).play()
End SubThis first 'applies' the filter that we added to the image element in the HTML (elements can have more than one filter attached to them at a time and this selects the filter we want to use). Next it makes the image visible, but because the filter has been applied this 'locks' the image, which doesnít actually appear in the page. The final step is to 'play' the filter, which makes it gradually appear.

You can learn all about IE4's animations and filters (along with all kinds of other techniques) from our sister book Professional IE4 Programming, ISBN 1-861000-70-7.