When you are satisfied with your control, it's time to build it into an
file..OCX
1. Select the
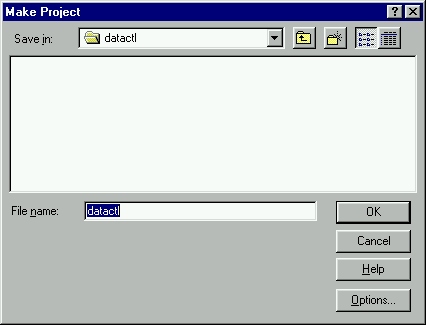
project so it gets focus. Next, select File-Make dataCtl.ocx… from the VB menu. The Make Project dialog is displayed:dataCtl.vbp
2. Keep the name dataCtl. Press the Options… button to bring up the Project Properties box:
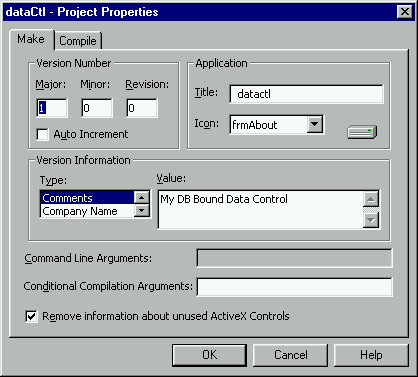
3. This is where we put the final touches on the attributes of our
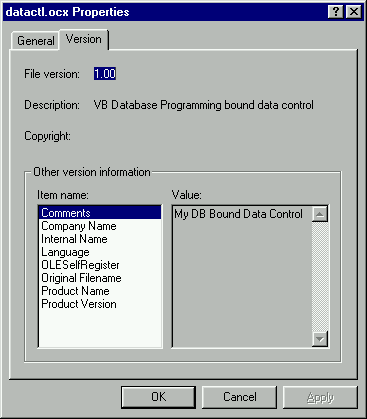
control. Since we added the disk drive icon to our frmAbout form, we will select that in the Icon drop-down box. It is also a good idea to add information for each of the Type choices in the Version Information frame. This is so a user can right click on our .OCX
file and get information on our program. When you are finished, press OK. Then press OK on the Make Project dialog box. .OCX
At this point, anything that the compiler does not understand will be shown to you. Many programmers periodically compile their control during the development phase. This is because it does a thorough job of ensuring the program is tight and well constructed. When everything is as it should be, the compiler will convert your code to a .OCX file. Nothing in the source is changed; it just creates another file, one with an .OCX extension.
Now when the user finds your
file in on the hard drive using Windows Explorer, simply right clicking brings up the control properties. These have been compiled right into the program. When you right click on your brand new .OCX
file within the File Explorer, you will be greeted with the following:dataCtl.ocx