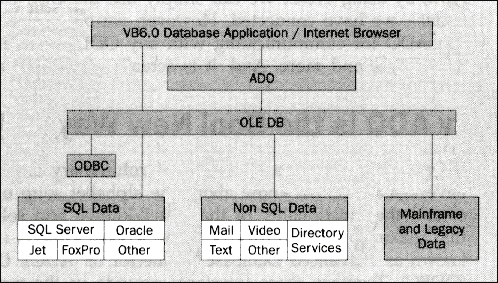
The latest technology that performs this magic is OLE DB. OLE DB is designed to provide universal access to several relational and non-relational data sources. We will communicate with OLE DB using Active Data Objects. By using ADO in conjunction with OLE DB, we can talk to Access, Oracle, SQL Server, or any other data source by simply using the ADO object model.
To the VB6.0 database programmer, ADO is the interface we need to understand. Take a look at this figure:

Notice that this object model is much 'flatter' than the previous diagram. ADO and UDA are all about simplicity.
You can see that by using ADO from either a web browser or a Visual Basic 6.0 application, we can talk to just about any data source. OLE DB handles the grunt work out of our sight to make all of this magic work. And best of all, ADO is actually easier to work with than DAO! As we mentioned, Microsoft has indicated that DAO and RDO will eventually be replaced with ADO. So it does make sense to start learning it now. OLE DB will now handle working with the standard relational data and non-relational data from just about anywhere on the planet.
Let's take a closer look at ADO. We'll begin by making sure that VB knows all about ADO.
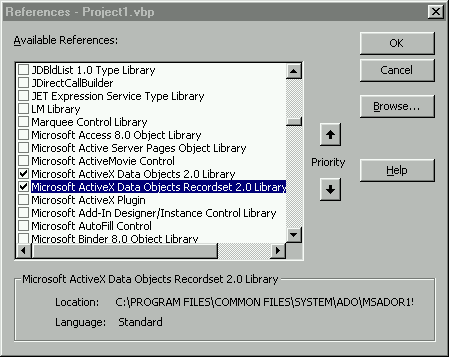
1. Start a new project called \Chapter11\prjfirstADO. Now go into the Project | References dialog and add the Microsoft ActiveX Data Objects 2.0 Library and ActiveX Data Objects Recordset 2.0 Library references to your project. Now VB 6.0 knows about the ADO components we want to use.
Then right click on your tool palette and select Components. Select the Microsoft ADO Data Control 6.0 (OLEDB):
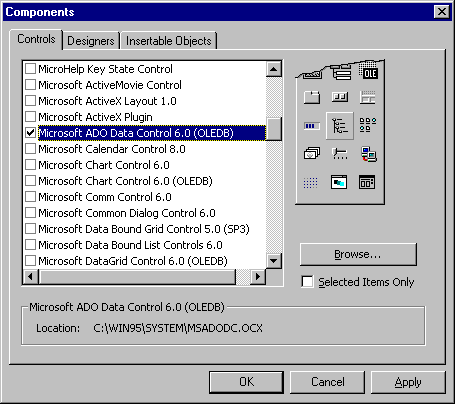
Click OK. This will add an ADO data control to your palette.
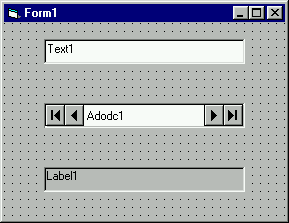
2. Name the default form in the project frmADO. Draw an ADO Data Control (ADODC) on the form. Next, draw a textbox and label as shown on the form as well. We are going to create a simple bound text box program like our first data control program. And we will use the label to show where we are in the recordset.
In order to hook up the ADODC to our Biblio.mdb database, we must first set some properties. We did this a bit earlier in the book, remember?
Right click on the ADODC and select ADODC Properties. This will bring up a Property Page dialog box for the control. The first thing we must do is tell the control some important information. Unlike the singular DatabaseName property we need to set on the standard data control, the ADO data control requires a connection string. The connection string consists of the specific OLE DB provider to use, as well as the data source we want to access. The connection string is the critical piece of information the ADODC control needs to find the data source. Let's take just a minute to review the connection string, because we will be using them for the rest of the examples in this chapter, and though the rest of the book.
If you haven't already done so, right click on the ADODC control and select ADODC Properties.
We are presented with the property page for the ADODC control. Since setting up the ConnectionString must contain just about every piece of information required to connect to our data source, this comes in very handy indeed! Recall that the connection string needs to know things like the location and name of the database, any passwords that might be required, and the OLE DB data provider.
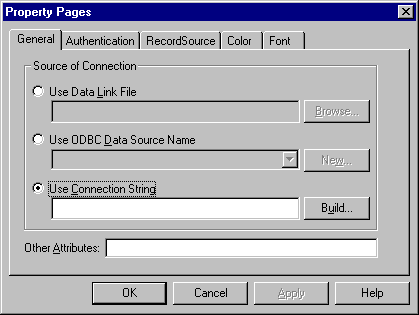
Click the Build button and let's step through the process.
We are presented with another set of property pages for the Data Link. Notice the list of OLE DB Providers that are shipped with VB6.0. If we wanted to connect to a generic ODBC source, we have a provider for ODBC Drivers. Notice that we have providers for Oracle and SQL Server. And as time goes on, all of the major database providers will ship their own OLE DB providers. This way, ADO can talk directly to the specific provider, just as DAO can now talk to ODBC.
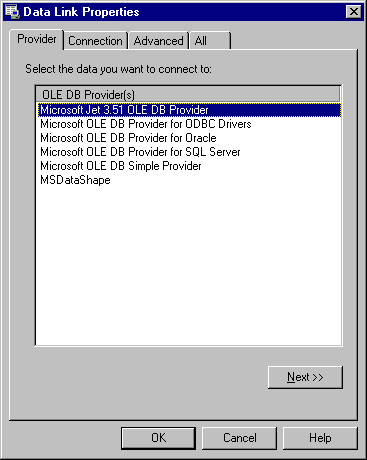
Select the Microsoft Jet 3.51 OLE DB Provider.
Click the Next>> button. This brings up the Connection tab. Here is where we must tell VB the location and name of the database we will be using. Click the button with the ellipsis and locate the usual \BegDB\Biblio.mdb database. Since the database does not require a password, don't change the entries for logging on to the database. As you'll recall, Admin is the default user name for Access databases:
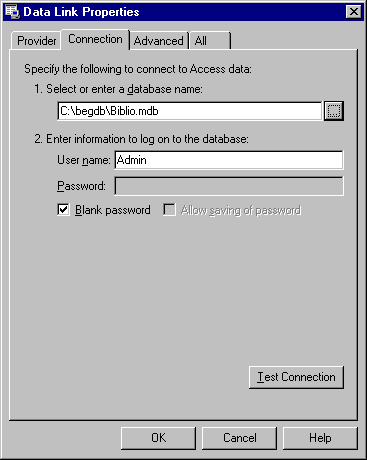
It always is a good idea to use the Test Connection option. This way, if there was something wrong with the location or name of the database, we would get an error advising us of this. Let's say that you entered the name of the database but forgot to add the .mdb extension. By testing the Data Link, we would know immediately:
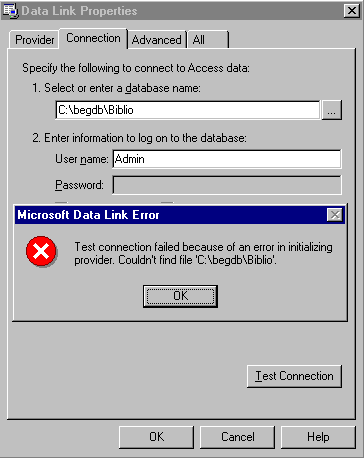
We can then correct the error in the name and location of the database and press Test Connection once again.
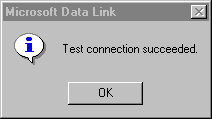
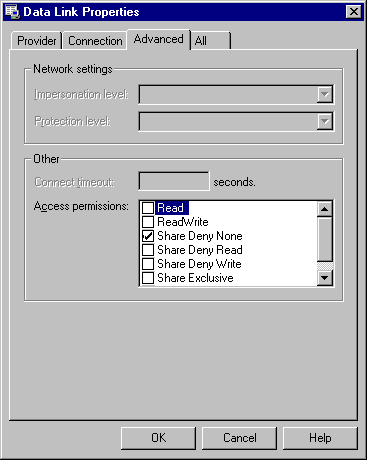
There, that's better. Now click the Advanced tab just to see what options are available to us. Leave the default Share Deny None (if you needed to open the database in a read only, exclusive mode you would check the Read box):
Now click the All tab. Here you can see all of the information the Data Link property box garnered for us:
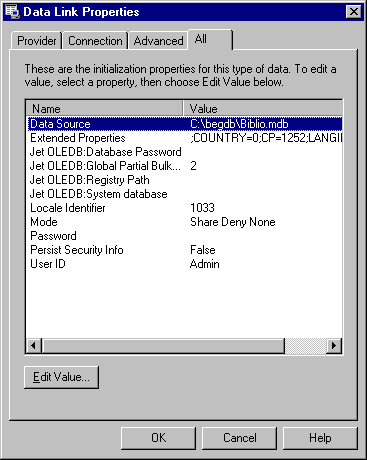
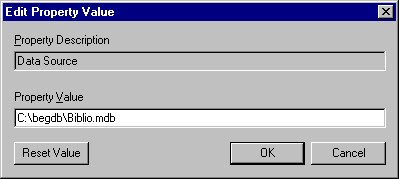
This is all of the information that will be used to create the connection string. If you need to modify any of the properties, simply click the Edit Value…button.Highlight any value you wish to edit and press the Edit Value button. This will give you a chance to modify any value in the connect string prior to clicking the OK button.
After the connection string is built, click OK to dismiss the property pages for the Data Link. Now the control has the information it needs to connect to the data source. However, we still need to inform the data control which table(s) we wish to access. Right click on the ADODC data control again and select ADODC Properties. Notice that the connection string text box is now filled in:
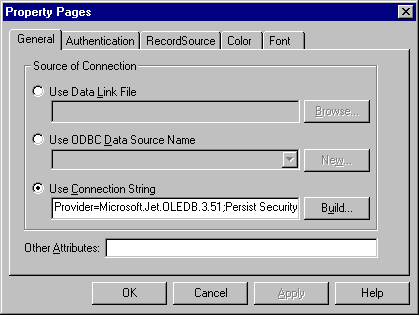
Click on the RecordSource tab and click the drop down list box for the Command Type:
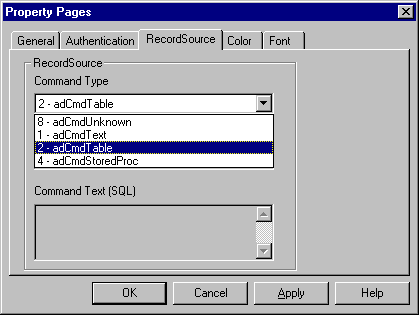
Select 2 - adCmdTable. Now the control knows we want to access records from a table directly. If the DataSource is not known in advance, then adCmdUnknown is selected. If we were going to issue a SQL command, then adCmdText would be selected, and the bottom text box, Command Text (SQL), would become enabled. Finally, if we have stored, pre-compiled procedures, we would choose adCmdStoredProc. This time, be sure to select choice 2 - adCmdTable.
Now the control knows that we want to access records from a table, and it knows the name of database from when we set up the Data Link. Now, the Table or Stored Procedure Name listbox becomes enabled. Click the listbox and all of the tables in the database are shown:
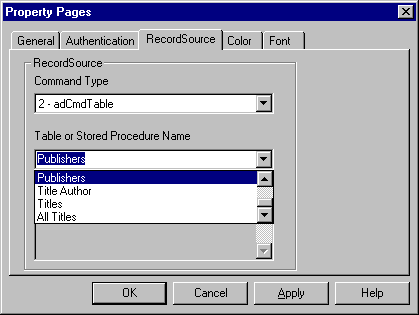
Select the Publishers table and click OK.
The data control now has the connection string built, and will be able to retrieve a recordset for us from the data source. Double-click on the data control to bring up the code window. You might notice that the Adodc1 data control has a few new event procedures. And many more parameters are passed in by VB so we can really know what is going on.
3. Now that the ADODC data control has been set up, let's bind the Text1 textbox. Bring up the property dialog box for Text1. Set the DataSource property to Adodc1.
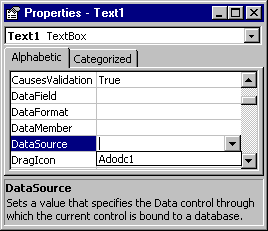
Now click the drop down box for the DataField. Notice that just like the DAO data control, all of the valid fields are displayed:
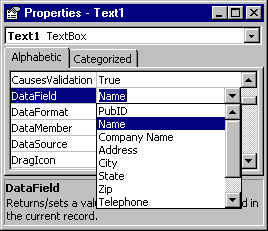
Select the Name field.
Now double click on the ADODC data control to bring up the code window. In the MoveComplete event procedure of the control, add the following highlighted code:
Private Sub Adodc1_MoveComplete(ByVal adReason As ADODB.EventReasonEnum, ByVal pError As ADODB.Error, adStatus As ADODB.EventStatusEnum, ByVal pRecordset As ADODB.Recordset)

Label1 = "Record " & Adodc1.Recordset.AbsolutePosition _
        & " of " & Adodc1.Recordset.RecordCount
End Sub
The MoveComplete event of the ADODC control will fire when the control navigates to a new record. So this is the perfect place to update our label, lablel1, to show what record is the current record in the recordset managed by the ADODC control. Of course, we read the .AbsolutePostion property to tell us what record we are on and then read the .RecordCount to inform us how many records are in the recordset.
Remember way back when we noted that when the form's Activate event procedure is fired, we can be sure that all of the visible components (like the ADO data control) are fully initialized and displayed? Let's place a line of code that will display the current record when the form is fully loaded.
4. Add the following code to the frmADO form's Form_Activate event. When this event fires, we know the ADODC data control has been completely initialized so it is safe to read the properties.
Private Sub Form_Activate()

Label1 = "Record " & Adodc1.Recordset.AbsolutePosition _
        & " of " & Adodc1.Recordset.RecordCount

End Sub5. Go ahead and run the program. You can see that it works as advertised:
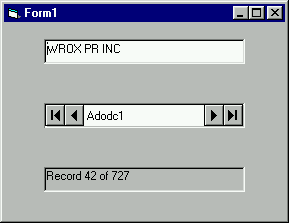
To the user, there is absolutely no difference between the intrinsic data control and our new ADO data control. See - I told you that the transition would be painless.
Well, no magic here. We just used the same techniques we used earlier for the DAO data control. The only twist here was setting up the connection string. As you can see, this is a bit more involved. But the connection string provides a generalized method to encapsulate all of the information required to talk to the OLE DB provider, locate the database, and provide password information. But once the string was built, the rest of the code was pretty much the same. As the user navigates the recordset with the ADODC control, we update the label.