When the PWS is installed, it adds a directory called
(on NT, the directory is called Webshare
). PWS then adds a few subdirectories underneath. We want to place all of our ASP pages we write in the subdirectory InetPub
. We'll also create a Virtual directory within PWS that will refer to our physical \Chapter13
directory. All of the cool ASP pages you write will be in the (physical) Chapter13
directory, and PWS will be able to find them.Chapter13
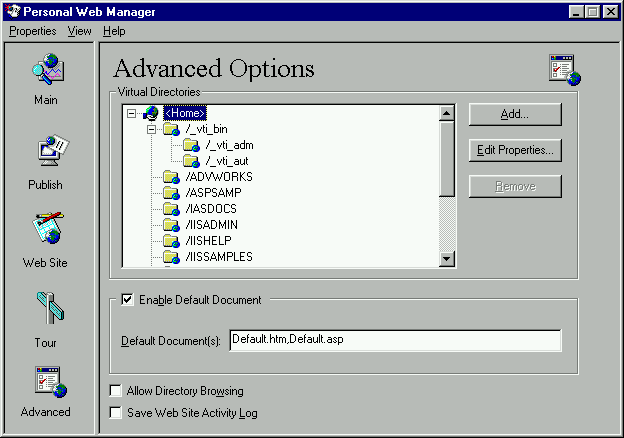
1. Click on View | Advanced from the main menu on the Web server:

2. When you have <Home> highlighted, click Add.
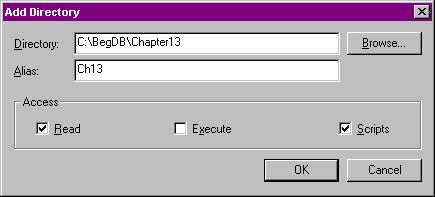
3. In the Add Directory window, use the Browse button to find your
directory, and add it. In the Alias box, enter Ch13:BegDB\Chapter13

4. Click OK.
Now, we can use the Ch13 alias to get to the files we'll store in the
directory. To do this, we'll type in the URL in our browser in this form:Chapter13
http://my_server_name/Ch13/filename
Note that PWS uses the alias
to refer to the physical directory Ch13[drive letter]:\BegDB\Chapter13
So all the ASP pages you write should be in
.\Chapter13
When you run an ASP page that your write, you must type its URL in the browser's address window. You can't load the file into the browser because it won't execute the ASP features unless you access it via PWS.