As you know, our control can't work by itself. We need to have a form to host it. VB provides us a simple and easy way to do that. We can actually add another project to our existing project. VB will then take these two projects and create a Project Group. So now instead of having two instances of VB running - one to build the control and another to test it, we can simply add another project to the existing one and switch between them in the same session.
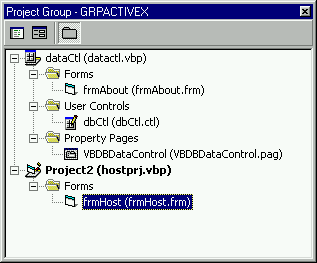
1. From the main VB menu, select File-Add Project… Be sure not to select New Project! When you select Add Project, choose a Standard EXE type. Add a new project and name it hostPrj. This will distinguish it from our dataCtl.vbp that holds the control. Both visual basic projects are now included in the same group. From the main VB menu, select File-Save Project Group As… and follow through the save dialogs. Save the new project's form as frmHost, and save the project as hostPrj. Save the project group itself as GRPACTIVEX. Now when you return to your program, just load in the new group GRPACTIVEX. When you select this, both of the .vbp project files will also be loaded. Your Project Explorer should now look like this:

Notice how our dataCtl project has three folders: Forms, User Controls and Property Pages. When we create our control, all of these will be bundled into the final .OCX file.
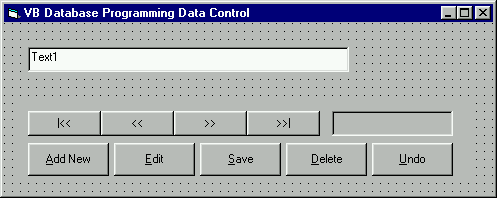
2. Close all the windows related to the dataCtl project. Click on the frmHost and draw a copy of our new control and a text box. Try to stretch or shrink our control. It will bounce back to the size we specified because when the user changes the shape, the Resize event fires in our control and we placed code to resize the control there. So they can try to resize this till the sun goes cold - it will always retain its correct shape:

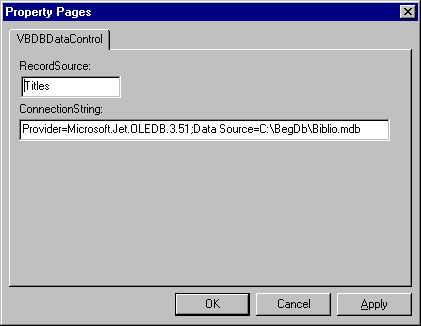
3. Now bring up the Properties window for our new control and select the (Custom) page we created:

Add Titles as the RecordSource and the key in the ConnectionString as shown. These are the only two properties the user of our control must set. It really can't get any easier than that! (If you need a refresher on how to create a connection string, please refer back to the last chapter under the heading Review of steps to set up the ADODC ConnectionString).
Click on OK.
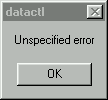
One of the things I encountered when entering a ConnectionString is that if it is not exactly correct, VB provides this extremely verbose and descriptive message (not!) telling us exactly what went wrong when the program is run:

So if you get this message, it's a good bet that the ConnectionString was typed in wrong. Take a look at it and try again.
Just so you can get a better sense of how the PropertyBag works, here is how the form (the host of our control) stores the properties of our control. As you probably know, VB forms are stored in ASCII text. Later we will add a form to host our control. But if you opened a form that was hosting our control in Notepad.exe and took a peek, you would see the handy work of the Read and Write Properties routines:
Object = "*\Adatactl.vbp"
Begin VB.Form frmHost
   Caption         =   "VB Database Programming Data Control"
   ClientHeight    =   4125
   ClientLeft      =   2355
   ClientTop       =   3810
   ClientWidth     =   7335
   LinkTopic       =   "Form1"
   ScaleHeight     =   4125
   ScaleWidth      =   7335
   Begin dataCtl.dbCtl dbCtl1
      Height          =   1200
      Left            =   360
      TabIndex        =   1
      Top             =   2520
      Width           =   6780
      _ExtentX        =   11959
      _ExtentY        =   2117
  RecordSource    =   "Titles"
  ConnectionString=   "Provider=Microsoft.Jet.OLEDB.3.51;Data
  Source=c:\BegDb\Biblio.mdb"
   End
   Begin VB.TextBox Text1
      BackColor       =   &H00FFFFFF&
      DataField       =   "Title"
      DataSource      =   "dbCtl1"
      Height          =   375
      Left            =   360
      Locked          =   -1  'True
      TabIndex        =   0
      Text            =   "Text1"
      Top             =   360
      Width           =   4815
   End
End
Notice the two properties RecordSource and ConnectionString. These are the string titles we gave the properties when reading and writing. So the property bag works something like the old .INI files. It has a key - the string name of the property - and finds it in the host, which is the form. It then either reads or writes the property there. So again, it is the host of our control that is really responsible for storing the properties. Notice the highlighted areas and you can see the various property values. Our two custom properties are stored at the end of the dataCtl area.