This is the server machine, and it has the following software configuration:
On this machine, machine B, we'll set up the
COM server class, and we will set pointers to the ATLFinder.exe
class that will be residing on machine C. To prepare the machine for serving ATLFinder objects, perform the following steps:ATLDept.dll
Regsvr32.exe\Windows\System atl.dll\Windows\Systemregsvr32 atl.dllATLFinder.exeATLFinder /RegServerThis is all that's needed for ATLFinder. In order to create the link to the required ATLDept objects, we need to do the following:
ATLDept.dllregsvr32 ATLDept.DLLATLDept.dllOleview.exe
This machine is now ready to support calls to ATLFinder1 classes and remote calls to ATLDept1 classes. Before moving on to set up machine C, it's a good idea to test the setup between machine A and machine B. To do this, we again acquire the assistance of
:Oleview.exe
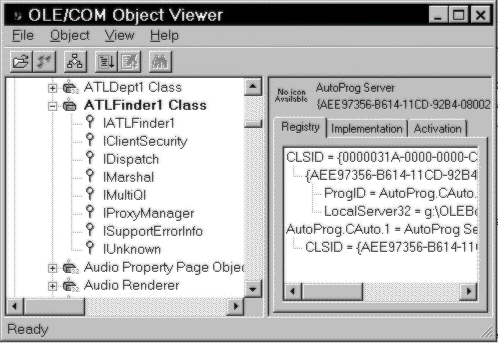
ATLFinder /ServerOleview.exeIf everything is setup correctly, after a little delay, you should see ATLFinder being expanded on the left pane with all its interfaces exposed. The ATLFinder1 Class entry is also in bold to indicate that an instance has been created successfully.

Using Object Viewer, you can then select the Object menu and Release Instance to release the selected instance.
This concludes and confirms the setup of machine B.
In actual deployment, under certain design circumstances, one may need to install the middle tier server components (such as ATLFinder) repeatedly on different systems. In these cases, of course, the Setup toolkit that comes with Visual C++ 5.0 may be used to create a setup script which can perform all of the above for us when the server object is installed on the system.