![]()

beyond@microsoft.com
Download the code (4KB)
Ken Spencer
Building Windows DNA 2000 Components

|
Starting Out
The first step in moving the application requires setting up the environment. I knew the application used an ODBC data source, so I started out by creating a new one in Windows 2000. This is where you'll hit the first bump; things may not be where you usually found them in Windows 98 and Windows NT® 4.0.
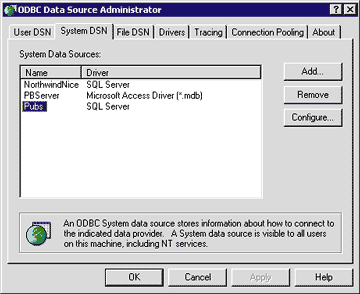
To create a data source, open the ODBC manager by clicking Start | Programs | Administrative Tools | Data Sources (ODBC). This will open the familiar ODBC manager. To add the data source, I clicked the Add button and created a new data source named Pubs that pointed at my SQL Server system. Figure 1 shows the completed DSN.
 |
| Figure 1: Creating a New Data Source |
|
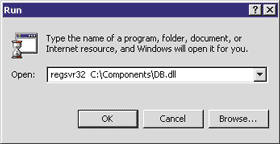
Next, I created a new Web project in Visual InterDev, targeted toward Internet Information Services (IIS) 5.0 on the Windows 2000 server. This process went smoothly and provided no surprises. While the new Web project was open, I copied the TestDatabase.asp file from last month's column to the new project. To register the component used by the ASP file (db.dll), I opened the Run dialog from the Start menu, then dragged db.dll from Windows Explorer and dropped it into the Run dialog. I prefixed the path with regsvr32 (just as I would with Windows NT 4.0—see Figure 2), and then clicked OK to execute it. |
 |
| Figure 2: Registering DB.dll |
|
I did discover something interesting while playing around with Explorer. The property pages for a file provide a Summary page that contains information about the file. You can see the information that exists for a file, and you can change it if you have permission. This is pretty cool when you want to categorize a file to provide more accurate searching across the local or network file system. Back in the ASP application, I viewed the page in Microsoft® Internet Explorer and it worked—no changes were needed to make it run. It's good to know that your ASP code should work without major revisions and that COM objects won't need to be totally rewritten to make them work. So far, so good; now for the fun.
Changes
|
 |
| Figure 4: Setting Application Protection |
|
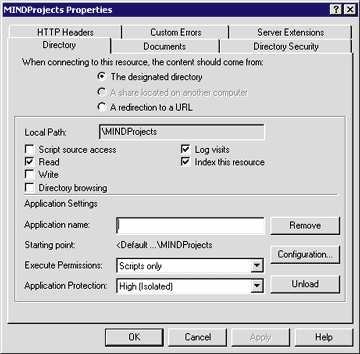
I also tried this experiment with the Medium (Pooled) application protection level. The Medium level will isolate the Web from IIS, but will also pool this application with other pooled Webs in the same process. Using the Medium level gave me the same results as the High level. It looks like you can use either Medium or High level to allow you to test and recompile components during the development cycle. The big difference between these two levels is what happens
with the Web's isolation. When you use the Medium level, unloading the application will also unload all other pooled applications on this server. This can cause problems when other developers are working on the same server and using the Medium setting because when anyone unloads a pooled application, all the applications in the pool shut down. Next, I decided to place the database component in Microsoft Transaction Services (MTS), which is now part of Component Services in Windows 2000. This makes using and working with components much easier. |
 |
| Figure 5: Component Services |
|
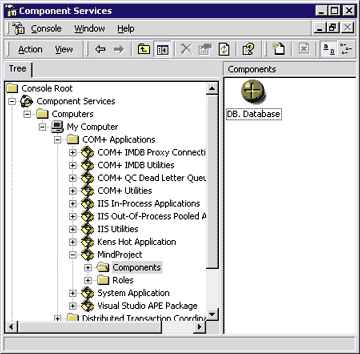
Because the component is going into Component Services (see Figure 5), I wanted to set the transaction level for the Database class. The transaction level controls whether the class can participate in transactions. To implement this setting, I opened the Database class in Visual Basic, then changed the MTS TransactionMode property for the class to 3—Uses Transaction. This puts the transaction mode setting in the DLL. You can also configure this in Component Services, but setting it in the DLL automatically sets it in Component Services. Plus, when you place this component in any application, you do not need to remember to set the transaction mode—it's already there.
After these changes, I compiled the class again. Before you can use a component in Component Services, you must create a COM+ Application for the component and for any others that will be used with it. COM+ Applications are similar to MTS Packages; the application is the process space where the component will execute. To create a new application, open Start | Programs | Administrative Tools | Component Services. This will open the Component Services manager in the Microsoft Management Console (MMC). Next, expand the Component Services, Computers, and COM+ Applications folders. Click the COM+ Applications folder, and then right-click it. Select New | Application from the context menu. This will start the COM Application Install Wizard. Click Next on the opening page. I used an empty application, which I created by clicking "Create an empty application" on the second step of the wizard. |
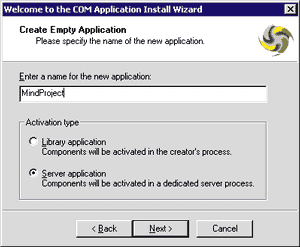 |
| Figure 6: Creating a New Application |
|
In the next step, enter the application name (see Figure 6). You can also select the type of application in this step. A server application runs in its own process space, while a library application runs in the process space of the calling application. If you are using a component from ASP, then a library application will run in the same process space as the ASP application. This will make the application run faster, but also endangers other applications if they are running in the same process. A server application runs in its own process space and does not have this problem. After you enter the application's name and set the application type, click Next. The next page of the wizard is used to set the application's identity. The identity is the user account under which the application will execute. You can set this value to either the currently logged-in user or to another account, but don't choose the former option—an application server will normally be running in a computer room or similar location and will not have a user logged in. It is much better to just enter the proper user account on this page and assign that account the correct permissions and rights from Windows 2000. You must have the password of the account you use for the application's identity. Once you have selected the identity type and a user account, click Next. Click Finish on the last page to complete the application creation process. To place the db.dll component in the new application, you can use Windows Explorer to drag the component from the file system and drop it into the application's Components folder in Component Services.
Running the App
Conclusion
|
From the January 2000 issue of Microsoft Internet Developer.