
Directory replication allows you to keep shared resources current in a single-domain or multiple-domain environment. Using directory replication, you can ensure that all backup domain controllers have a copy of the logon scripts and system policy files for that domain. Directory replication can also provide load balancing by maintaining identical folder hierarchies across the domain. By maintaining the source files at a single location, typically on a primary domain controller, all servers participating in the replication can automatically receive updates triggered by changes on the export server. Replication consists of an export server and an import server. The export server maintains export directories and the import server maintains import directories. The replication process is controlled by the Windows NT directory replicator service. The export server must be a Windows NT server. The import server can be a Windows NT server, a Windows NT Workstation client, or a LAN Manager server.
In this article, we'll show you how to configure directory replication using a single export server and a single import server. You can extend this scenario by using a single export server and multiple import servers according to your needs. We'll provide step-by-step instructions for completing the following major tasks:
At the conclusion of this article, we'll take a look at how you can mange both export and import directories.
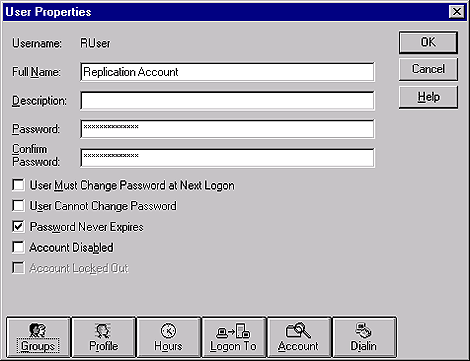
Figure A: Create a special user account for replication.
Before you complete the account setup, you'll need to make the user a member of both the Backup Operators group and the Replicator group. Click the Groups button in the User Properties dialog box, select the appropriate groups, and then click the Add button, as shown in Figure B. Click OK in the Group Memberships dialog box. Then, click OK in the User Properties dialog box to finish setting up the account.
Figure B: Make the user a member of the Backup Operators and
Replicator groups.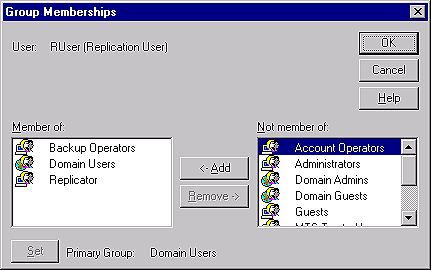
Figure C: Select the Directory Replicator service and click
Startup.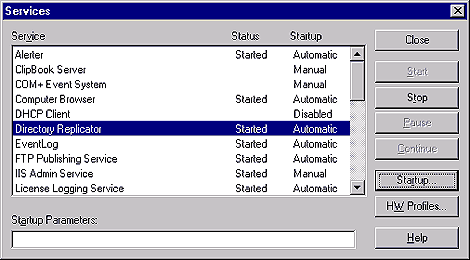
In the Startup Type section of the Service dialog box, shown in Figure D, select the Automatic option button. In the Log On As section, select the This Account option button. Next, click on the ellipsis button (...) to the right of the text box and select the special user account you created earlier. Finally, complete the Password and Confirm Password text boxes, and then click OK.
Figure D: Specify the startup type and the user account for the
replication service.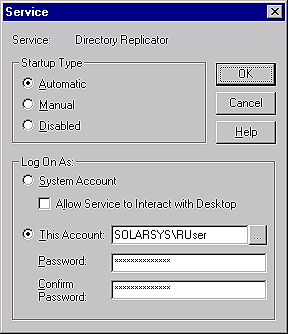
Figure E: Display the Properties dialog box for your export
server and click Replication.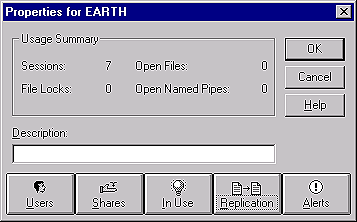
In the Properties dialog box, click Replication to display the Directory Replication dialog box shown in Figure F. In this dialog box, you'll specify the path to the export directory and the server that will act as the import server.
Figure F: Specify the path to the export directory.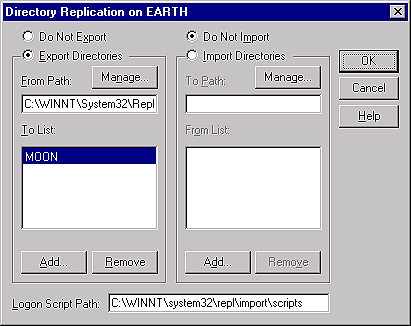
Select the Export Directories option button. In the From Path, you'll see that the default export directory is
<WINROOT>\SYSTEM32\REPL\EXPORT
Initially, the To List is empty. To specify the import server, click Add. You'll now see the Select Domain dialog box shown in Figure G.
Figure G: Select the server that will act as an import
server.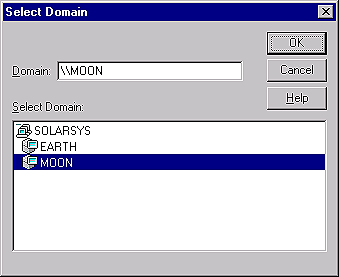
Now, double-click on the domain name to display the list of available servers. Double-click on the server you want to use as an import server, and then click OK. The server name now appears in the To List of the Directory Replication dialog box.
Figure H: Create your replication directory structure.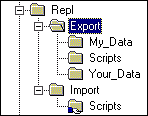
Figure I: Display the Properties dialog box for your import
server.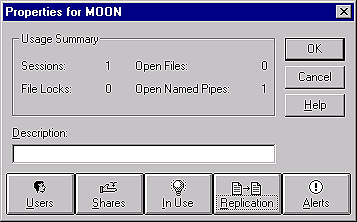
In the Properties dialog box, click Replication to display the Directory Replication dialog box shown in Figure J. In this dialog box, you'll specify the path to the import directory and the server that will act as the export server.
Figure J: Specify the path to the import directory.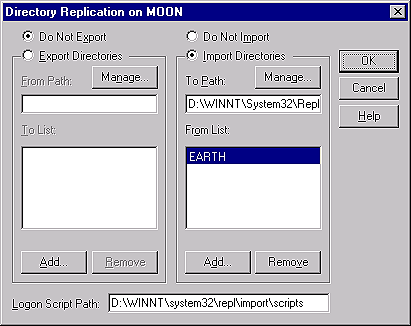
Select the Import Directories option button. In the To Path field, you'll see that the default import directory is
<WINROOT>\SYSTEM32\REPL\IMPORT
Initially, the From List is empty. To specify the export server, click Add. Now, you'll see the Select Domain dialog box, as shown in Figure K.
Figure K: Select the server that will act as an export
server.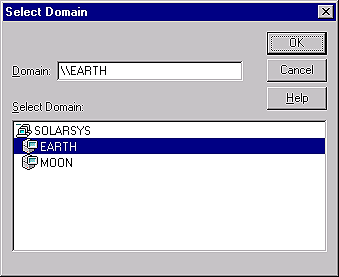
Double-click on the domain name to display the list of available servers. Next, double-click on the server you want to use as an export server, and then click OK. The server name now appears in the From List on the Directory Replication dialog box.
Figure L: Verify the replication on your import server.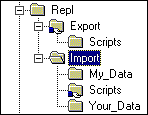
Note: You can change the default time interval by using the Windows NT Registry Editor (REGEDT32.EXE). You'll find the Interval value in the following file:
HKEY_LOCAL_MACHINE\SYSTEM\
CurrentControlSet\Services\Replicator\
Parameters
Figure M: You can manage the export hierarchy and directory
locks.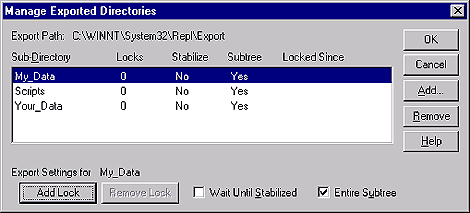
Another option available on export directories is the ability to lock directories. Locking a directory prevents it from being exported until you unlock it. For example, you can use this feature to control the export of sensitive data. Another reason for locking a directory is when you're making many changes to a directory and you don't want the directory replicated until you've completed all your changes.
You can also lock import directories. Using Figure J as a guide, you can click the Manage button to display the Manage Imported Directories dialog box shown in Figure N.
Figure N: You can control import directories by locking
them.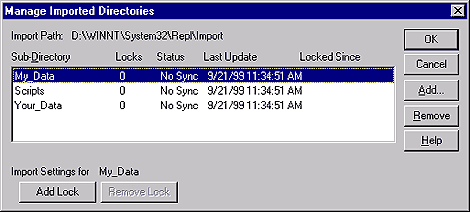
Locking an import directory will prevent imports to the directory until you release the lock. This offers an added value of management and control.
Copyright © 2000, ZD
Inc. All rights reserved. ZD Journals and the ZD Journals logo are trademarks of ZD
Inc. Reproduction in whole or in part in any form or medium without
express written permission of ZD Inc. is prohibited. All other product
names and logos are trademarks or registered trademarks of their
respective owners.